# Lagless Documentation — Full Content
> Premium game server hosting for Minecraft, Vintage Story, and Hytale.
> Source: https://lagless.gg/docs
---
# Lagless.gg Hosting Docs
URL: https://lagless.gg/docs
Description: Your comprehensive guide to Lagless.gg game server hosting
# Welcome to Lagless.gg Hosting Documentation
Welcome to the official documentation for Lagless.gg game server hosting. This resource is designed to help you make the most of your game server, providing everything from basic setup instructions to advanced configuration techniques.
## Documentation Categories
## Server-Specific Documentation
We support a range of popular game servers, each with their own dedicated documentation section:
- Minecraft (Java and Bedrock)
- Satisfactory
- Terraria
- Factorio
- Vintage Story
## Using the Panel
New to Lagless.gg? Our [Using the Panel](/docs/using-the-panel) guide will walk you through the essentials:
- Setting up your first server
- Managing your server through our control panel
- Basic configuration and optimization
- Troubleshooting common issues
## Advanced Configuration
For experienced users looking to take their servers to the next level, we offer comprehensive guides on:
- Performance optimization
- Server security best practices
- Plugin and mod integration
- Custom configuration options
## Support Resources
Can't find what you're looking for? We're here to help:
- Search our documentation using the search bar above
- Check our [Frequently Asked Questions](/docs/troubleshooting)
- Contact our [Support Team](https://lagless.gg/support) for personalized assistance
- Help improve these guides through our [documentation contribution guide](/docs/contributing)
Thank you for choosing Lagless.gg for your game server hosting needs. We're committed to providing you with a lag-free, reliable, and enjoyable hosting experience.
---
# Billing & Payments
URL: https://lagless.gg/docs/billing
Description: Comprehensive guides on billing, payment processing, and financial management for Lagless.gg services
# Billing & Payments
---
# Request Cancellation
URL: https://lagless.gg/docs/billing/cancel
Description: This is how you cancel a service with us.
---
# Dedicated Ports
URL: https://lagless.gg/docs/billing/dedicated-ip
Description: Dedicated Ports or commonly referred to Dedicated IP for your service and the benefits
## Introduction
Using the default port, like Minecraft's 25565 or bedrocks 19132 is primarily about convenience for you and your players.
Players can connect with just the IP without having to enter the port on java. Or with bedrock, it's automatically entered as default.
For users of map websites, like Dynmap, bluemap etc.. you won't need a port to connect to the map, as it will be automatically set to the default port.
This can be great help, as you don't have to support each player when they can't connect with the default port. It just works.
---
# Fraud-Marked Transactions
URL: https://lagless.gg/docs/billing/fraud-transactions
Description: What to do when your payment is flagged as fraudulent and how to resolve the issue
# Fraud-Marked Transactions
**"My payment was declined and marked as fraud - what happened?"**
## Quick Answer
**Your payment was blocked for security reasons by either your bank OR Lagless.gg's fraud protection system.** No money was charged and your service wasn't activated. Contact your bank first to authorize the transaction, then retry. If the issue persists, open a support ticket with us.
Transactions can be flagged as fraudulent by two different systems:
1. **Your Bank/Payment Processor** - Automatic fraud detection to protect your account
2. **Lagless.gg** - Our internal fraud protection system to prevent unauthorized purchases
Both systems are designed to protect you from unauthorized charges, but they require different resolution steps.
Regardless of which system blocked your payment, **no money has been charged** and **your service hasn't been activated**. The transaction was blocked before completion to protect your account.
## What Is Fraud Detection?
Fraud detection systems monitor transactions for suspicious patterns that might indicate unauthorized use of your payment method. These systems err on the side of caution to protect your financial accounts.
### Bank Fraud Detection
Your bank or payment processor automatically scans transactions for suspicious activity and blocks potentially fraudulent charges.
### Lagless.gg Fraud Protection
We also have our own fraud protection system that may block transactions based on various risk factors to protect both you and our service.
### Common Fraud Triggers
**Bank/Payment Processor:**
- **Unusual location**: Purchasing from a location different from your normal spending patterns
- **New merchant**: First-time purchases from unfamiliar businesses
- **Large amounts**: Transactions significantly larger than your typical spending
- **International transactions**: Payments to businesses in different countries
- **Rapid purchases**: Multiple payment attempts in quick succession
**Lagless.gg System:**
- **VPN/Proxy usage**: Payment attempts through VPN or proxy connections
- **Suspicious account activity**: New accounts with unusual purchasing patterns
- **High-risk payment methods**: Certain payment types that have higher fraud rates
- **Geographic inconsistencies**: Mismatched billing and IP locations
- **Velocity checks**: Too many payment attempts in a short time period
Fraud detection is an automatic security feature provided by both banks/payment processors AND Lagless.gg. Both systems are designed to protect you from unauthorized transactions.
## What Happened to Your Payment?
When a transaction is flagged as fraud, here's the typical sequence of events:
**Payment Initiation**
You attempted to purchase a Lagless.gg service using your payment method.
**Fraud Detection Activated**
Either your bank's fraud detection system OR Lagless.gg's fraud protection system identified the transaction as potentially suspicious.
**Transaction Blocked**
The payment was automatically declined and blocked before any money was transferred.
**Decline Notification**
You received an error message indicating the payment was declined or marked as fraud.
**Service Not Activated**
Since no payment was completed, your Lagless.gg service was not activated.
**Security Alert**
You may have received a text message, email, or phone call from your bank about the attempted transaction.
## How to Resolve This Issue
### Step 1: Determine Who Blocked the Transaction
**If the error message mentions "fraud" or "security":**
- This is usually a bank/payment processor block
- Follow Steps 2-4 below
**If the error message is from Lagless.gg or mentions our fraud protection:**
- This is our internal system
- Skip to Step 5 (Contact Support)
### Step 2: Contact Your Bank First (For Bank Blocks)
}
>
Contact your bank or credit card company to report that the transaction was legitimate and authorize future payments to Lagless.gg.
}
>
Your bank may ask you to verify your identity and confirm that you attempted to make the purchase.
### Step 3: Authorization Process (For Bank Blocks)
Most banks will ask you to:
1. **Verify the transaction details** (amount, merchant name, date/time)
2. **Confirm your identity** using security questions or codes
3. **Authorize the merchant** (Lagless.gg) for future transactions
4. **Update your account settings** if needed
### Step 4: Retry Your Payment (For Bank Blocks)
Wait at least 15-30 minutes after speaking with your bank before attempting the payment again. It can take time for authorization changes to take effect.
Once your bank has authorized the transaction:
1. **Clear your browser cache** and cookies
2. **Disable any VPN** connections
3. **Use the same payment method** you discussed with your bank
4. **Try the payment again** on Lagless.gg
### Step 5: Contact Lagless.gg Support (For Our Fraud Protection)
If the transaction was blocked by our fraud protection system:
Please [open a support ticket](https://my.lagless.gg/submitticket.php?step=2&deptid=6) immediately. Include:
- The exact error message you received
- Your account email address
- Payment method you were trying to use
- Any VPN or proxy services you were using
Our team can review your account and payment attempt to determine why it was flagged and help resolve the issue.
## Prevention Tips
To reduce the likelihood of future fraud flags:
Contact your bank to pre-authorize gaming and hosting service purchases. Many banks can add notes to your account about legitimate recurring expenses.
**What to tell your bank**: "I regularly purchase gaming server hosting services online and want to prevent fraud flags on these transactions."
Stick to the same payment method and avoid switching between different cards or payment services frequently.
**Benefits**: Establishes a pattern of legitimate use that fraud detection systems recognize.
Disable VPN connections when making payments, as they can trigger location-based fraud detection.
**Why**: VPNs make it appear you're purchasing from a different location, which can trigger security systems.
Ensure your bank has your current phone number and email address for fraud alerts and verification.
**Important**: Up-to-date contact information helps banks reach you quickly for transaction verification.
## Common Scenarios
### Scenario 1: First-Time Customer
**Situation**: You're new to Lagless.gg and your first purchase was flagged.
**Solution**:
- This is very common for new merchants
- Call your bank to verify the transaction
- Ask them to whitelist Lagless.gg for future purchases
- Retry the payment after authorization
### Scenario 2: International Customer
**Situation**: You're located outside the US and your payment was flagged.
**Solution**:
- International transactions are commonly flagged
- Contact your bank to authorize international online purchases
- Consider using a payment method known to work internationally
- Ensure your billing address matches your bank records
### Scenario 3: Large Purchase Amount
**Situation**: You're purchasing an expensive server package and it was flagged.
**Solution**:
- Large purchases often trigger fraud detection
- Call your bank to authorize the specific amount
- Consider splitting the purchase if possible
- Ask about temporary spending limit increases
## What NOT to Do
- **Don't try multiple payment methods rapidly** - this can trigger additional fraud flags
- **Don't use different billing addresses** - stick to your registered bank address
- **Don't ignore bank security alerts** - respond to them promptly
- **Don't assume it's a Lagless.gg error** - the block happens before we see the transaction
## When Fraud Detection Helps
Remember that fraud detection systems are there to protect you:
- **Unauthorized use prevention**: Stops criminals from using stolen card information
- **Account security**: Protects your financial accounts from fraudulent charges
- **Peace of mind**: Provides an extra layer of security for online transactions
- **Quick resolution**: Most legitimate transactions can be authorized quickly
## Frequently Asked Questions
Fraud detection systems use various factors including location, purchase patterns, and merchant history to identify potentially suspicious transactions. Your payment likely triggered one or more of these security measures.
Usually no. Once you've authorized Lagless.gg with your bank and established a payment history, future transactions are less likely to be flagged.
It depends on who blocked the transaction. If your bank blocked it, you need to contact them directly. If our fraud protection system blocked it, please open a support ticket and we can review and potentially resolve the issue.
Bank authorization is usually immediate, but it can take 15-30 minutes for the changes to propagate through their systems. Some banks may take up to a few hours.
If your bank is unwilling to authorize the transaction, consider using a different payment method, or contact us via support ticket to discuss alternative payment options.
## Still Need Help?
If you've followed these steps and are still unable to complete your payment:
Please [open a support ticket](https://my.lagless.gg/submitticket.php?step=2&deptid=6) with our billing support team. Include details about:
- The error message you received
- When you contacted your bank
- What payment method you're trying to use
- Any authorization codes your bank provided
---
*Fraud detection is a security feature designed to protect you. While it can be inconvenient, it's an important safeguard for your financial accounts.*
---
# Payment Method Removal
URL: https://lagless.gg/docs/billing/payment-method-removal
Description: Learn about the requirements and restrictions for removing payment methods from your account.
# Payment Method Removal
You can remove a payment method from your account under certain conditions. This guide explains when and how you can remove payment methods.
## When You Can Remove a Payment Method
You can remove a payment method from your account if **one** of the following conditions is met:
✅ No Active Services
If you have no active services on your account, you can remove any payment method without restrictions.
✅ Multiple Payment Methods Available
If you have multiple payment methods on your account, you can remove one as long as at least one other payment method remains active.
## When You Cannot Remove a Payment Method
You **cannot** remove a payment method if:
❌ You have an active service on your account **AND** the payment method you want to remove is the only payment method on your account.
This restriction ensures that your active services continue to have a valid payment method for billing purposes.
## How to Remove a Payment Method
1. Log in to your [Client Area](https://my.lagless.gg/)
2. Navigate to **Billing** → **Payment Methods**
3. Find the payment method you want to remove
4. Click **Remove** or **Delete**
5. Confirm the removal when prompted
## Alternative Options
If you cannot remove a payment method due to having an active service:
### Add a New Payment Method First
1. Add a new payment method to your account
2. Once the new payment method is verified, you can then remove the old one
### Cancel Your Service
1. [Cancel your active service](/docs/billing/cancel)
2. Once the service is cancelled, you can remove the payment method
## Need Help?
If you're having trouble removing a payment method or have questions about your billing setup, please contact our support team for assistance.
---
# What Does "Pending" Mean on My Service?
URL: https://lagless.gg/docs/billing/pending-service-status
Description: Understanding the pending status on your Lagless service and how to resolve it
# What Does "Pending" Mean on My Service?
"Pending" can mean various things on your order. If your order remains as "Pending" for over ten minutes, please consider the following:
## Common Reasons for Pending Status
### 1. Unpaid Invoice
Your invoice for the order might not be paid. Check your invoices - if it is marked as "Unpaid" and you have paid, please open a billing ticket.
### 2. Server Setup in Progress
If your invoice is marked as paid, it could take a few minutes for the server to set up.
### 3. Node Capacity
If it's been a few minutes and the invoice is paid, then our nodes are full (we never oversell our servers) - we will add a new node and then your order will carry on as usual.
## What to Do
If you are ever unsure of what is going on with your order then you can always open a ticket to see what is going on.
### Steps to Take:
1. **Check your invoice status** - Ensure it's marked as "Paid"
2. **Wait a few minutes** - Server setup can take some time
3. **Contact support** - If the issue persists after 10+ minutes, open a billing ticket
## When to Contact Support
- Your service has been pending for over 10 minutes
- Your invoice shows as paid but the service hasn't activated
- You're unsure about the status of your order
Our support team can provide specific details about your order and help resolve any issues quickly.
---
# Pre-authorized Payments & Incomplete Transactions
URL: https://lagless.gg/docs/billing/pre-authorized-payments
Description: Understanding when payments show on your card but services don't activate - and why you haven't actually been charged
# Pre-authorized Payments & Incomplete Transactions
**"I see a charge on my card but my service didn't activate - have I been charged?"**
This is one of the most common billing questions we receive. The short answer is: **No, you have not been charged.** What you're seeing is a pre-authorization hold, not an actual charge.
If your service didn't activate but you see a "charge" on your card, this is a pre-authorization hold. **Lagless.gg has not received your money** and the hold will be automatically released by your bank within 1-14 days.
## What Happened to My Payment?
When you see a charge on your card but your service didn't activate, here's what actually occurred:
**Payment Attempt**
You tried to purchase a Lagless.gg service and entered your payment details.
**Pre-authorization Created**
Your bank placed a temporary hold on your card to verify funds were available - this appears as a "pending" charge.
**Transaction Failed**
Something went wrong during processing (technical issue, verification failure, etc.) and the transaction couldn't complete.
**Service Not Activated**
Since the payment failed, your service wasn't activated and your account wasn't credited.
**Money Never Transferred**
Lagless.gg never received your money - only your bank knows about the pre-authorization hold.
**Automatic Release**
Your bank will automatically release the hold within 1-14 days, returning the funds to your available balance.
**We never received your money.** The "charge" you see is just your bank holding funds that will be automatically returned to you.
## How Long Until I Get My Money Back?
The time it takes for the pre-authorization hold to be released depends entirely on your bank or card issuer:
- **Most Common**: 1-3 business days
- **Standard Duration**: Up to 5-7 days
- **Some Banks**: May hold for up to 14 days
- **Rare Cases**: Some issuers may hold up to 30 days
**Lagless.gg has no control over when the hold is released.** Since we never received the payment, we cannot "refund" it - only your bank can release the pre-authorization hold. Contacting us will not make this happen faster.
### What You'll See on Your Statement
- **Initially**: "Pending" or "Processing" charge
- **During Hold**: May show as a completed transaction (but it's not)
- **After Release**: The charge will disappear completely
- **Final Result**: Money returns to your available balance
## Why Did This Happen?
Several things can cause a payment to get stuck in pre-authorization without completing:
Server problems, payment gateway timeouts, or network issues can interrupt the transaction process.
**What you see**: Pending charge on card
**What happened**: Payment gateway couldn't complete the transaction
**Result**: Service not activated, hold will be released automatically
Issues with CVV verification, address verification, or fraud detection can block the transaction.
**What you see**: Pending charge on card
**What happened**: Your bank blocked the transaction for security
**Result**: Service not activated, hold will be released automatically
If your account doesn't have enough available balance, the pre-authorization may be placed but the actual charge fails.
**What you see**: Pending charge on card
**What happened**: Not enough funds for the full transaction
**Result**: Service not activated, hold will be released automatically
Problems with your Lagless.gg account, payment method setup, or billing information can prevent transaction completion.
**What you see**: Pending charge on card
**What happened**: Account verification or setup issues
**Result**: Service not activated, hold will be released automatically
## What Should You Do?
```mermaid
graph TD
A[See Charge on Card] --> B{Service Activated?}
B -->|No| C[Wait 1-14 Days]
B -->|Yes| D[Transaction Completed Successfully]
C --> E[Hold Released Automatically]
E --> F[Try Payment Again]
F --> G[Contact Support if Issues Persist]
D --> H[Enjoy Your Service!]
```
### Immediate Steps
1. **Don't Panic** - You haven't been charged
2. **Check Your Service** - Look in your Lagless.gg control panel to confirm the service didn't activate
3. **Wait Patiently** - The hold will be released automatically
4. **Don't Contact Your Bank** - They can't speed up the process
5. **Try Again Later** - Once the hold is released, you can retry your purchase
If you're seeing multiple pending charges for the same purchase, each one is a separate pre-authorization that will be released. Don't worry - you won't be charged multiple times.
## How to Prevent This
### Before Making a Payment
}
>
Ensure you have sufficient available balance before attempting payment.
}
>
Double-check your card details, billing address, and CVV code.
### Best Practices
1. **Use a Stable Internet Connection** - Avoid mobile data or unstable wifi during payment
2. **Don't Click Multiple Times** - If the page is loading, wait - don't refresh or click again
3. **Check Card Status** - Ensure your card isn't expired or blocked
4. **Update Browser** - Use a modern, updated web browser
5. **Disable VPN** - Some payment processors block VPN connections
If your first payment attempt fails, wait for the pre-authorization to be released before trying again. Making multiple attempts can result in multiple holds on your card.
## Common Customer Questions
### "Why does my bank statement show a charge if you didn't receive payment?"
**Answer**: Your bank statement shows a pre-authorization hold, not an actual charge. Banks often display these as "pending" transactions, which can look like completed charges but aren't. We never received the money.
### "Can you refund the charge I see on my card?"
**Answer**: We cannot refund money we never received. What you're seeing is a pre-authorization hold that only your bank can release. We have no control over this process.
### "I've been waiting a week - why haven't you refunded me?"
**Answer**: There's nothing to refund. The pre-authorization hold will be automatically released by your bank. Different banks have different timelines (1-14 days), but it will happen automatically.
### "Can I dispute this charge with my bank?"
**Answer**: You can contact your bank to ask about the hold, but disputing it won't speed up the release. The hold will be released automatically according to your bank's policies.
## Industry Standards and Regulations
Pre-authorization is a standard practice across the hosting and technology industry. According to payment industry data, [31% of all payments in 2022 were made with credit cards](https://stripe.com/au/resources/more/preauthorization-charges-on-credit-cards-what-they-are-and-how-long-they-last), making proper pre-authorization management crucial for service providers.
### Regulatory Compliance
Lagless.gg follows all applicable regulations regarding pre-authorization:
- **PCI DSS Compliance**: All payment data is handled according to Payment Card Industry standards
- **Consumer Protection**: We adhere to consumer protection laws regarding payment holds
- **Transparency**: Clear disclosure of pre-authorization policies in our terms of service
## Frequently Asked Questions
Yes, the pre-authorization hold will be automatically released by your bank within 1-14 days. Lagless.gg has no control over this timing.
If you see a charge but no service activation, the payment transaction failed to complete. The "charge" is just a pre-authorization hold that will be released.
Yes, but wait for the current pre-authorization hold to be released first. Multiple attempts can result in multiple holds on your card.
Each failed payment attempt creates a separate pre-authorization hold. All holds will be released automatically - you won't be charged multiple times.
Contacting your bank won't speed up the release process, but you can call them to confirm the hold will be released automatically.
## Additional Resources
For more detailed information about pre-authorization charges and how they work across the payment industry, refer to [Stripe's comprehensive guide on pre-authorization charges](https://stripe.com/au/resources/more/preauthorization-charges-on-credit-cards-what-they-are-and-how-long-they-last).
If you have specific questions about pre-authorizations on your Lagless.gg account, please [open a support ticket](https://my.lagless.gg/submitticket.php?step=2&deptid=6) with our billing support team.
---
# Upgrading or Downgrading Your Service
URL: https://lagless.gg/docs/billing/Upgrading-or-Downgrading
Description: This is how you change your service configuration.
---
# Contributing
URL: https://lagless.gg/docs/contributing
# Welcome to Lagless.gg Contribution guide!
## Simple Way to Contribute
1. Fork the repository
2. Clone your fork: `git clone https://github.com/YOUR-USERNAME/lagdocs.git`
3. Create a new branch: `git checkout -b docs/your-change`
4. Edit or add documentation files using our existing format
5. Commit your changes and push them to your fork
6. Open a pull request with a brief description
That’s it! Our team will review your changes and provide feedback if needed.
We welcome community contributions to help improve our documentation.
# Our Guidelines
## Standards
- Follow the existing MDX structure and file layout
- Keep content clear, concise, and neutral
- Use proper headings and do not skip heading levels
- Always include language tags for code blocks
- Include alt text for all images
- Use callouts only when necessary
## Writing Style
- Use active voice
- Keep sentences concise
- Break up long paragraphs
- Use consistent terminology
- Include examples for complex concepts
- Ensure all links work
- Check spelling and grammar
## Pull Requests
1. Update your fork to the latest upstream changes
2. Run tests locally and ensure everything builds
3. Fill out the pull request template completely
4. Include screenshots for visual changes when applicable
5. Link to related issues and add labels as appropriate
6. Respond to reviewer feedback promptly
7. Make requested changes in new commits
8. Squash commits before final merge
All contributions are reviewed before merging and must meet our documentation quality standards.
---
# Games
URL: https://lagless.gg/docs/games
Description: Explore our collection of games and gaming resources
# Games Hub
Welcome to the games section! Pick a game below to get started.
---
# Hytale
URL: https://lagless.gg/docs/games/hytale
Description: Low-latency Hytale server hosting with mod support
# Hytale
---
# Creating a Hytale Server
URL: https://lagless.gg/docs/games/hytale/Creating-a-server
Description: How to authorize and start your Hytale server.
# Game Selection
- Go to the *Game Selection* section.
- Choose **Hytale**.
# Server Authorization
- Click **Start**.
- A popup will appear asking you to authorize the server.
## Device Verification
- Click the link in the popup, or open it manually:
https://oauth.accounts.hytale.com/oauth2/device/verify
- Enter the provided code to authenticate.
Authorization is required both for downloading and starting the server, so this step must be completed twice.
# Starting the Server
- After completing authorization, start the server again.
- The server will now finish downloading and launch normally.
This page is not final and may change at any time.
---
# Minecraft
URL: https://lagless.gg/docs/games/minecraft
Description: Low-latency Minecraft server hosting with mod support
# Minecraft
---
# Java Version Compatibility
URL: https://lagless.gg/docs/games/minecraft/configuration/java-versions
Description: Which Java version to use for your Minecraft server based on the server version.
## Overview
When installing or upgrading a Minecraft server, one of the most important parameters to configure correctly is the Java version. Using the wrong Java version will prevent your server from starting.
The "Java version" refers to the underlying Java runtime environment, not the "Java Edition" of Minecraft. This only applies to Java Edition servers - Bedrock Edition does not use Java.
## Compatibility Table
| Server Version | Java Version |
|----------------|--------------|
| 1.16.5 & older | Java 8 |
| 1.17 - 1.17.1 | Java 16 |
| 1.18 - 1.20.4 | Java 17 |
| 1.20.5 + | Java 21 |
| 26.1 + | Java 25 |
## Important Notes
- **Always use the correct Java version** - Your server will not start with an incompatible version
- **Newer Java versions** generally won't work with older Minecraft versions
- **On Lagless hosting**, the Java version is automatically configured based on your server version selection
- **For modded servers**, check your mod loader's requirements as they may have specific Java version needs
## Quick Reference
- **Most current servers (1.20.5+)**: Use Java 21
- **Popular versions (1.18-1.20.4)**: Use Java 17
- **Legacy servers (1.16.5 and older)**: Use Java 8
---
# Resource Packs
URL: https://lagless.gg/docs/games/minecraft/configuration/resource-packs
Description: This is how you install server Resource Packs
## Introduction
This guide uses the **Bare Bones** resource pack for a Minecraft 1.21.8 server as an example. Download the [Bare Bones resource pack](https://modrinth.com/resourcepack/bare-bones/versions?g=1.21.8).
Find or create a resource pack you would like on your server.
Upload this resource pack to [mc-packs.net](https://mc-packs.net/)
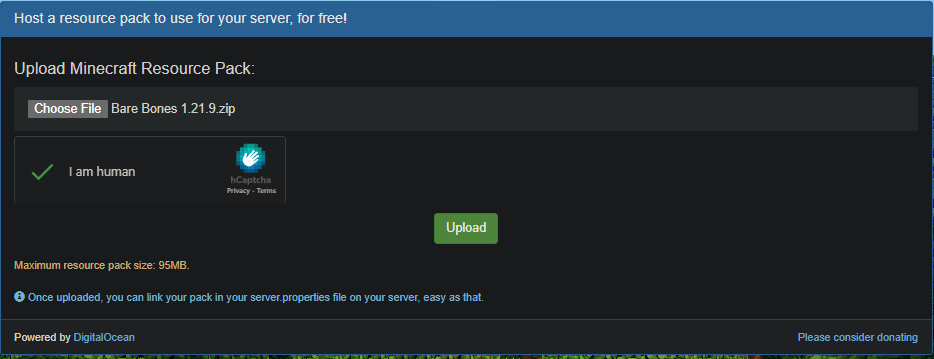
When uploaded, you'll receive two links. Copy both
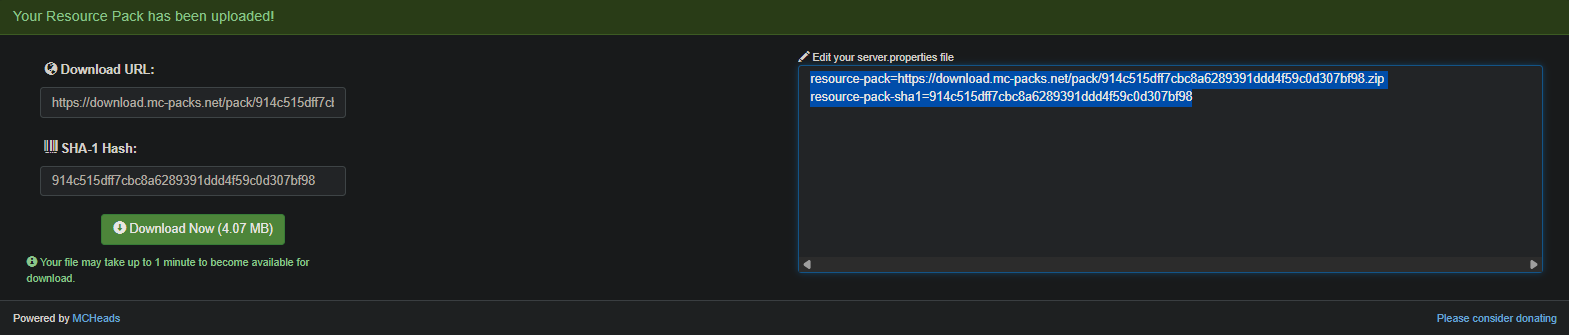
Paste both links into your `server.properties` file, all the way at the bottom
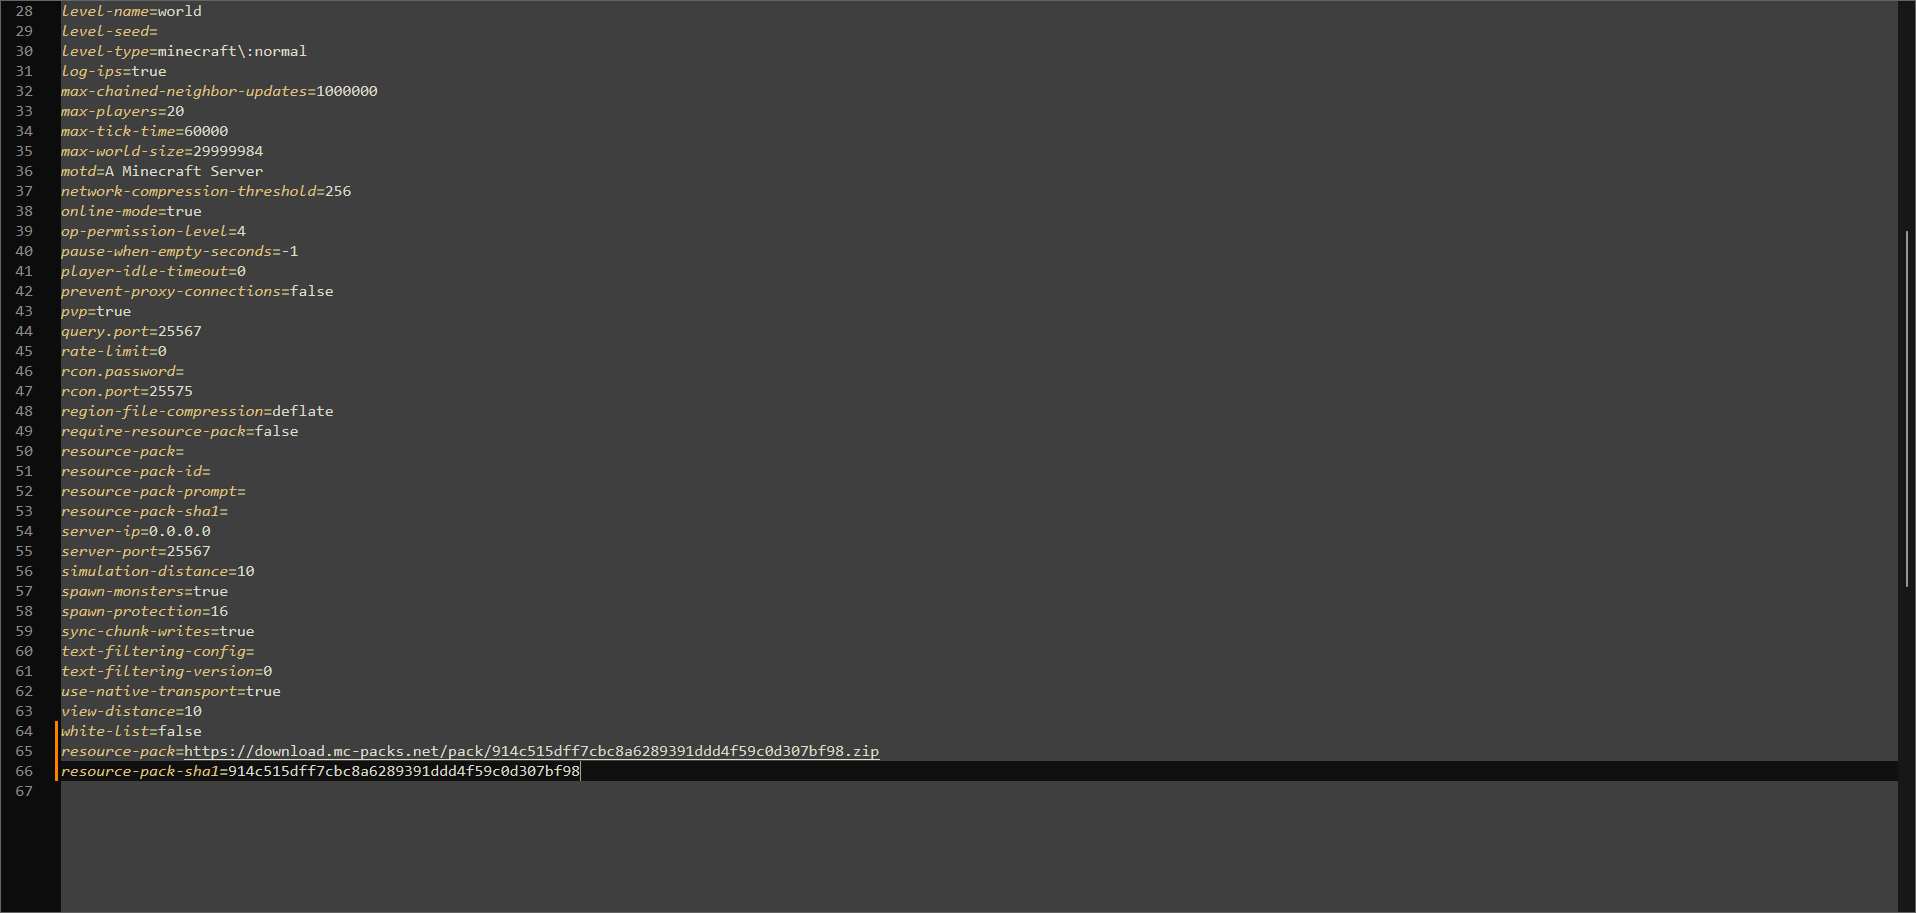
now delete the 2 lines you just pasted in, `resource-pack=` & `resource-pack-sha1=`
Save the file
Connect to your server and download the files when asked.
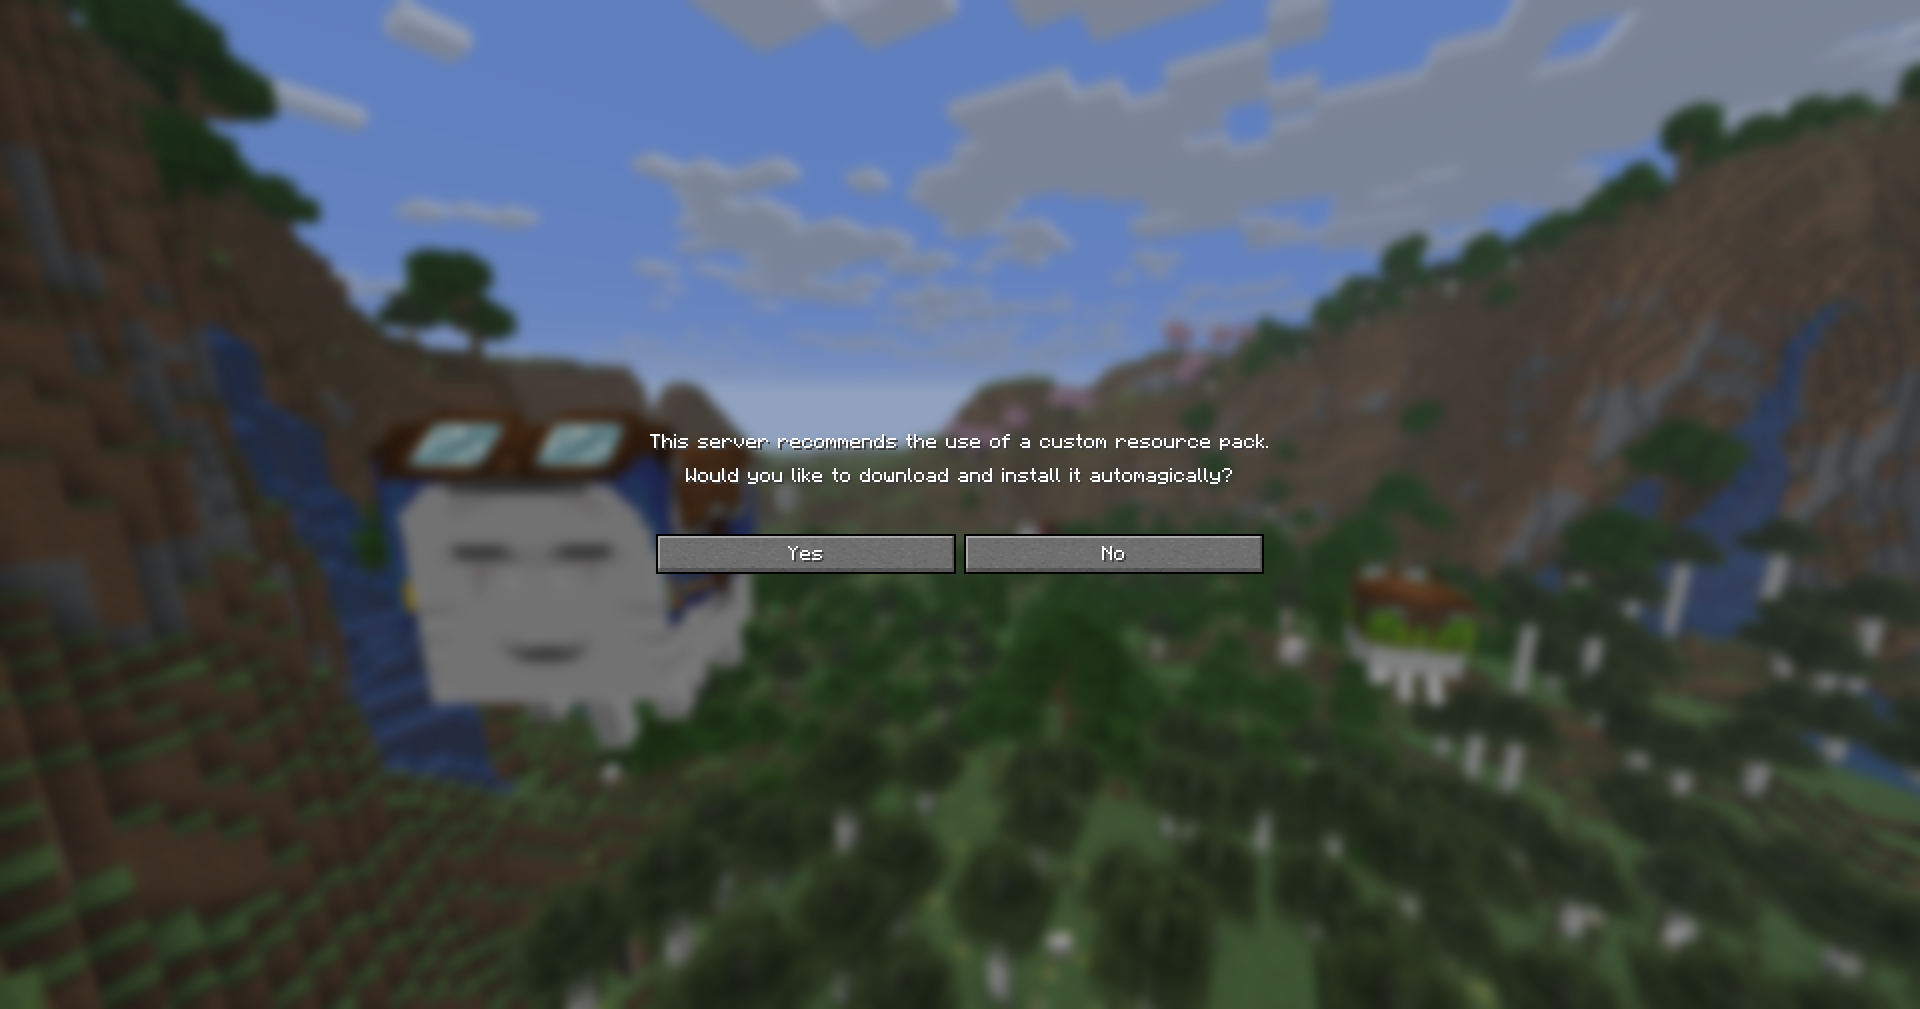
If you made it this far, congratulations, you now have an awesome server resource pack.
---
# Server Icon
URL: https://lagless.gg/docs/games/minecraft/configuration/server-icon
## Converting your icon
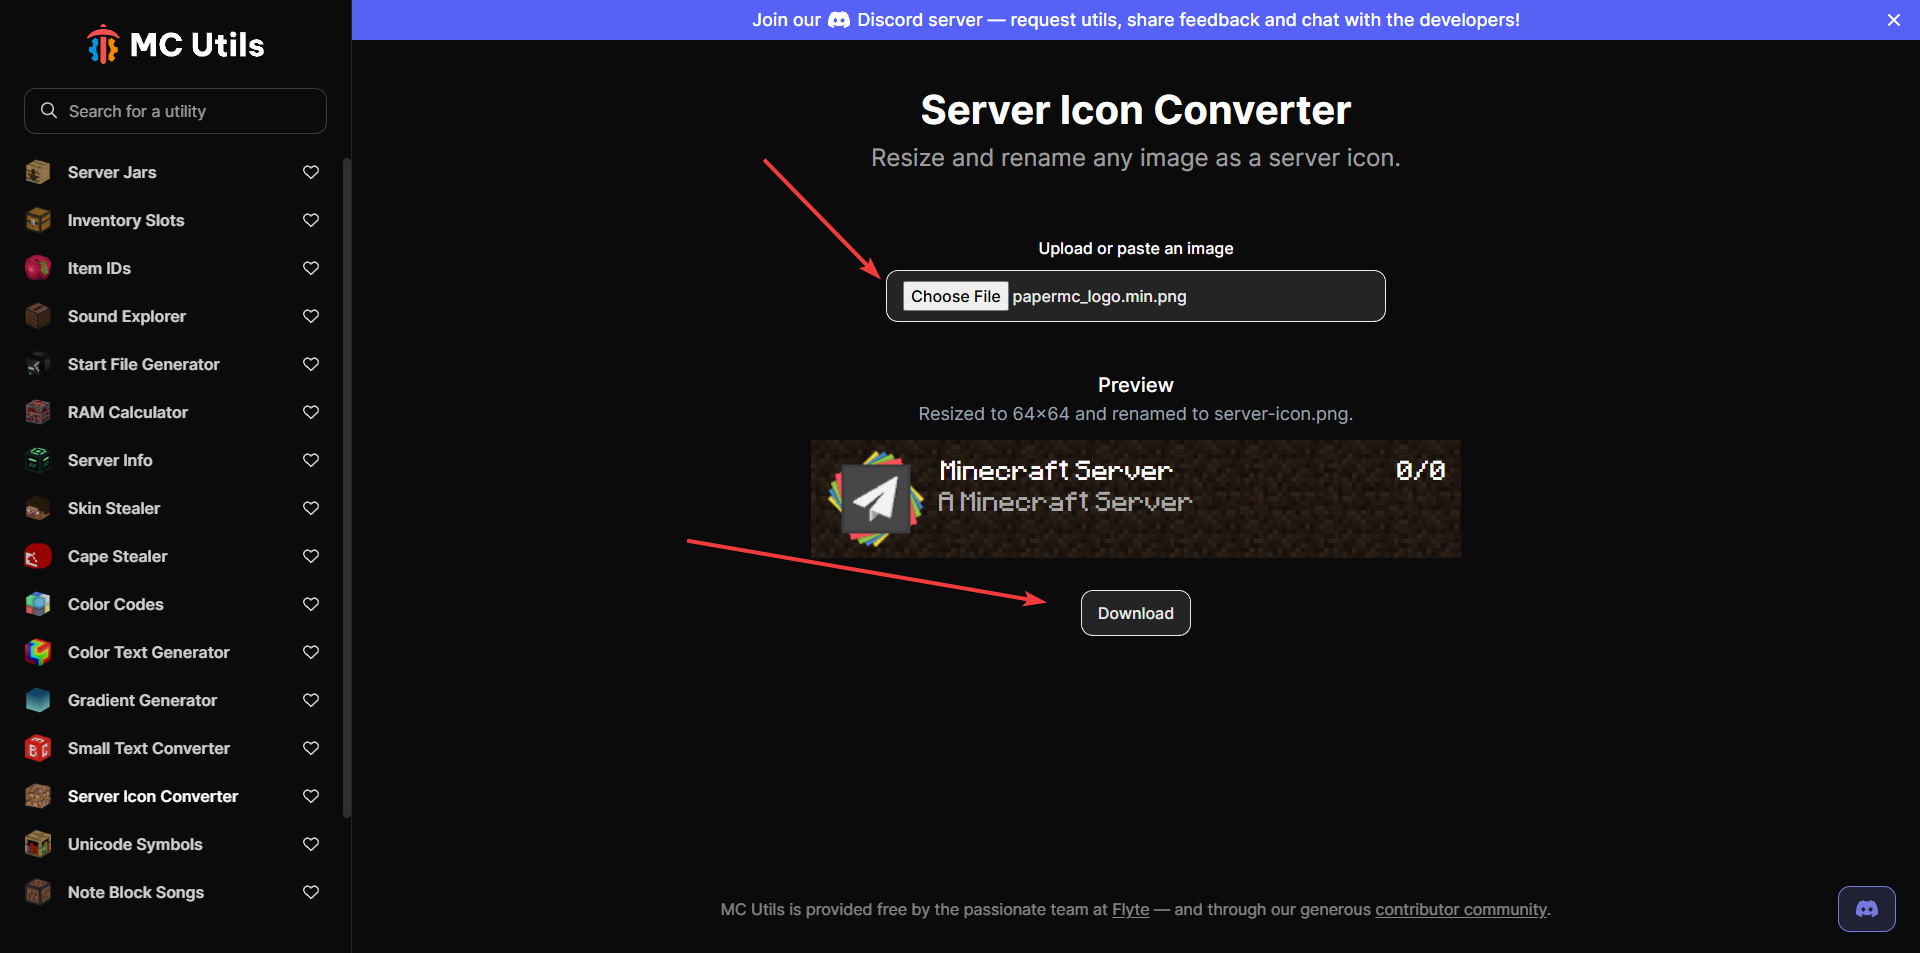
Select the server icon you want to use and upload it in [MCUtils](https://mcutils.com/server-icon-converter).
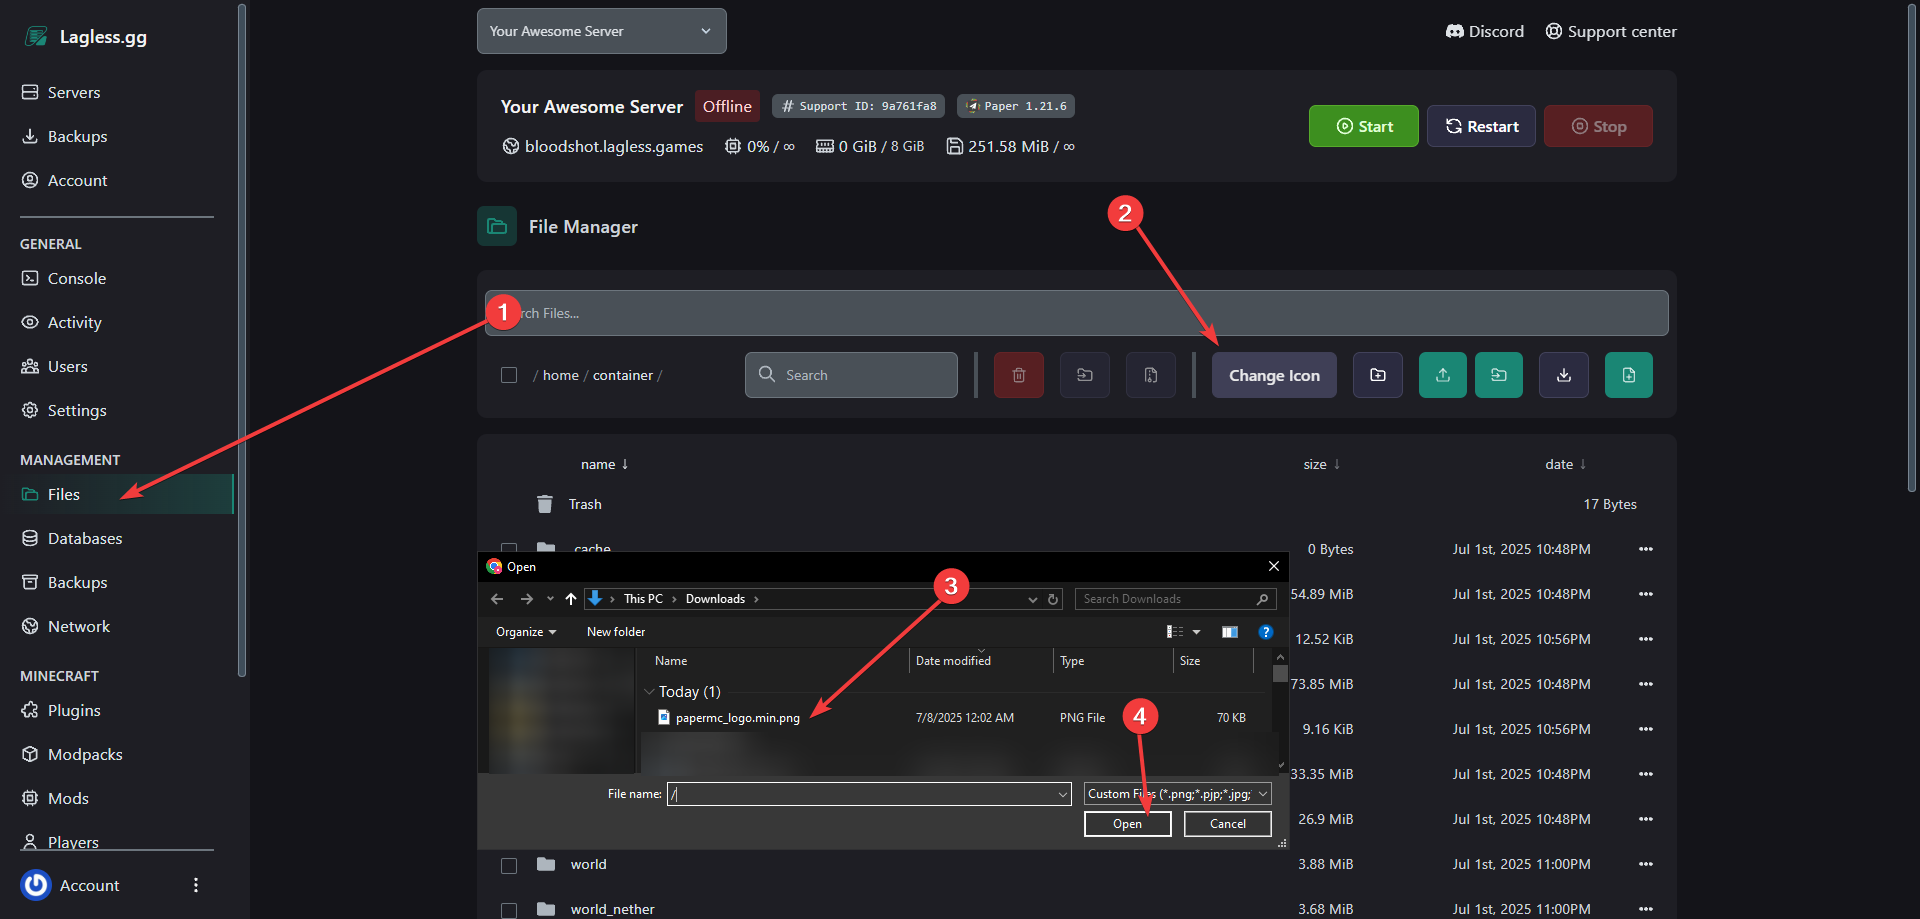
Next, go to your server and open the Files Manager. From here, you can
select on Change Icon then select the downloaded image.
Start your server and your icon should appear..
## Troubleshooting
If you are having issues with Change Icon, you can upload it directly to your File Manager.
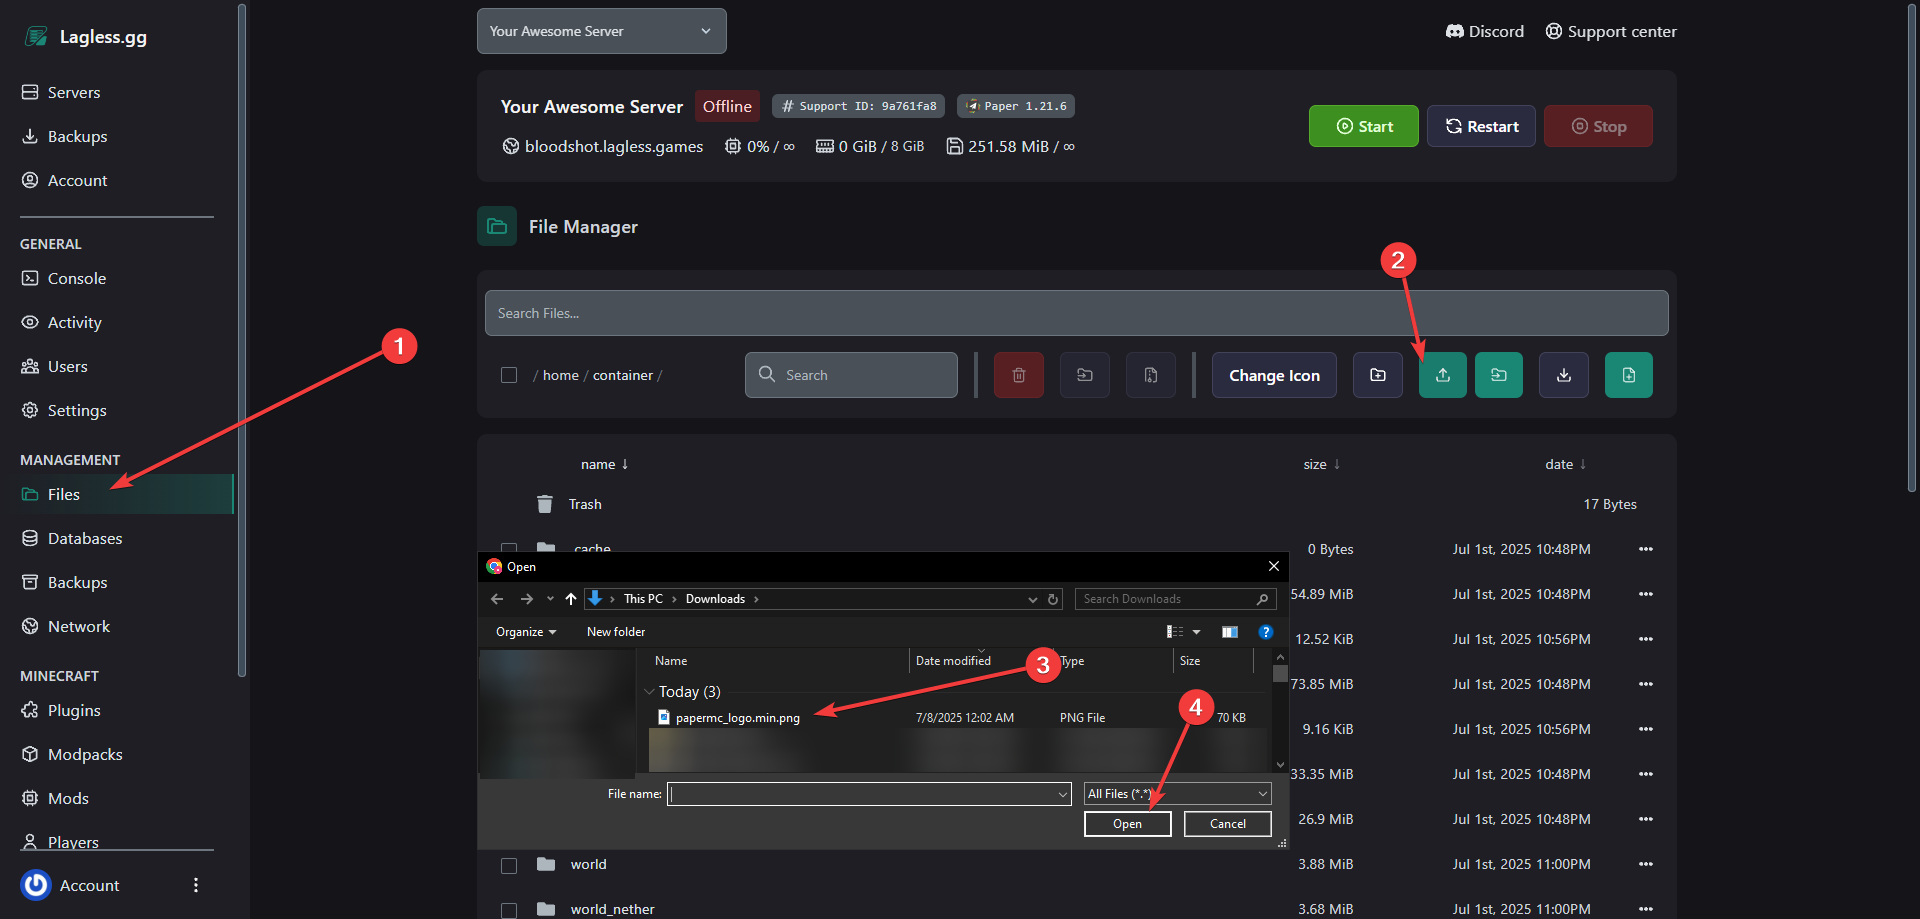
Once the file is uploaded, make sure the file is named `server-icon.png`. Start your server and verify the image is showing up.
---
# Server Properties
URL: https://lagless.gg/docs/games/minecraft/configuration/server-properties
Description: Configure and understand Minecraft's server.properties change max players, MOTD, world type and seed, render distance, gamemode, and performance-related options.
# Minecraft Server Properties
This guide walks through the most commonly changed settings in `server.properties` for Minecraft servers hosted on Lagless. We'll cover how to change max players, world type, seed, render distance, `motd`, `level-type`, and a few other useful properties.
## Accessing server.properties
Open your server panel and click File Manager
Navigate to the server root and locate `server.properties`
Click Edit to open the file in the panel editor
Make your changes and Save the file
Restart the server for changes to take effect
## Common Properties
### max-players
Controls the maximum number of concurrent players allowed on the server.
Example:
```
max-players=20
```
- Increase this if you expect more players, but ensure the server has enough resources. Lowering it can help reduce load.
### motd
The message-of-the-day shown in the server list.
Example:
```
motd=Welcome to our Lagless Server!
```
Tips:
- Keep it short and descriptive
- Avoid special characters that the client might not render
### level-type
Controls the world generator type. Common values:
- `default` — Standard world
- `flat` — Superflat
- `largeBiomes` — Larger biomes
- `amplified` — Amplified terrain
Example:
```
level-type=default
```
### level-seed
Sets the world seed used by the world generator. Use this to reproduce a specific world.
Example:
```
level-seed=1234567890
```
Tips:
- Seeds can be strings or numbers
- If empty, a random seed will be generated on world creation
### view-distance (render distance)
Controls how many chunks away the server will send to players. Higher values increase visibility but add CPU/memory and network cost.
Example:
```
view-distance=10
```
Recommendations:
- For small servers (up to 10 players): `8-10`
- For larger servers: monitor performance and adjust accordingly
### difficulty
Sets the game difficulty. Options: `peaceful`, `easy`, `normal`, `hard`.
Example:
```
difficulty=normal
```
### gamemode
Sets the default game mode for new players. Options: `survival`, `creative`, `adventure`, `spectator`.
Example:
```
gamemode=survival
```
### allow-flight
Allows players to fly (useful for mods/plugins or creative play). Set to `true` or `false`.
Example:
```
allow-flight=false
```
### spawn-protection
Protects an area around the spawn point from build/destroy actions by non-ops.
Example:
```
spawn-protection=16
```
### enable-command-block
Enable command blocks on the server. Set to `true` or `false`.
Example:
```
enable-command-block=false
```
## Advanced Options
- `max-tick-time` — Controls watchdog settings for server stalls
- `resource-pack` / `resource-pack-sha1` — Force a resource pack on players
- `query.port` and `query.enable` — Enable server query
Only change advanced options if you understand the impact — incorrect values may make the server unstable.
---
# Spawn Protection
URL: https://lagless.gg/docs/games/minecraft/configuration/spawn-protection
Description: Spawn protection prevents players from building around world spawn, undoing any attempts at placing or breaking blocks.
## Introduction
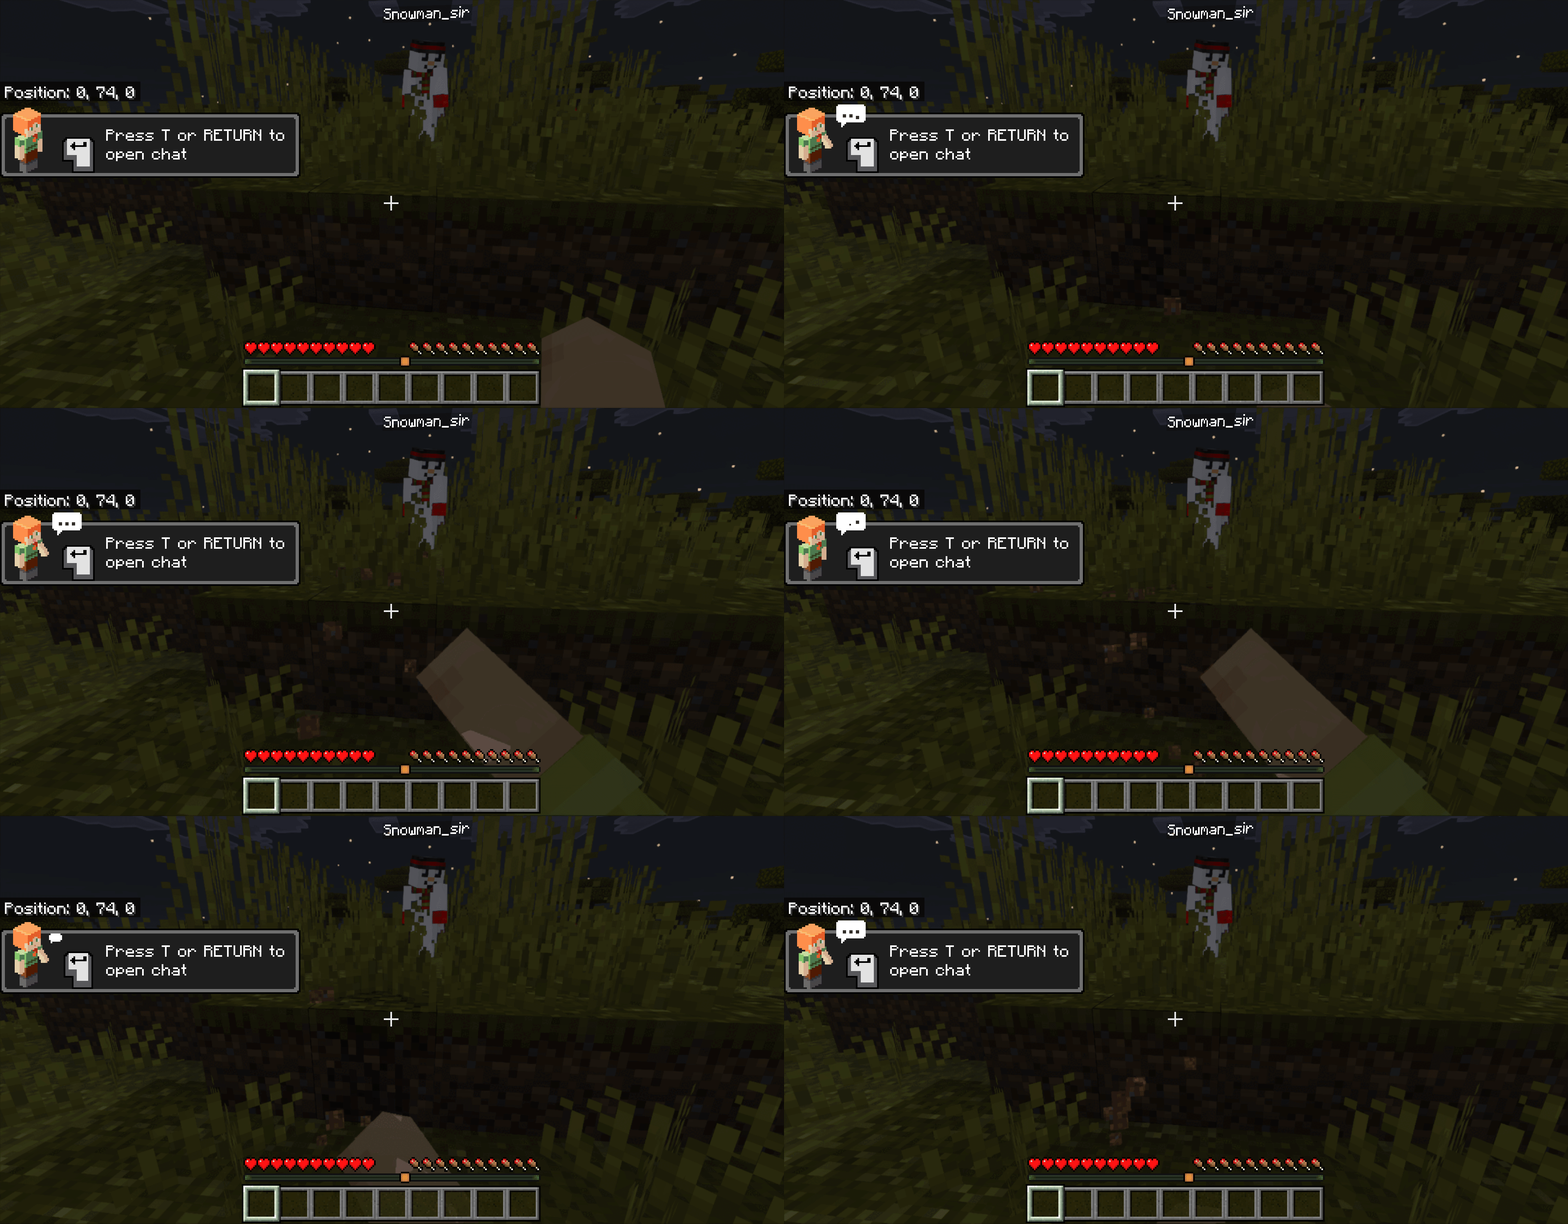
Spawn protection only exists in dedicated servers and does not apply in singleplayer worlds or LAN worlds. Spawn protection only applies in the Overworld, since the world spawn is always in the Overworld.
Spawn protection may be a useful feature for servers to prevent players from griefing the spawn area. You may want to disable it or change its range for a private server or a specific world design.
## Spawn-Protection
If there are no op(erators) at all in the server, spawn protection does not apply.
Login to our lagless game panel
Go to the files tab and search for the **server.properties** file.
Search for the field
`spawn-protection=16`
Setting this field to `0` will disable spawn protection.
Setting it higher than 16 will increase the spawn protection range around the world spawn block.
Save the file and restart your server for the changes to take effect.
---
# Subdomain Setup
URL: https://lagless.gg/docs/games/minecraft/configuration/subdomain-setup
Description: How to use your own domain for Minecraft
# Lagless.Games Subdomain
Lagless.gg has a built-in feature to use one of our subdomains free of charge. Under the Network tab, you can
select Create Subdomain and pick a custom name tying it to an allocation.
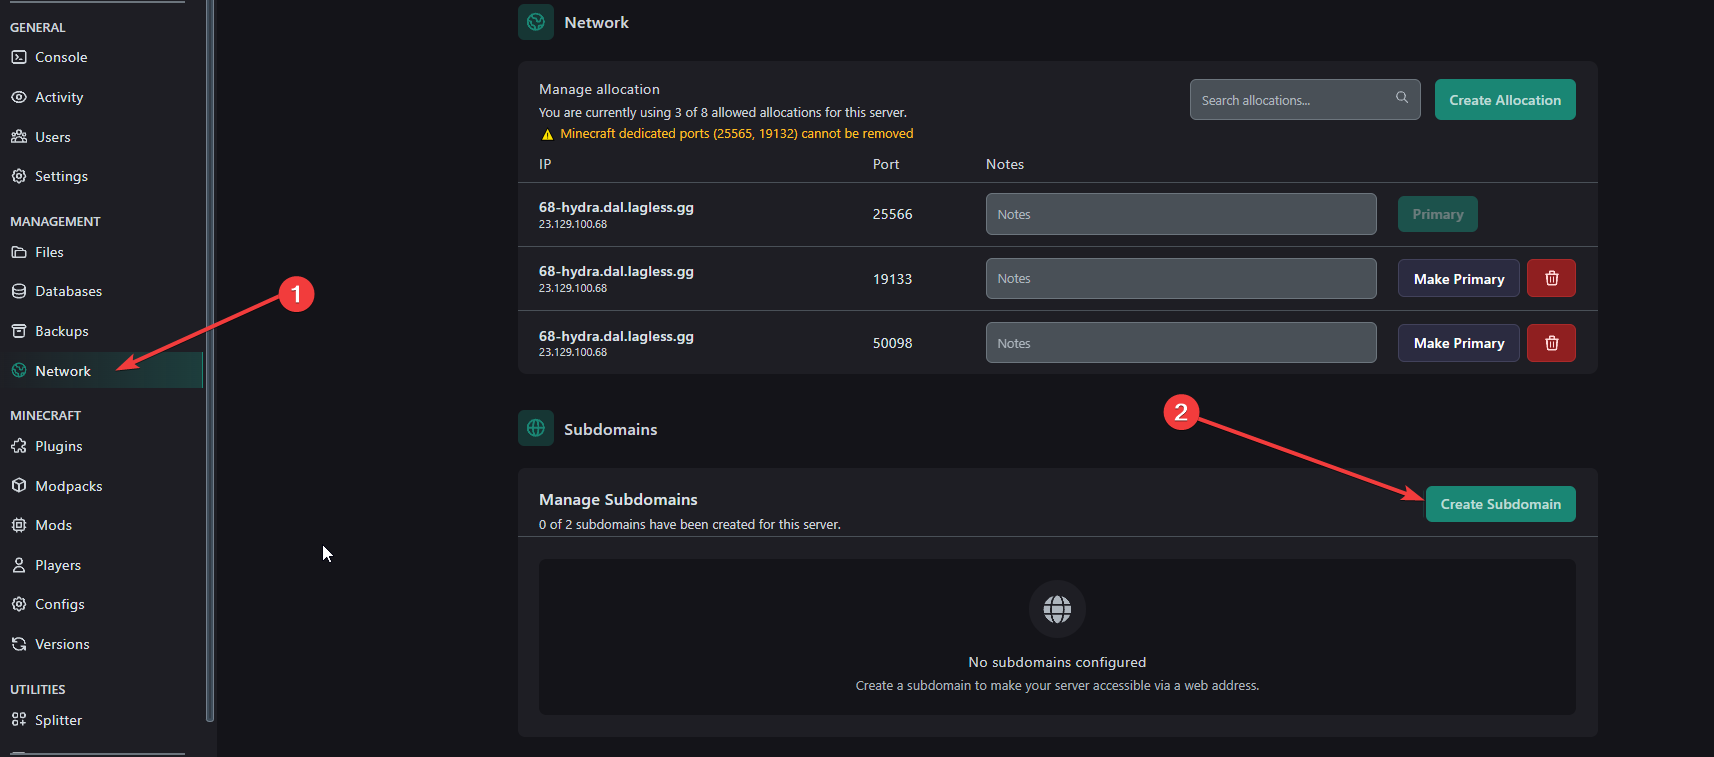
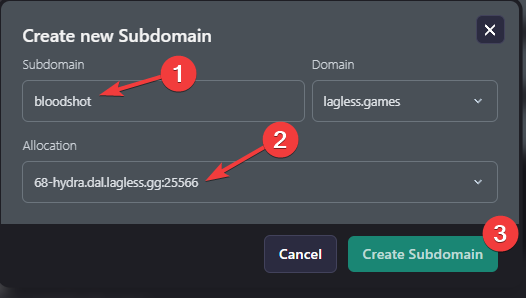
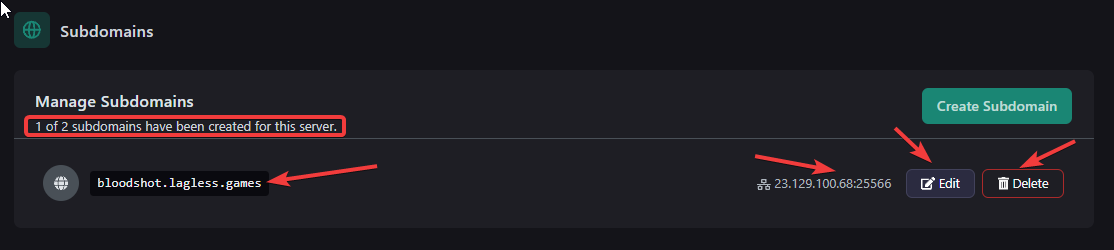
Afterwards, you can see the subdomain you created along with what allocation it's tied to. You can always go back and delete or modify the records later on.
# Adding DNS records
Go to your registrar's website to manage your domain and find your DNS settings.
## Dedicated Port
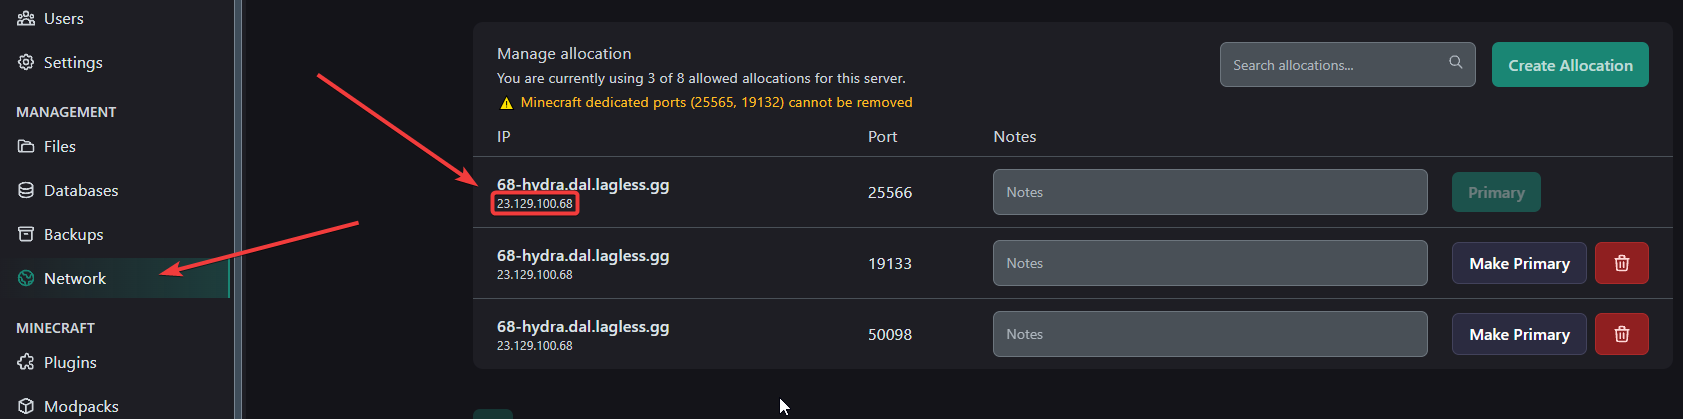
If you have purchased a dedicated port for your Minecraft server (25565 or 19132), you will only need an A record.
Create an A record with the subdomain you want and put the IPv4 address of your server. You can find the server IP
under the Network Tab on your server.
In this case, we're using Cloudflare but it should look something similar to this. If you are using Cloudflare as well,
make sure you disable Proxy Status and save.

## Non-Dedicated Port
Using a shared IP means you'll need to add an extra SRV record. Make sure to still add an A record as shown above.
At the end, it should look similar to this.
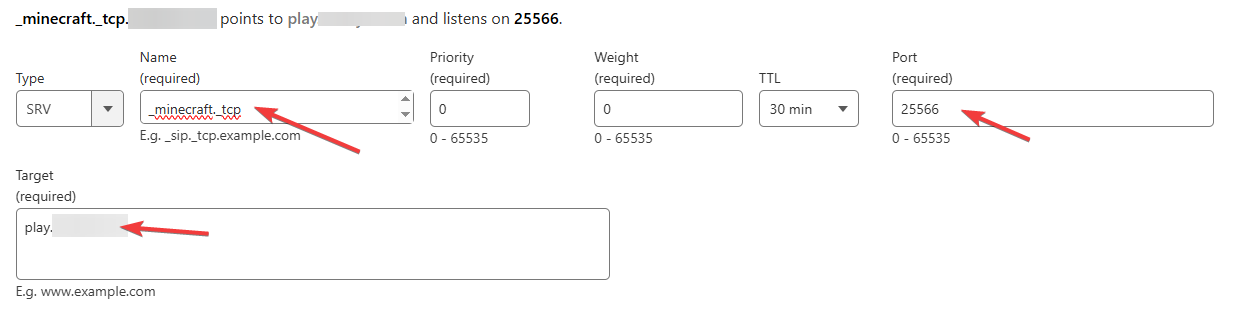
### Cloudflare
- Name: `_minecraft._tcp`
- Priority: `0`
- Weight: `0`
- TTL: `Auto` or `30 mins`
- Port: Your port under Network
- Target: The A record you created
### Namecheap/Other Registrars
- Service: `_minecraft`
- Protocol: `_tcp`
- Priority: `0`
- Weight: `0`
- TTL: `Auto` or `30 mins`
- Port: Your port under Network
- Target: The A record you created
# Verifying DNS record
Depending on your DNS, it may take up to 24-72 hours for the DNS to propagate. You can also try to
put the IP directly into Minecraft to see if you can resolve it. Alternatively, you can use mcsrvstat.us to check
if its resolvable.
---
# Whitelisting Players
URL: https://lagless.gg/docs/games/minecraft/configuration/whitelist
Description: Keep certain people in your server while keeping others out
# General Information
Why even whitelist? Nowadays anyone can figure out the IP and port to a server and grief your world. You can whitelist your server, blocking strangers and only letting people you know in.
The commands in this wiki are provided without the `/` (slash) included. If you are executing these commands via Console, the slash is already assumed.
When running the commands as OP in-game, you will need the `/` (slash) to properly execute the commands.
Respectively, Java uses `whitelist` while Bedrock uses `allowlist`. Generally the commands are the same but are provided depending on which server you're running.
## Java Edition
### Commands
`whitelist add `
- Adds the player profile(s) to the whitelist. The player does not need to be online.
`whitelist list`
- Displays all player profiles in the whitelist.
`whitelist off`
- Disables the server’s use of a whitelist.
`whitelist on`
- Enables the server’s use of a whitelist.
`whitelist reload`
- Reloads the list of player profiles in whitelist.json from disk (used when the file has been modified outside of Minecraft).
`whitelist remove `
- Removes the player profile(s) from the whitelist. The player does not need to be online.
## Bedrock Edition
### Allowlist Commands
`allowlist add `
- Adds the player to the allowlist. The player does not need to be online.
`allowlist list`
- Displays all player names in the allowlist.
`allowlist off`
- Disables the server’s use of an allowlist.
`allowlist on`
- Enables the server’s use of an allowlist.
`allowlist reload`
- Reloads the list of players in allowlist.json from disk.
`allowlist remove `
- Removes the player from the allowlist. The player does not need to be online.
---
# Creating a Custom Modpack
URL: https://lagless.gg/docs/games/minecraft/mods/modpack-creation
Description: Create a custom modpack, share it online
## Introduction
This guide will teach you how to create a custom modpack and upload it for everyone to use.
### Creating a Custom Modpack
Download the [CurseForge app](https://www.curseforge.com/download/app) if you haven't already installed it. This guide uses the **Standalone** version without Overwolf.
Navigate to **Minecraft**, **MyModpacks** and click on **Create**
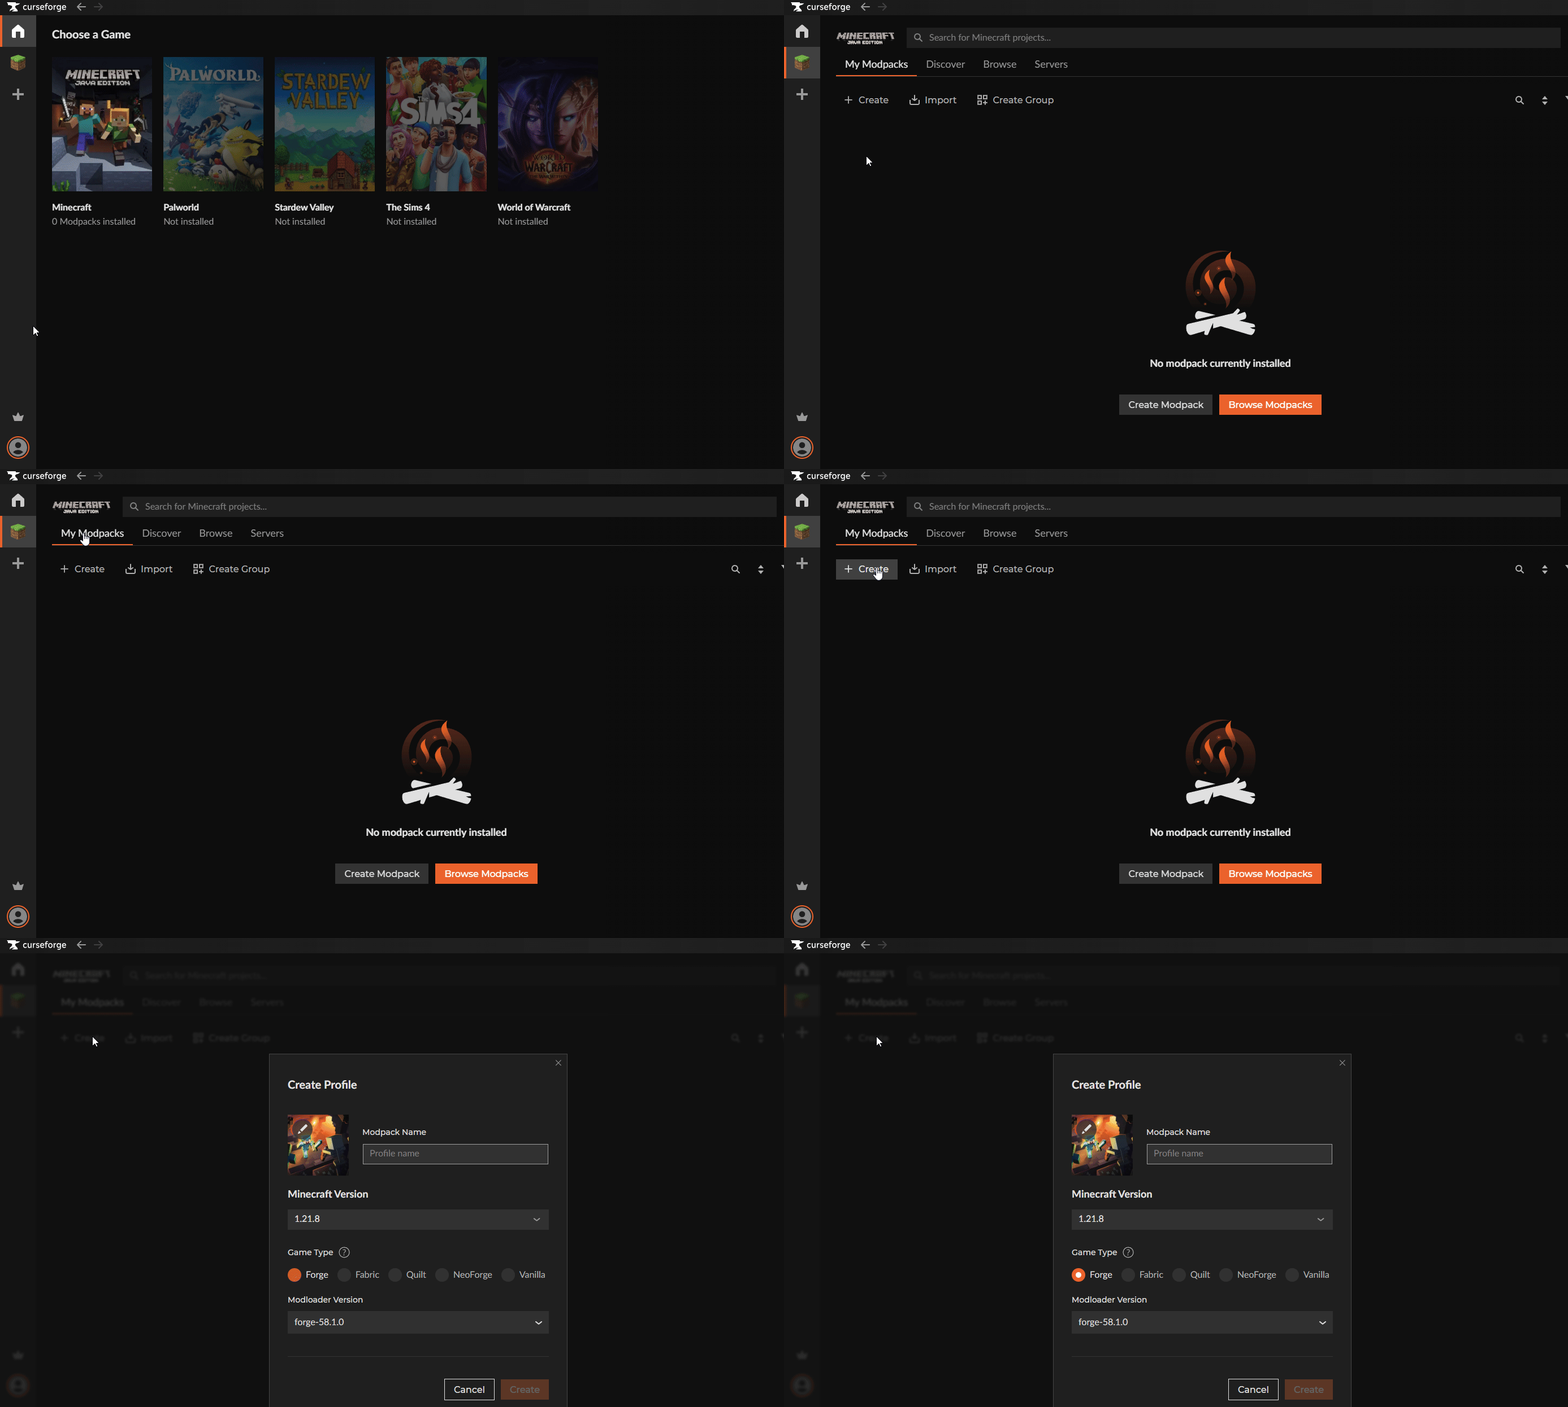
A new window shows up where you can change the Modpack name, version, image, loader and version. Once done click on **Create**
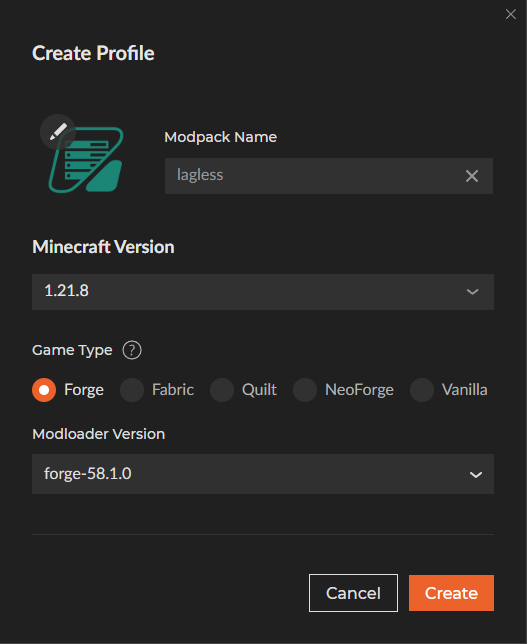
Click on **Add More Content** to add mods, shaders, resource packs etc. till you have a great Modpack.
When you have a great modpack, you need to export your modpack. You can do this by clicking the three dots next to the play button, or by right clicking the modpack and clicking **Share Profile**
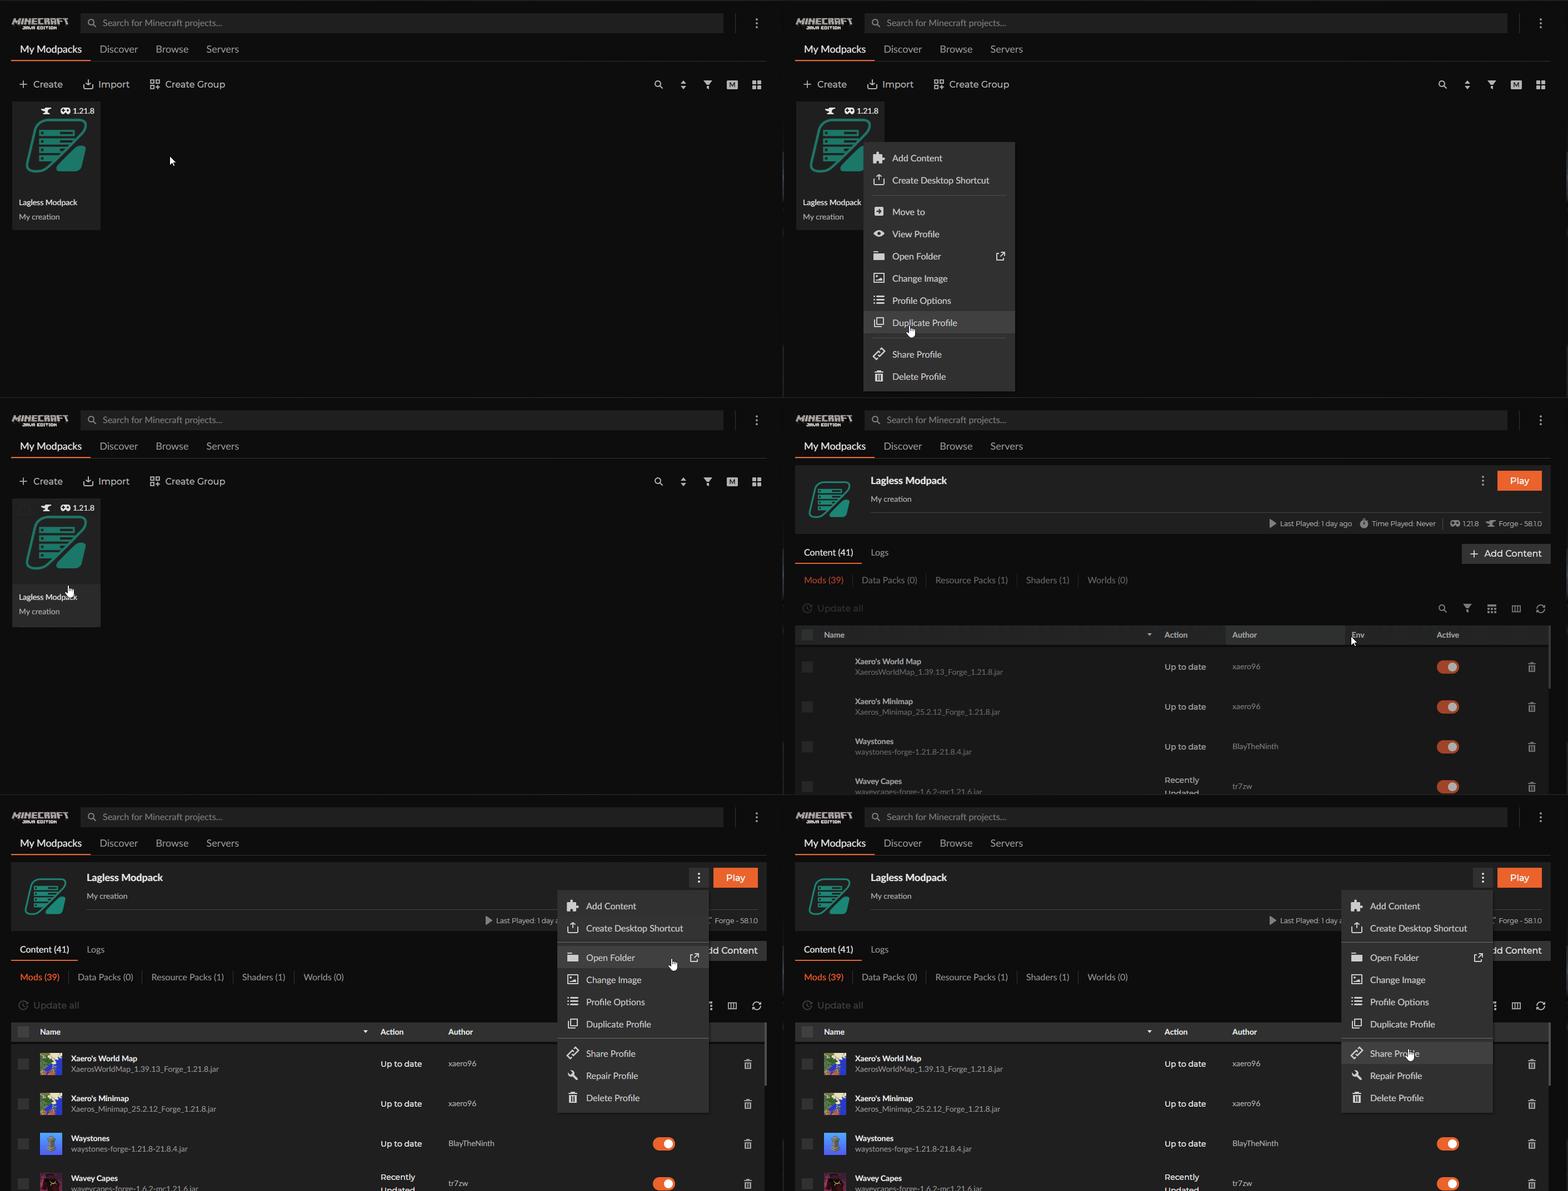
Export as Zip file
You can now change **Package Version** and set **RAM Recommendation**. Also, don't tick the **Select server mods only**, as it does not work well.
Ensure **Config** and **Mods** are at least selected. While client only content is not. (such as shaders and client mods)
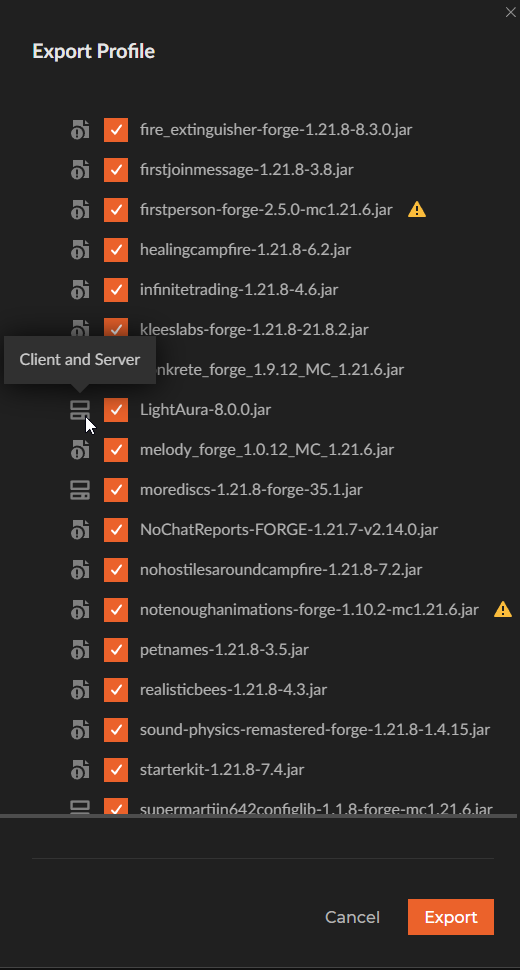
Save the zip file by clicking export.
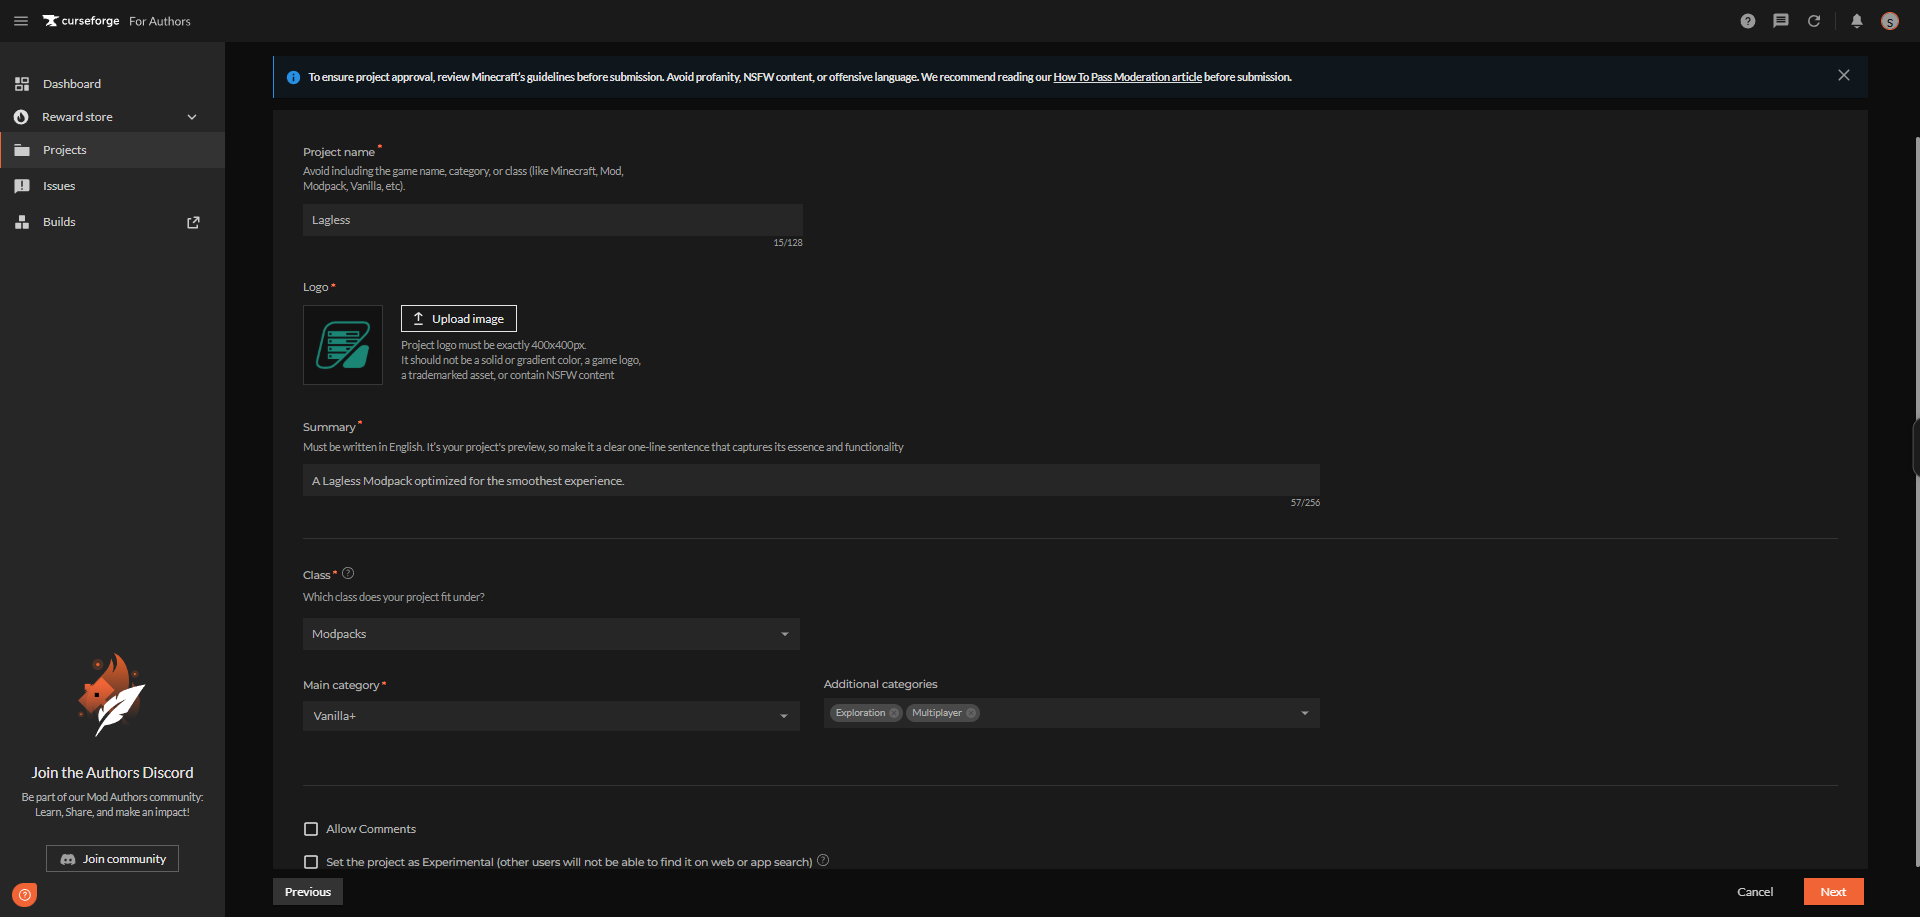
Avoid including the game name, category, or class like Minecraft, Mod, Modpack, Vanilla, etc. There is a high chance your modpack will not be approved with this.
### Become a Creator
Once approved, your modpack will be available in our panel's Modpack tab for easy installation!
Log in to [CurseForge](https://www.curseforge.com/)
If you don't have an account, create an account.
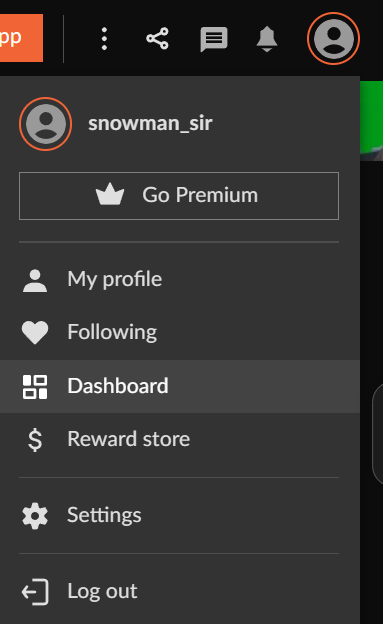
Go to the main page and click your profile in the top right, then click dashboard
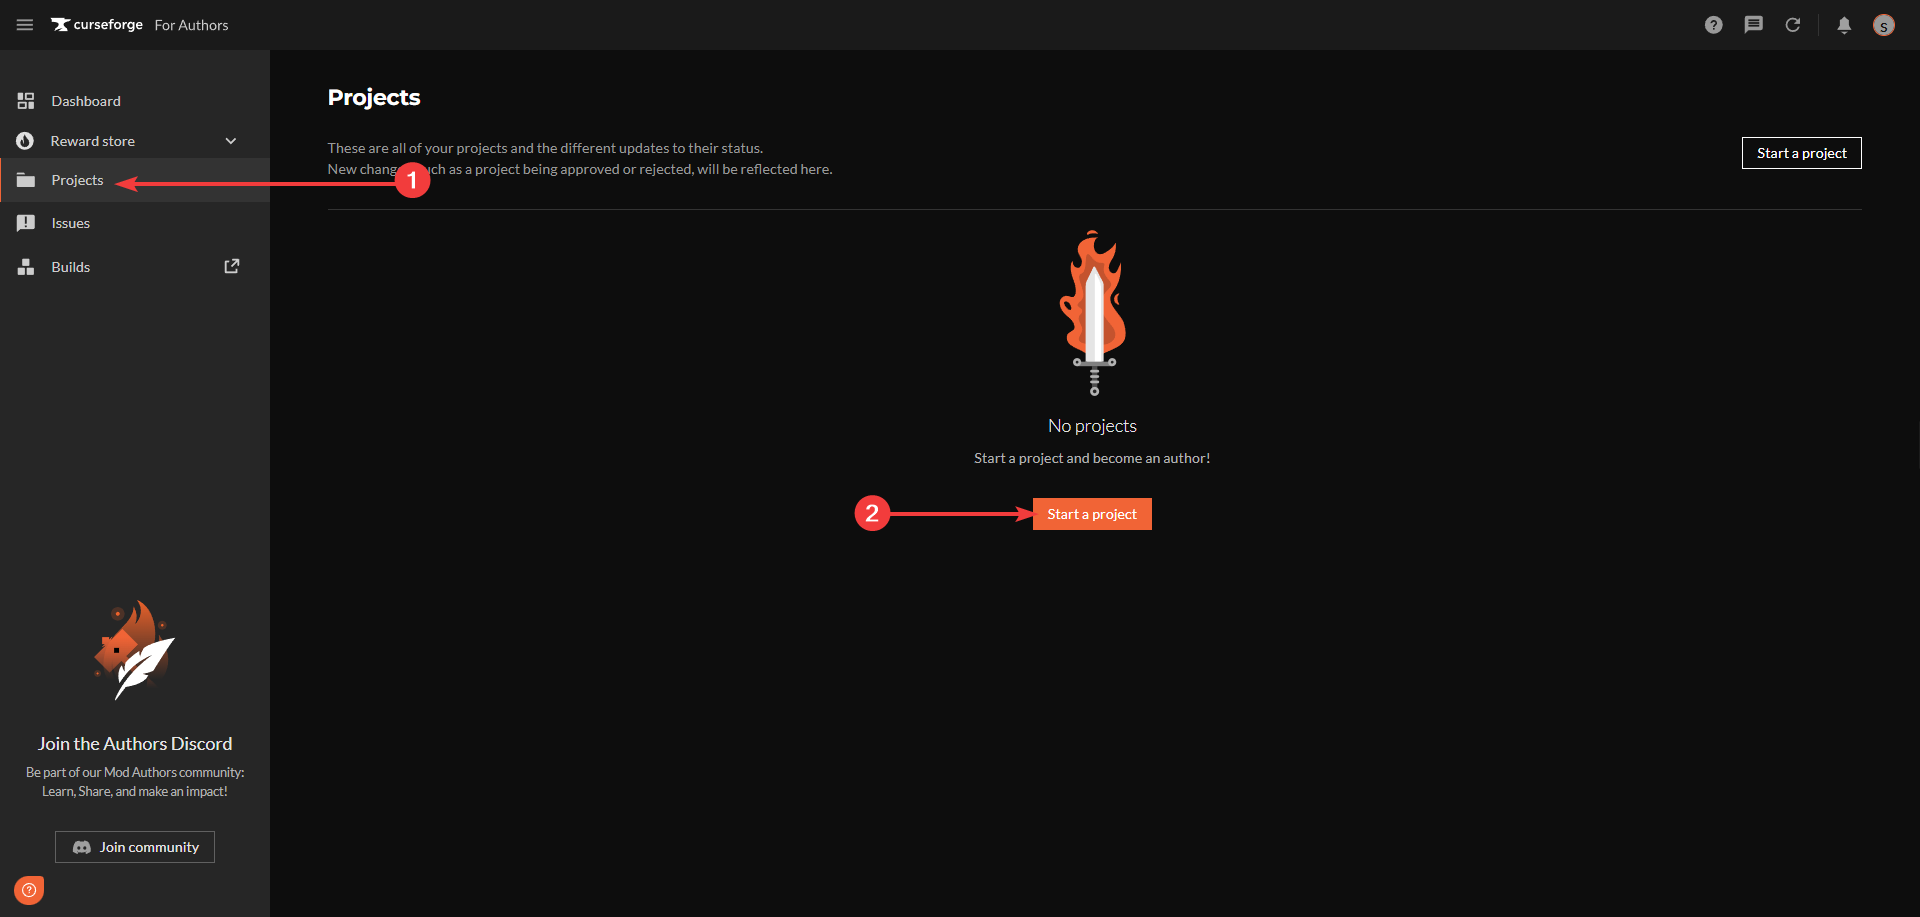
Click on **Projects** on the left, and click **Start a project** in the center.
Click on the game you want to start a project for, Minecraft in this instance.
Fill out the information to best describe your modpack and click next.
Give a description about the modpack, and click next.
Fill out the license description, and click create.
You will now see this message `This is a new project. Until approved by a Moderator, the project will not be visible to others, and its files will not synchronize across CurseForge.`
It has to be approved, for now move to the next step.

Now go to the **Files** tab of your project and upload the zip file you exported earlier, fill out the description once more and click **Add file**
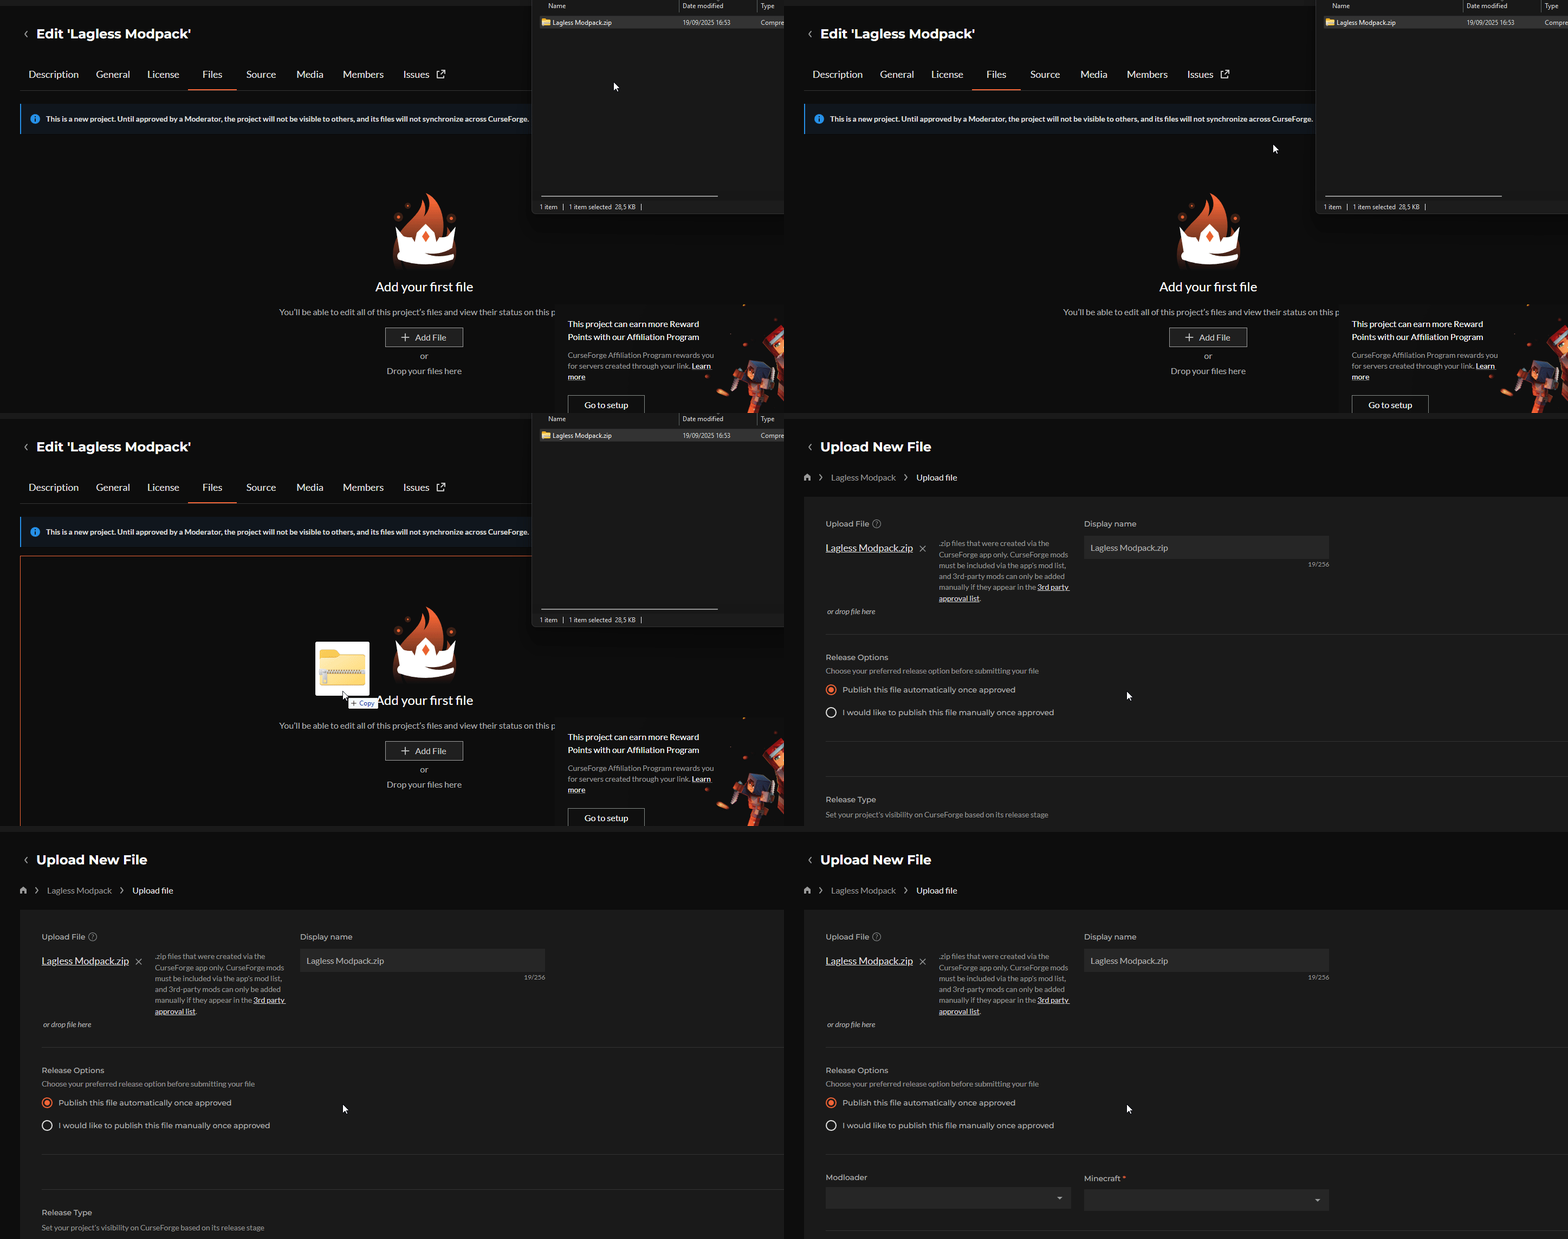
When your project status has been approved, you can now find your modpack in our Modpacks tab on the panel.
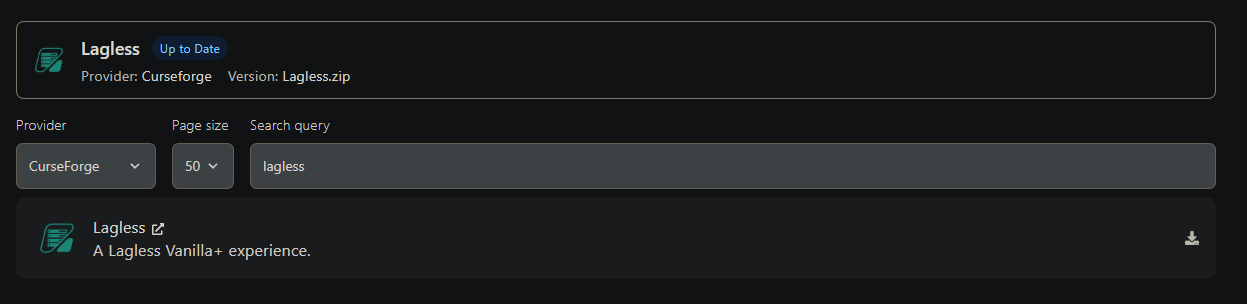
### Uploading to Your Lagless Server
Before uploading your modpack ensure you have the right versions.
Go to the versions tab and select the right version for your modpack. Typicall Forge/NeoForge/Fabric
Upload your modpack using [sftp](/docs/using-the-panel/sftp)
Start your server.
---
# Installing a Modpack
URL: https://lagless.gg/docs/games/minecraft/mods/modpacks
Description: Customize your Minecraft with a new collection of mods to include new biomes, mobs, items and quests.
# Lagless Modpack Installer
Before installing a new modpack, back up important data.
Installing a modpack may overwrite or delete existing files.
Head over to our [lagless panel](https://panel.lagless.gg/) and log in.
On the left menu, look for **Modpacks**
In this example, we're going to look for **BMC4** which is hosted with Modrinth.
Depending on your modpack, you may need to switch provider.

Once you have found the modpack you want to install, press the install button.
Select your version, and whether you want to **Delete files** or not. Keep in mind, this is irreversible. So make backups if you have not already.
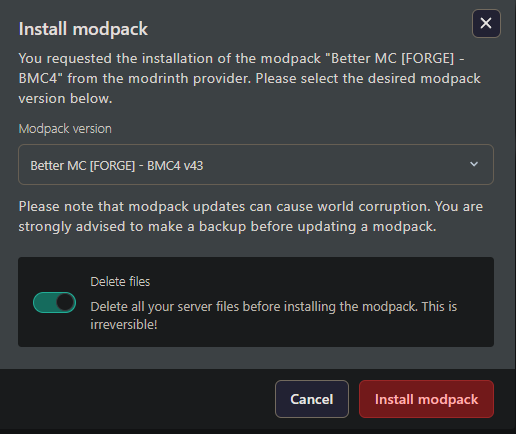
Press **Install modpack**, it may take a few moments to install.
Enjoy the new modpack.
# Uploading a Modpack
If you have a modpack that isn't available on any of our providers or are using a custom modpack to play with friends, you'll need to upload it via SFTP.
Read our existing guide on how to connect and upload your server with SFTP.
After uploading your zipped modpack, navigate to the File Manager, click on the uploaded file, and select Unarchive.
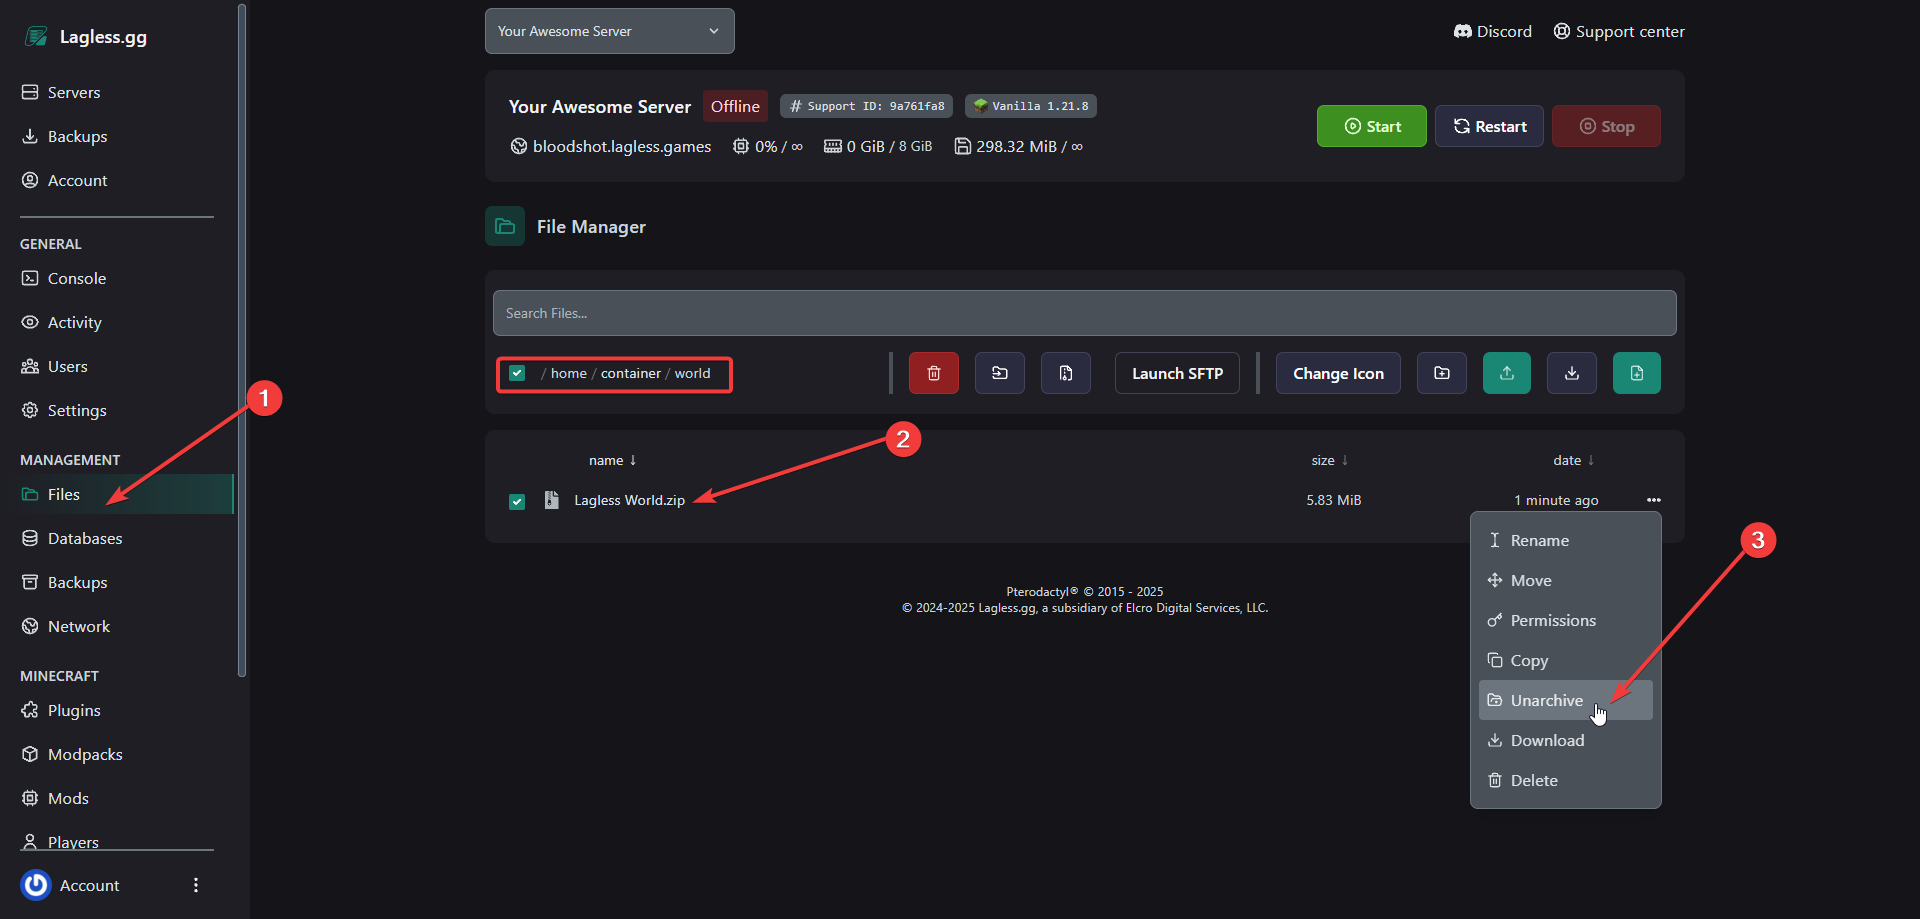
Use custom modpacks at your own risk. Ensure you've done proper research and are
using compatible mods—otherwise, you may encounter server issues, client-side problems, or crashes.
---
# Installing Shaders
URL: https://lagless.gg/docs/games/minecraft/mods/shaders
Description: Give your Minecraft a visual update with Shaders
## Introduction
Want to make your Minecraft look better? Shaders are a great way to do that. They add new lighting and visual effects to the game, making it look more realistic and immersive.
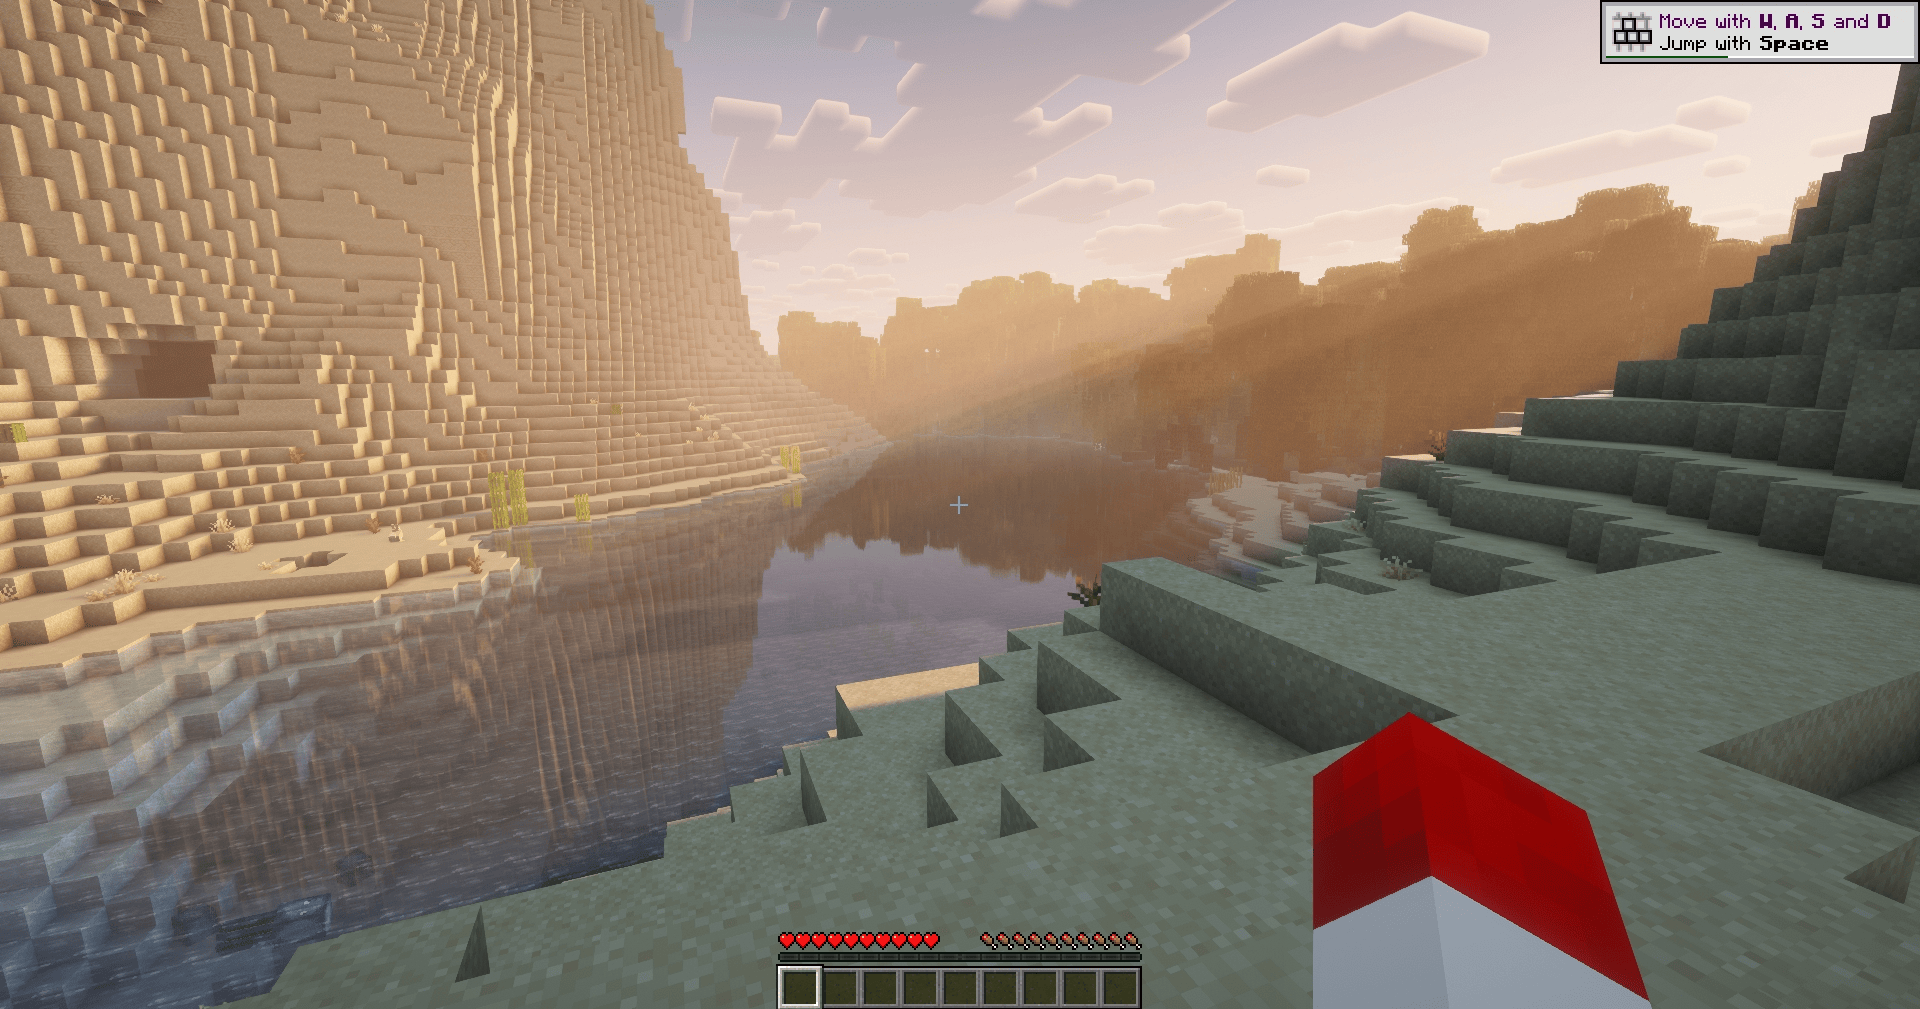
This is how you install the shader loader Iris and shader pack "Complementary Shaders - Reimagined" the recommended way.
We are going to start with Modrinth for this, CurseForge will be covered in the next section.
Iris supports fabric 1.16.5 and up, NeoForge 1.21.1 and up and quilt on Java. You can't use this on bedrock or mobile devices.
This may seem obvious to some, but don't install shaders on servers.
Servers are not able to use these.
### Modrinth
If you haven't already, make sure you have a shader compatible instance. If you don't, create one by clicking the "Create Instance +" button. Make sure to select a compatible version and modloader.
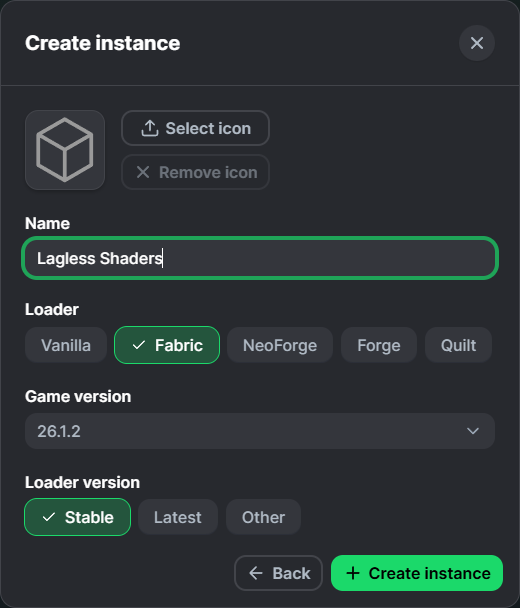
Search for iris shaders by coderbot on modrinth. This is the shader loader that we will be using. Click on install for the version compatible with your instance.
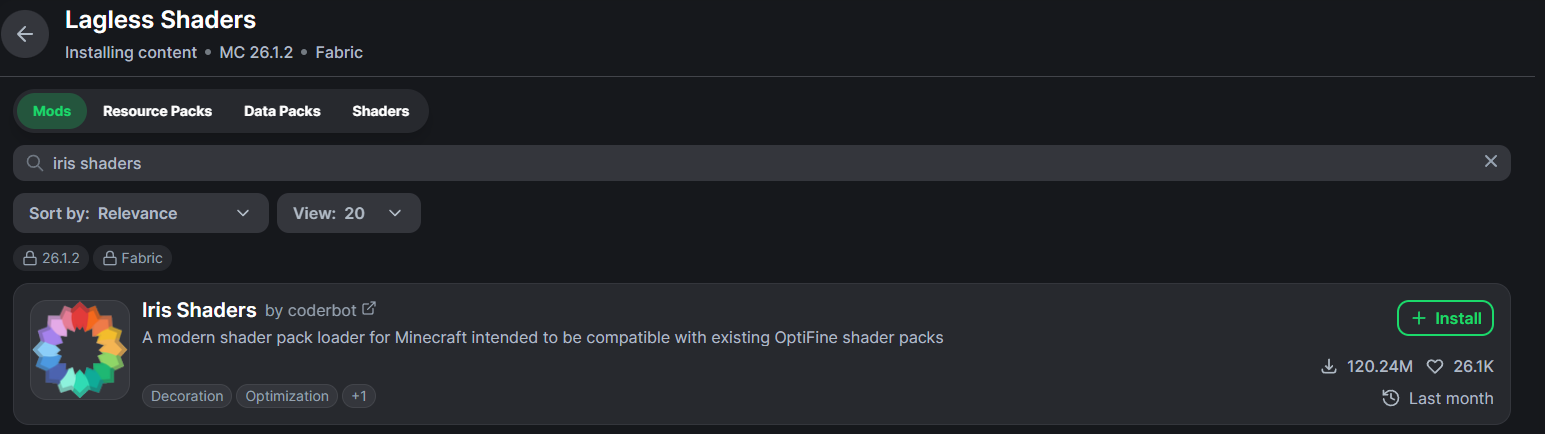
go back to the instance and click on the "Mods" tab. You should see iris shaders in the list of mods. If you don't, make sure to check if you installed it on the correct instance.
Now, we need to install the shader pack. In your instance, click on "Browse content" and click on the shaders tab. Here we're going to search for the shader pack. In this example, we're going to look for **Complementary Shaders - Reimagined** which is hosted with Modrinth.
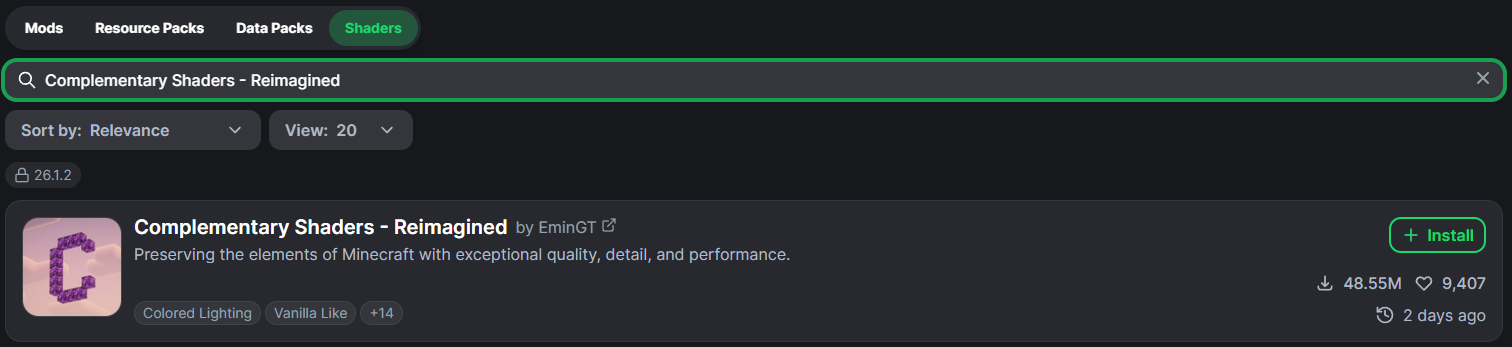
Install the shader pack and go back to the instance. You should see the shader pack in the list of mods. If you don't, make sure to check if you installed it on the correct instance.
Now, you can launch the instance and enjoy your new shaders! You can also customize the shader settings in-game to your liking.
### CurseForge
If you haven't already, make sure you have a shader compatible profile. If you don't, create one by clicking the "+ Create" button. Make sure to select a compatible version and modloader.
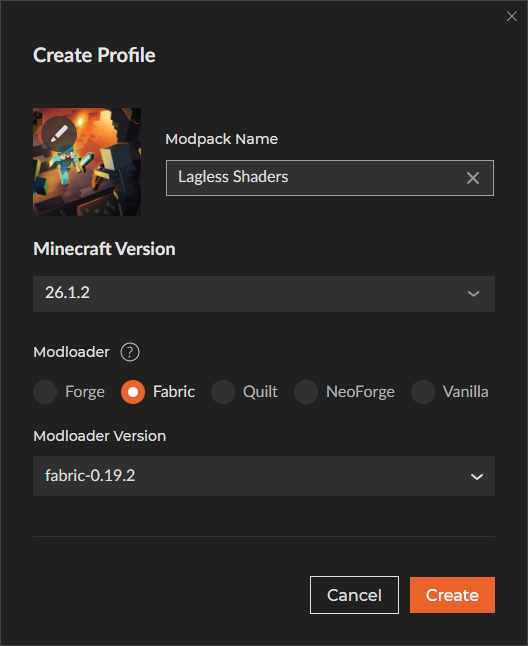
Click on "+ Add Content" and search for iris shaders by coderbot. This is the shader loader that we will be using. Click on install for the version compatible with your profile.
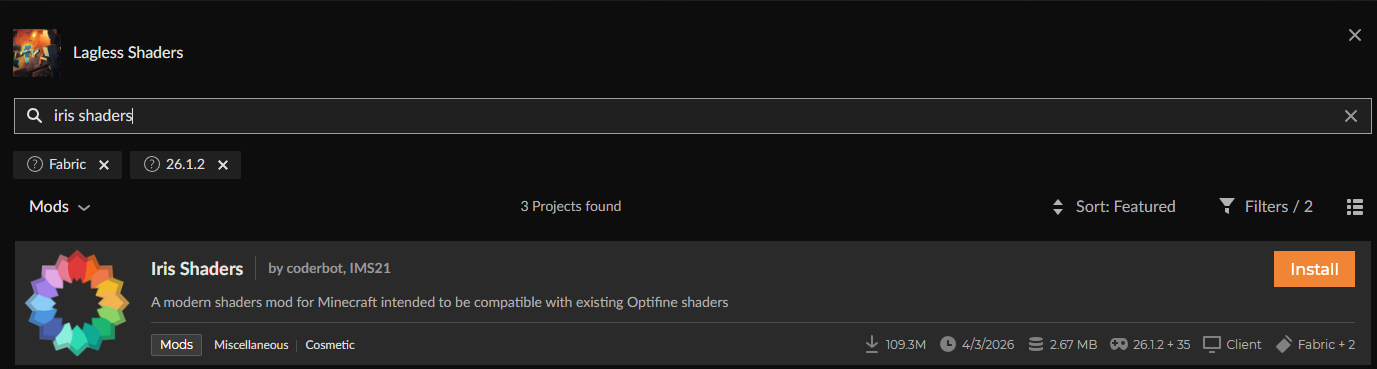
go back to the profile and click on the "+ Add Content" tab. You should see iris shaders in the list of mods. If you don't, make sure to check if you installed it on the correct profile.
now, we need to install the shader pack. In your profile, click on "Add content" and make sure to select the "Shader" category. Here we're going to search for the shader pack. In this example, we're going to look for **Complementary Shaders - Reimagined** which is hosted with CurseForge.
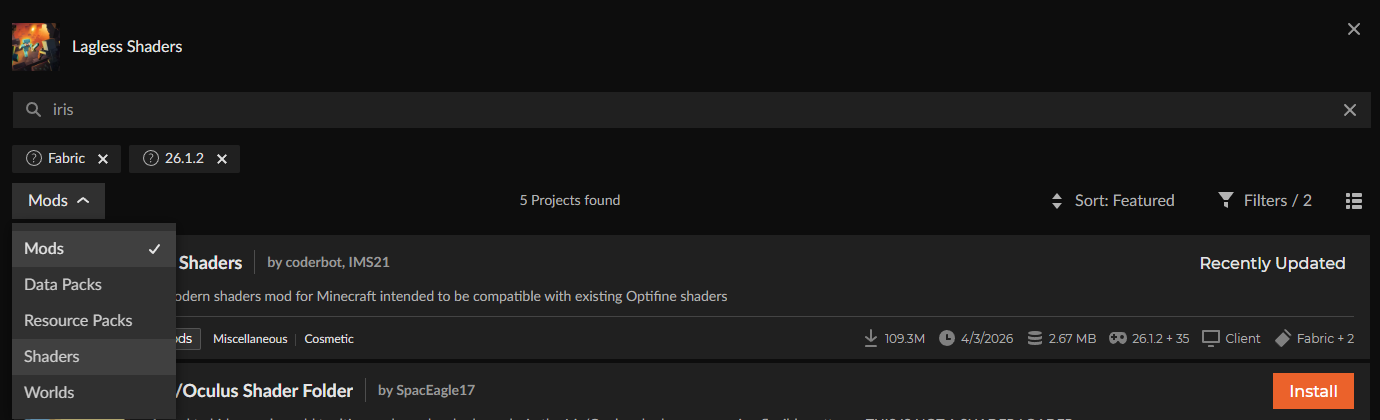
Install the shader pack and go back to the profile. You should see the shader pack in the list of shaders under content. If you don't, make sure to check if you installed it on the correct profile.
Now, you can launch the profile and enjoy your new shaders! You can also customize the shader settings in-game to your liking.
---
# Chunky
URL: https://lagless.gg/docs/games/minecraft/plugins/chunky
Description: Your step-by-step guide to using Chunky to pregenerate a world
## Getting Started
Install Chunky on your server by downloading either the [plugin](https://modrinth.com/plugin/chunky/versions?l=bukkit&l=paper&l=spigot) or [mod](https://modrinth.com/plugin/chunky/versions?l=fabric&l=neoforge&l=forge) and dragging & dropping the file into your server's `plugins` or `mods` folder. You can use an SFTP client or the **Plugins**/**Mods** tab in your game panel to do this.
Even though you would ideally generate each world, be mindful that 1 block in the nether is 8 in the overworld.
Because of this players can get outside of the worldborder if you make them the same size. So make the overworld 8 times bigger to not have this happen.
This can use a lot of storage space, so don't go overboard. A site like [world size calculator](https://onlinemo.de/world) may give you a estimate of that. The difference between 10k and 20k is about 50GB storage.
### Configuring Chunky
**Enable Continue-on-Restart (Recommended)**
Chunky can use a lot of RAM and may require server restarts. To ensure your pregeneration continues after a restart, navigate to `/plugins/Chunky/config.yml` and change the setting from `continue-on-restart: false` to `continue-on-restart: true`. You typically won't need to change anything else in this file.
**Verify Your Permissions**
Make sure you have the necessary permissions to use Chunky's commands. The simplest method is to give yourself operator (OP) status using the console or an in-game command.
```bash
op snowman_sir
[11:06:26 INFO]: Made snowman_sir a server operator
```
If you are using a permissions plugin like LuckPerms, you can grant the wildcard permission `chunky.*`.
### Using Chunky
The following example uses commands in the server console.
You can also run them in-game, which provides autocomplete.
It is recommended to pregenerate only one world at a time, especially for modded servers.
Start by selecting the world you want to pregenerate by using the command `/chunky world world`
```bash
chunky world world
[11:42:29 INFO]: [Chunky] World changed to world.
```
**Set a worldborder** using the command `worldborder set 100` for 100 blocks, if you want chunks simply multiply by 16. (since each chunk is 16 blocks)
**Example**: To pregenerate a 5,000-chunk area, the diameter would be 5,000 * 16 = 80,000.
```bash
worldborder set 100
[11:44:20 INFO]: Set the world border to 100.0 block(s) wide
```
Use the command `chunky worldborder` so Chunky knows the world border size and center.
```bash
chunky worldborder
[11:46:17 INFO]: [Chunky] Center changed to -519.5, -365.5.
[11:46:17 INFO]: [Chunky] Radius changed to 50.
```
The final step, use the command `chunky start`. When it's finished it will tell you and you should no longer see any progress of generating.
```bash
chunky start
[11:58:59 INFO]: [Chunky] Task running for world. Processed: 8 chunks (0.00%), ETA: 1:22:43, Rate: 79.2 cps, Current: -63, -31
[11:59:00 INFO]: [Chunky] Task running for world. Processed: 74 chunks (0.02%), ETA: 1:39:14, Rate: 66.0 cps, Current: -52, -29
[11:59:01 INFO]: [Chunky] Task running for world. Processed: 226 chunks (0.06%), ETA: 1:05:37, Rate: 99.8 cps, Current: -57, -17
[11:59:02 INFO]: [Chunky] Task running for world. Processed: 323 chunks (0.08%), ETA: 1:06:36, Rate: 98.3 cps, Current: -63, -7
[11:59:03 INFO]: [Chunky] Task running for world. Processed: 428 chunks (0.11%), ETA: 1:05:59, Rate: 99.2 cps, Current: -51, -2
[11:59:04 INFO]: [Chunky] Task running for world. Processed: 656 chunks (0.17%), ETA: 0:53:09, Rate: 123.1 cps, Current: -38, -4
[11:59:05 INFO]: [Chunky] Task running for world. Processed: 1379 chunks (0.35%), ETA: 0:31:51, Rate: 204.9 cps, Current: -26, -8
[11:59:06 INFO]: [Chunky] Task running for world. Processed: 1773 chunks (0.45%), ETA: 0:28:17, Rate: 230.6 cps, Current: -7, -15
... Progress continues ...
[11:48:51 INFO]: [Chunky] Task finished for world. Processed: 80000 chunks (100.00%), Total time: 0:30:00
```
For more information, read the [Chunky wiki](https://github.com/pop4959/Chunky/wiki).
---
# DiscordSRV
URL: https://lagless.gg/docs/games/minecraft/plugins/discordsrv-setup
Description: How to install and configure DiscordSRV to connect your Minecraft server with Discord.
## Introduction
DiscordSRV is a popular plugin that bridges your Minecraft server chat with a Discord channel. Players can chat between Minecraft and Discord, and you can set up various notifications and integrations.
## Prerequisites
- Access to the [Lagless Panel](https://panel.lagless.gg)
- A Minecraft server running Spigot, Paper, or similar
- A Discord server where you have admin permissions
- Basic understanding of Discord bot creation
## Installation Process
### Installing the Plugin
Watch this video to see the basic installation process on the Lagless panel:
### Manual Installation Steps
If you prefer step-by-step instructions:
1. **Download DiscordSRV**
- Go to the [DiscordSRV releases page](https://github.com/DiscordSRV/DiscordSRV/releases)
- Download the latest `.jar` file
2. **Upload to Your Server**
- Log into the [Lagless Panel](https://panel.lagless.gg)
- Navigate to your server and go to the **Files** tab
- Open the `plugins` folder
- Upload the DiscordSRV `.jar` file
3. **Restart Your Server**
- Stop your server if it's running
- Start it back up to generate the configuration files
## Discord Bot Setup
### Creating a Discord Bot
1. **Create the Application**
- Go to the [Discord Developer Portal](https://discord.com/developers/applications)
- Click "New Application" and give it a name
- Go to the "Bot" section on the left
2. **Configure Bot Settings**
- Click "Add Bot" if there isn't one already
- Under "Privileged Gateway Intents", enable:
- **Server Members Intent**
- **Message Content Intent**
- Copy the bot token (you'll need this later)
3. **Invite Bot to Your Server**
- Go to the "OAuth2" > "URL Generator" section
- Select these scopes: `bot` and `applications.commands`
- Select these bot permissions:
- View Channels
- Send Messages
- Read Message History
- Add Reactions
- Use Slash Commands
- Manage Messages
- Embed Links
- Copy the generated URL and open it to invite the bot
## Plugin Configuration
### Basic Config Setup
1. **Stop Your Server** (if running)
2. **Edit the Config**
- In the Lagless Panel, go to **Files** > `plugins` > `DiscordSRV`
- Open `config.yml`
3. **Add Your Bot Token**
Find this line and replace `BOTTOKEN` with your actual bot token:
```yaml
BotToken: "BOTTOKEN"
```
4. **Set Your Channel ID**
- In Discord, right-click your desired channel and "Copy ID"
- Find this section and replace the channel ID:
```yaml
Channels: {"global": "000000000000000000"}
```
### Getting Discord Channel IDs
To copy Discord channel IDs, you need Developer Mode enabled in Discord. Go to User Settings > Advanced > Developer Mode and turn it on.
1. Right-click the channel you want to use
2. Select "Copy ID"
3. Paste this ID in your DiscordSRV config
### Important Config Options
Here are some key settings you might want to adjust:
```yaml
# Allow Discord users to run commands
DiscordChatChannelAllowedCommands: ["say", "me"]
# Require players to link their accounts
RequireLinkedAccount: false
# Format for messages from Discord to Minecraft
DiscordToMinecraftChatMessageFormat: "&b[Discord] %name%&r: %message%"
# Format for messages from Minecraft to Discord
MinecraftChatToDiscordMessageFormat: "**%displayname%**: %message%"
```
## Testing the Setup
1. **Start Your Server**
- After saving your config changes, start the server
2. **Check the Console**
- Look for DiscordSRV connection messages
- You should see "DiscordSRV has connected to Discord"
3. **Test Chat Integration**
- Send a message in your Minecraft server
- It should appear in your Discord channel
- Send a message in Discord and it should appear in Minecraft
## Common Issues
### Bot Won't Connect
- Double-check your bot token is correct
- Make sure the bot has proper permissions
- Verify the bot is in your Discord server
### Messages Not Syncing
- Confirm your channel ID is correct
- Check that the bot can read/send messages in that channel
- Make sure you've restarted the server after config changes
### Permission Errors
- Ensure your Discord bot has the required permissions
- Check that the channel isn't restricted to certain roles
## Advanced Features
### Account Linking
Players can link their Minecraft and Discord accounts using:
```
/discord link
```
This will provide them with a code to DM to the bot for verification.
### Console Integration
You can set up console command integration to run Minecraft commands from Discord. Edit these sections in your config:
```yaml
DiscordConsoleChannelId: "000000000000000000"
DiscordConsoleChannelUsageLog: true
```
### Custom Messages
DiscordSRV supports custom messages for join/leave events, deaths, achievements, and more. Check the `messages.yml` file for all available options.
## Conclusion
DiscordSRV is a powerful way to connect your Minecraft community with Discord. Once set up properly, it creates a seamless chat experience between platforms and can help grow your server community.
For more advanced configuration options, check the [official DiscordSRV documentation](https://docs.discordsrv.com/).
---
# Dynmap
URL: https://lagless.gg/docs/games/minecraft/plugins/dynmap
Description: 2D Map for your server
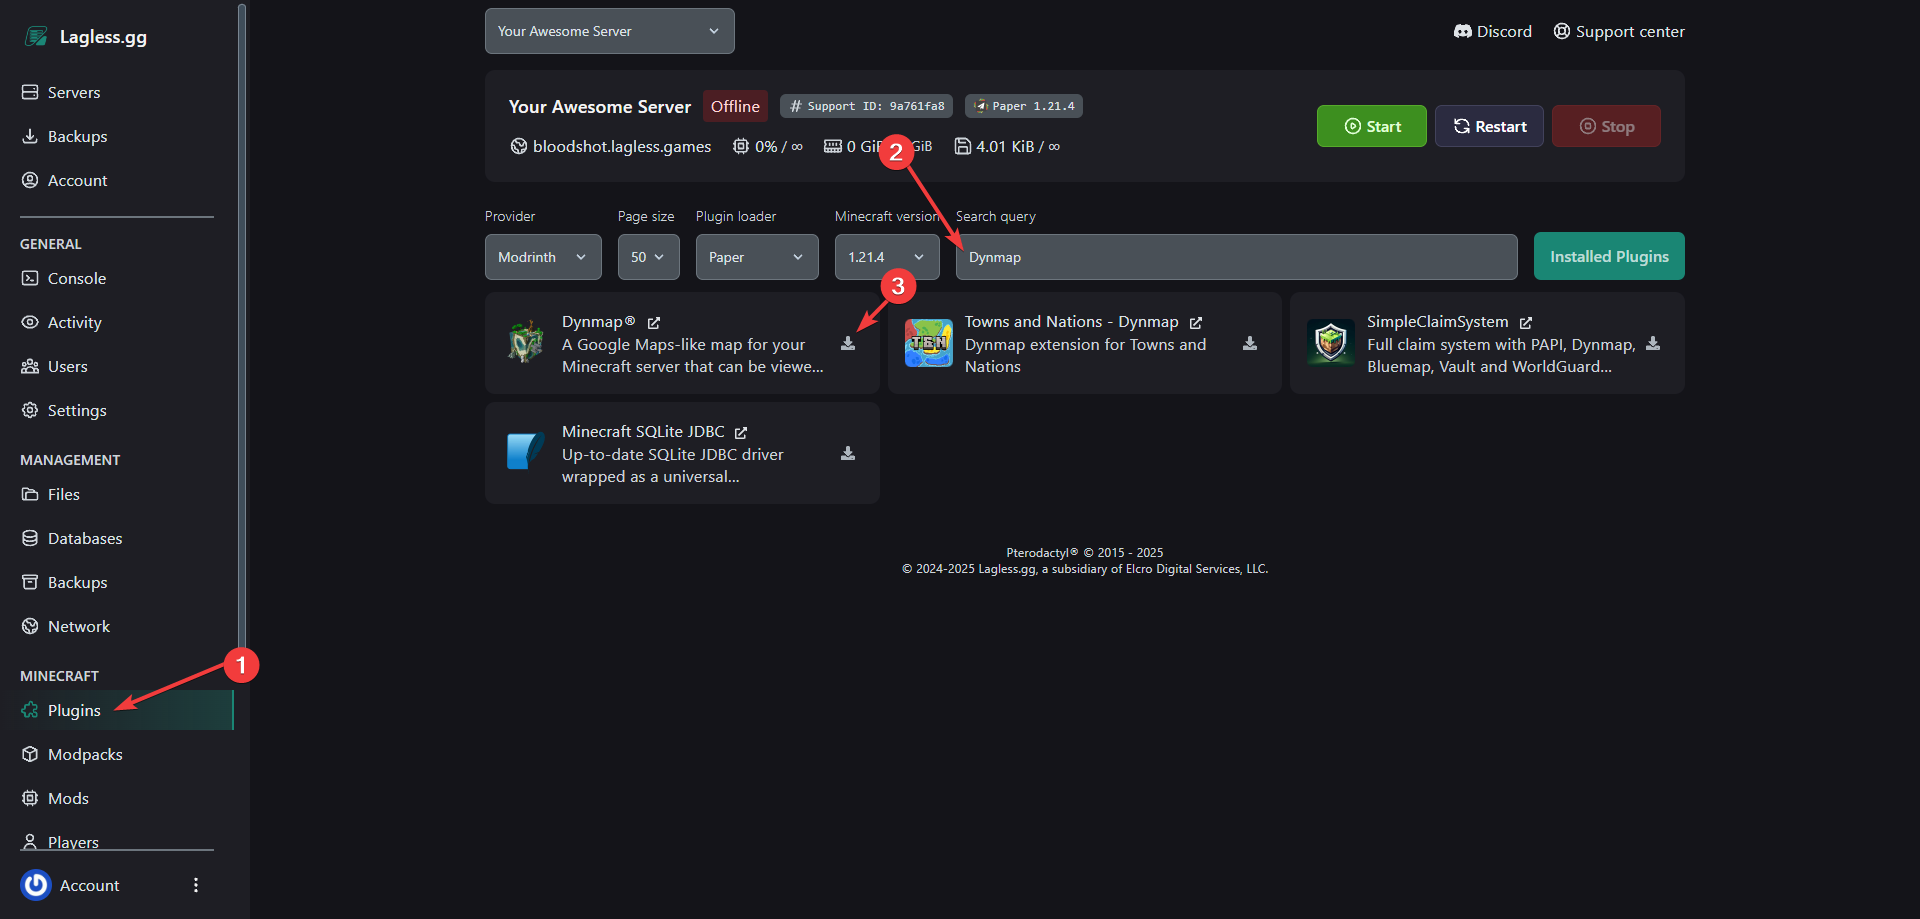
# Installing via Panel
Your server will already need to be running some sort of Spigot/Bukkit. For this example, I'll be using Paper.
Under Plugins, search for Dynmap and install the version based on your Minecraft version.
Your console output may be different from mine but you want to ensure you see this from Dynmap
```bash
[03:36:09 INFO]: [dynmap] Enabling dynmap v3.7-SNAPSHOT-968
[03:36:09 INFO]: [dynmap] Added 21 custom biome mappings
[03:36:09 INFO]: [dynmap] Using Bukkit Permissions (superperms) for access control
[03:36:09 INFO]: [dynmap] Web interface permissions only available for online users
[03:36:09 INFO]: [dynmap] Extracted files upgraded
[03:36:09 INFO]: [dynmap] Mod Support processing completed
[03:36:10 INFO]: [dynmap] Loaded 27 shaders.
[03:36:10 INFO]: [dynmap] Loaded 83 perspectives.
[03:36:10 INFO]: [dynmap] Loaded 22 lightings.
[03:36:10 INFO]: [dynmap] Starting enter/exit processing
[03:36:10 INFO]: [dynmap] Finish marker initialization
[03:36:10 INFO]: [dynmap] Web server started on address 0.0.0.0:8123
[03:36:10 INFO]: [dynmap] version 3.7-SNAPSHOT-968 is enabled - core version 3.7-SNAPSHOT-985
[03:36:10 INFO]: [dynmap] For support, visit our Discord at https://discord.gg/s3rd5qn
[03:36:10 INFO]: [dynmap] For news, visit https://reddit.com/r/Dynmap or follow https://universeodon.com/@dynmap
[03:36:10 INFO]: [dynmap] To report or track bugs, visit https://github.com/webbukkit/dynmap/issues
[03:36:10 INFO]: [dynmap] If you'd like to donate, please visit https://www.patreon.com/dynmap or https://ko-fi.com/michaelprimm
[03:36:10 INFO]: [dynmap] Loaded 3 maps of world 'world'.
[03:36:10 INFO]: [dynmap] Loaded 2 maps of world 'world_nether'.
[03:36:10 INFO]: [dynmap] Loaded 2 maps of world 'world_the_end'.
[03:36:10 INFO]: [dynmap] Enabled
```
From here, you want to allocate the proper port. Under Network, create another allocation.
Do not hit Make Primary
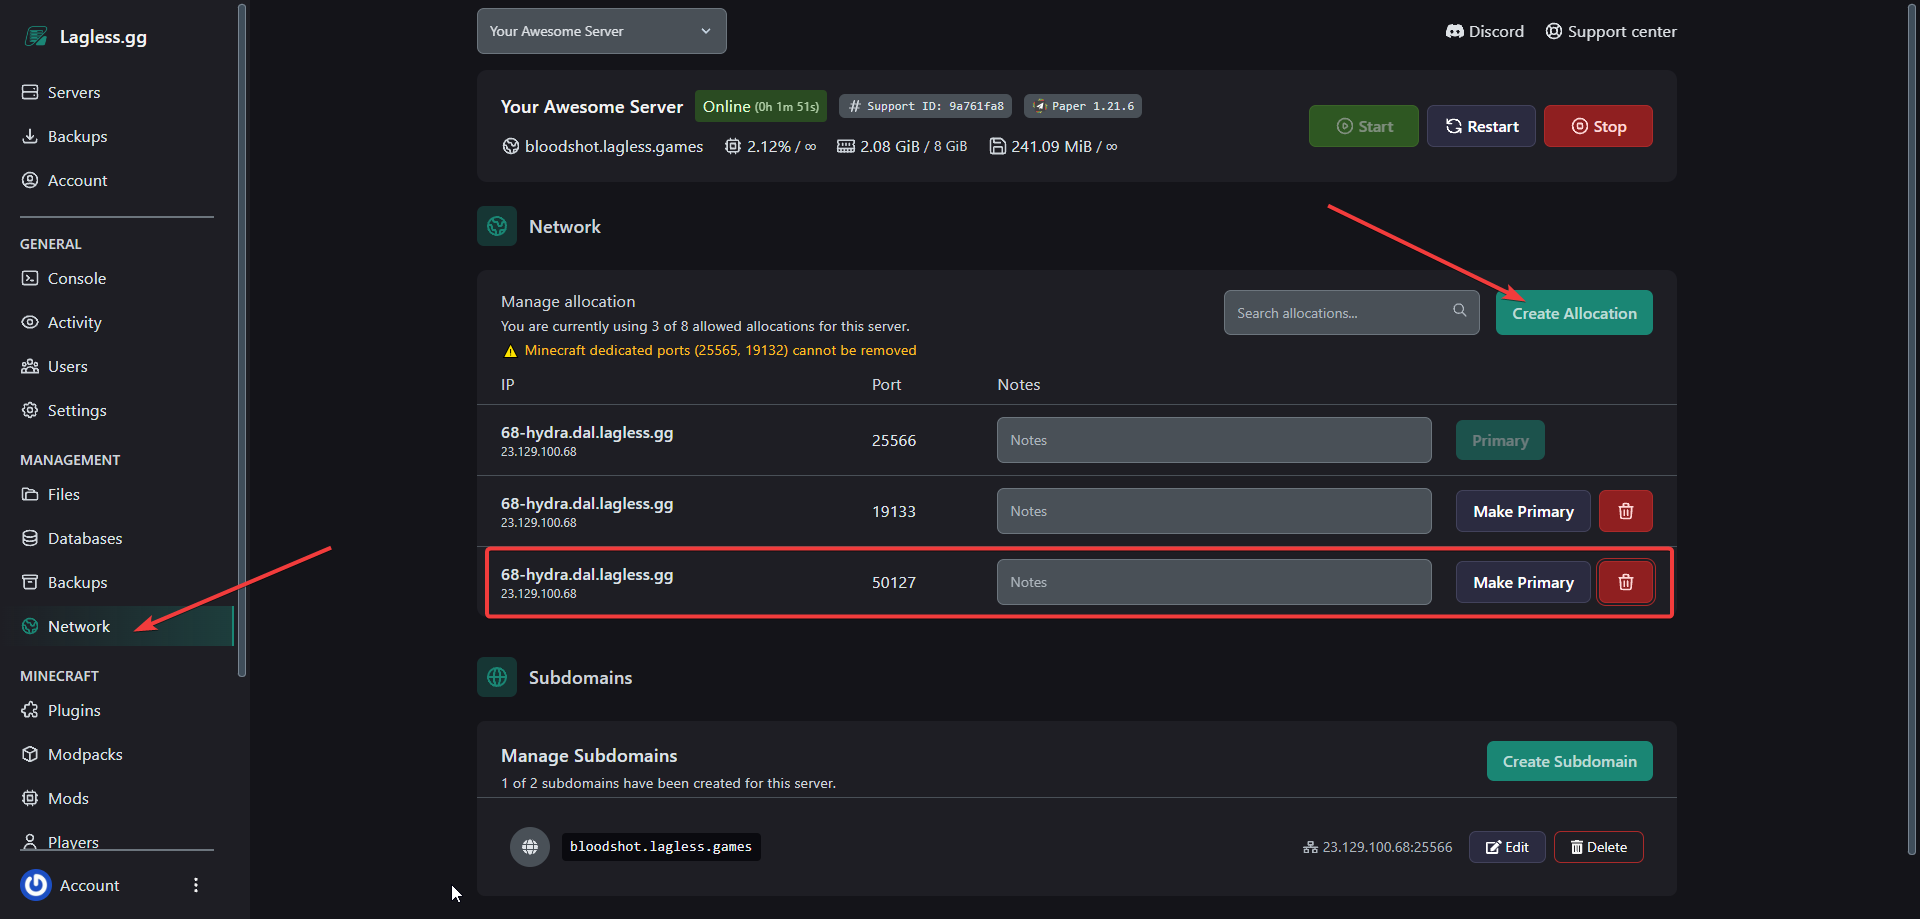
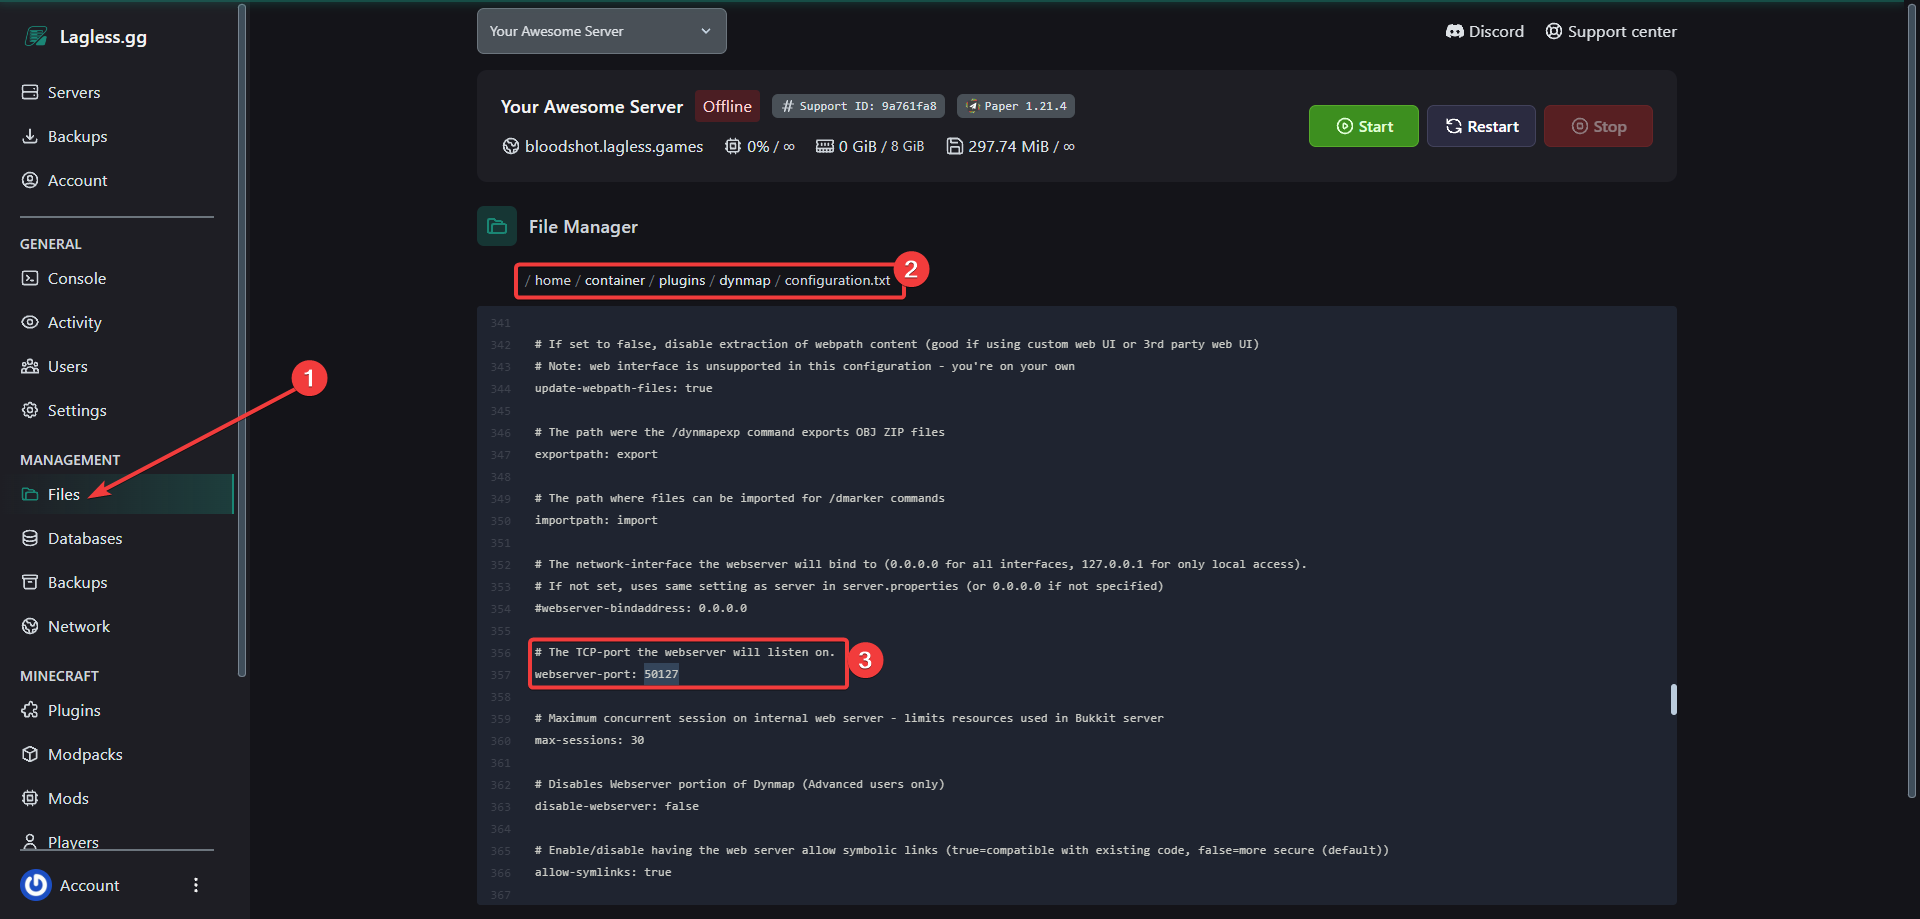
In this case, we are going to use `50127` as our port for Dynmap. You can add that to your notes to reference in case you forget.
Go to Files and update the config file to Dynmap to match this port. The simpliest way to find the word is by filtering the config string (Contrl + F/Command + F)
# Choosing Database Storage
By default, Dynmap will store your maps to render as files. You have the option to use SQLite, MySQL or S3.
### SQLite
To use SQLite, comment `type: filetree` and uncomment `type: sqlite` as you see below.
```yaml
storage:
# Filetree storage (standard tree of image files for maps)
#type: filetree
# SQLite db for map storage (uses dbfile as storage location)
type: sqlite
dbfile: dynmap.db
```
If you leave `dbfile` set to `dynmap.db` as seen above, this means Dynmap will save your database to `/home/container/dynmap.db`.
By default, you can leave it here unless you'd like to move it.
### MySQL / MariaDB
Lagless allows you to create databases for your servers. Click on Databases on the left then New Database
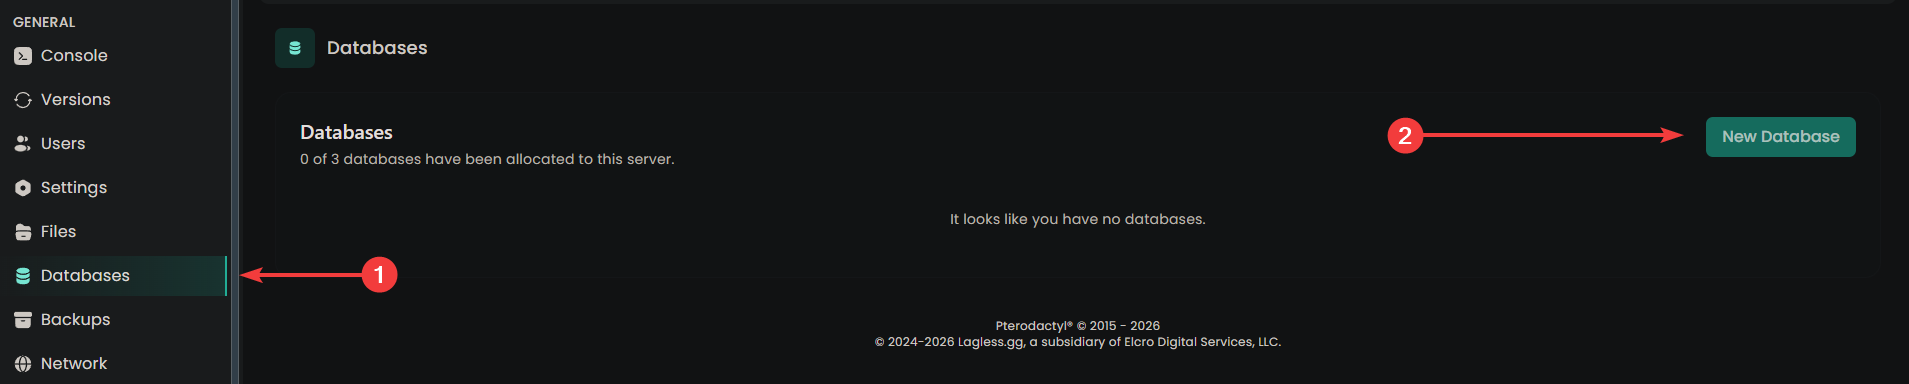
You can name your database anything but to be consistent, I'll name it `dynmap`. You also need to set up Connection From which I'll leave blank.
This will allow connections from anywhere so be careful and make sure you don't leak the credentials.
On the database that you created, you also have the options to preview the database address, username and size. To reveal the password, click on the eye icon.
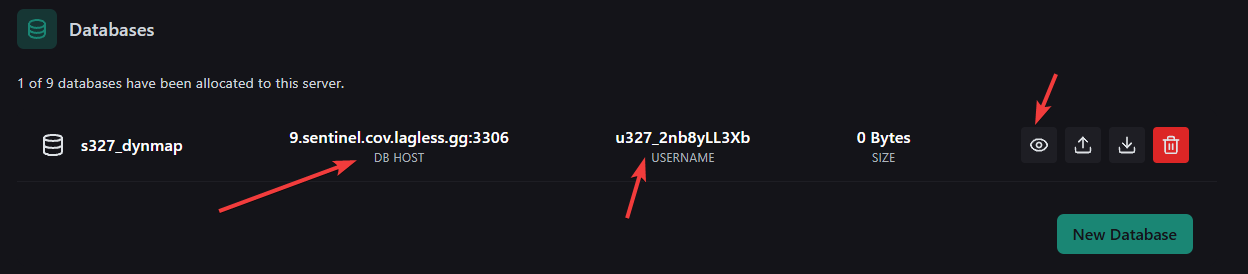
Once you click on the eye icon, it'll reveal your password which you'll use to plug in the configuration.
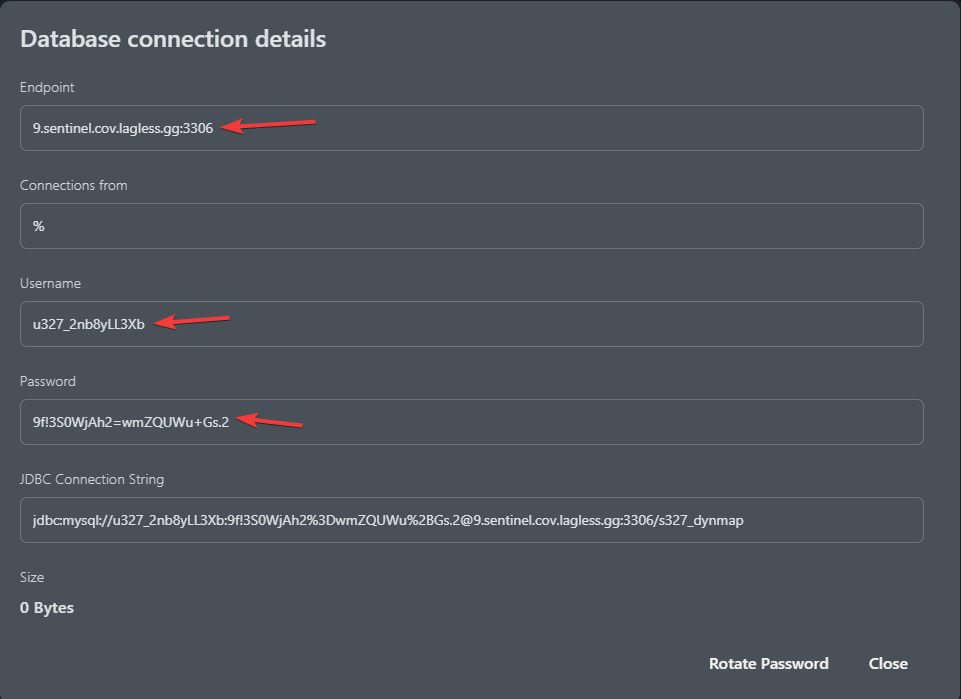
Copy your information over and your config should look like this.
```yaml
storage:
# Filetree storage (standard tree of image files for maps)
#type: filetree
# SQLite db for map storage (uses dbfile as storage location)
#type: sqlite
#dbfile: dynmap.db
# MySQL DB for map storage (at 'hostname':'port' with flags "flags" in database 'database' using user 'userid' password 'password' and table prefix 'prefix')
type: mysql
hostname: 9.sentinel.cov.lagless.gg
port: 3306
database: s327_dynmap
userid: u327_2nb8yLL3Xb
password: 9f!3S0WjAh2=wmZQUWu+Gs.2
prefix: ""
flags: "?allowReconnect=true&autoReconnect=true"
```
Start your server and go back to your Console. Make sure you aren't seeing any errors and it says Connected to MySQL. Your output will look something similar to this.
```bash
[05:04:44 INFO]: [dynmap] Opening MySQL database 9.sentinel.cov.lagless.gg:3306/s327_dynmap as map store
[05:04:45 INFO]: [dynmap] Connected to MySQL v5.5
[05:04:45 INFO]: [dynmap] Initializing database schema
[05:04:47 INFO]: [dynmap] Schema version = 6
[05:04:47 INFO]: [dynmap] Mod Support processing completed
[05:04:48 INFO]: [dynmap] Loaded 27 shaders.
[05:04:48 INFO]: [dynmap] Loaded 83 perspectives.
[05:04:48 INFO]: [dynmap] Loaded 22 lightings.
[05:04:48 INFO]: [dynmap] Starting enter/exit processing
[05:04:48 INFO]: [dynmap] Web server started on address 0.0.0.0:50127
```
# View your Map
Now, you'll want to try connecting to your dynmap instance. Under your allocation, grab the IP and port and piece them together.

As an example, yours should look like this
- http://23.129.100.68:50127
# Using your own domain
If you have your own domain you want to use it. So we (for example) don't get 23.129.100.68:50127 but http://map.nivalora.com:50127/ or even better, http://map.nivalora.com
## Using DNS records
To achieve http://map.yourdomain.com:50127/ as a map link.
We have to point an "A" record towards the IP of your Minecraft server. In this example we have been using 23.129.100.68, so we will keep doing so.
* Go to your domain provider, and search for the DNS records. This may be slightly different than out example.
* Create a new "A record"
* Name it "Map" (or otherwise desired)
* Point it towards your IP, 23.129.100.68
It should look something like this.

Because we now have this, we can connect to http://map.nivalora.com:50127/
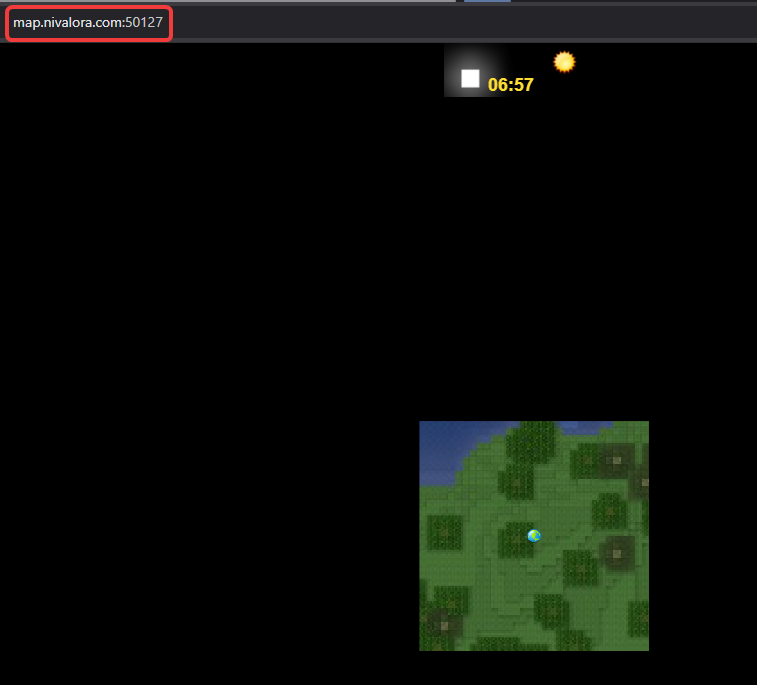
## Reverse Proxy
Currently lagless is working on getting reverse proxy implemented.
When this is implemented, we can create this http://map.nivalora.com. So we no longer need the port.
---
# How to Install Geyser and Floodgate
URL: https://lagless.gg/docs/games/minecraft/plugins/geyser-and-floodgate
Description: Your step by step way of installing Geyser and Floodgate
## Introduction
First some important notes regarding this.
- With **Geyser** alone, a Bedrock player must have a valid, paid **Java Edition account** to authenticate and join.
- With **Geyser + Floodgate**, Bedrock players can join **without a Java account.** This is required for console players (Xbox, PlayStation, Switch) and is ideal for easier access.
### Versions
You can use Geyser-Spigot on servers that run on 1.16.5 or above. Do note that Geyser requires Java 17 to run!
### chat signing
In order for Bedrock players to chat (1.19.3+) or join (1.19.1/1.19.2), you need to disable chat signing.
Vanilla, Spigot/Paper/forks, Fabric, NeoForge
```yaml
Set enforce-secure-profile: false in server.properties
```
BungeeCord and forks
```yaml
Set enforce_secure_profile: false in config.yml
```
Velocity
```yaml
Set force-key-authentication = false in velocity.toml
```
### Viaversion
Due to Bedrock automatically updating clients, [Via Version](https://www.spigotmc.org/resources/viaversion.19254/) is heavily recommended.
If this is not used. Bedrock users with a later version than the server won't be able to connect. Updating a plugin is also easier than the whole server.
## Installing on a Server(Spigot/Paper)
Login to your game panel and navigate to the **Network** tab. Check your list of allocations.
Your server is already using an assigned port. We can use this. You need to find one additional port for Bedrock players.
If you do **HAVE** dedicated ports (25565, 19132) you can move to the next step.
If you do **NOT** have dedicated ports, Find one free port in your allocation list for Bedrock players. If none are free, click **Create Allocation** to add a new port. Remember this port number.
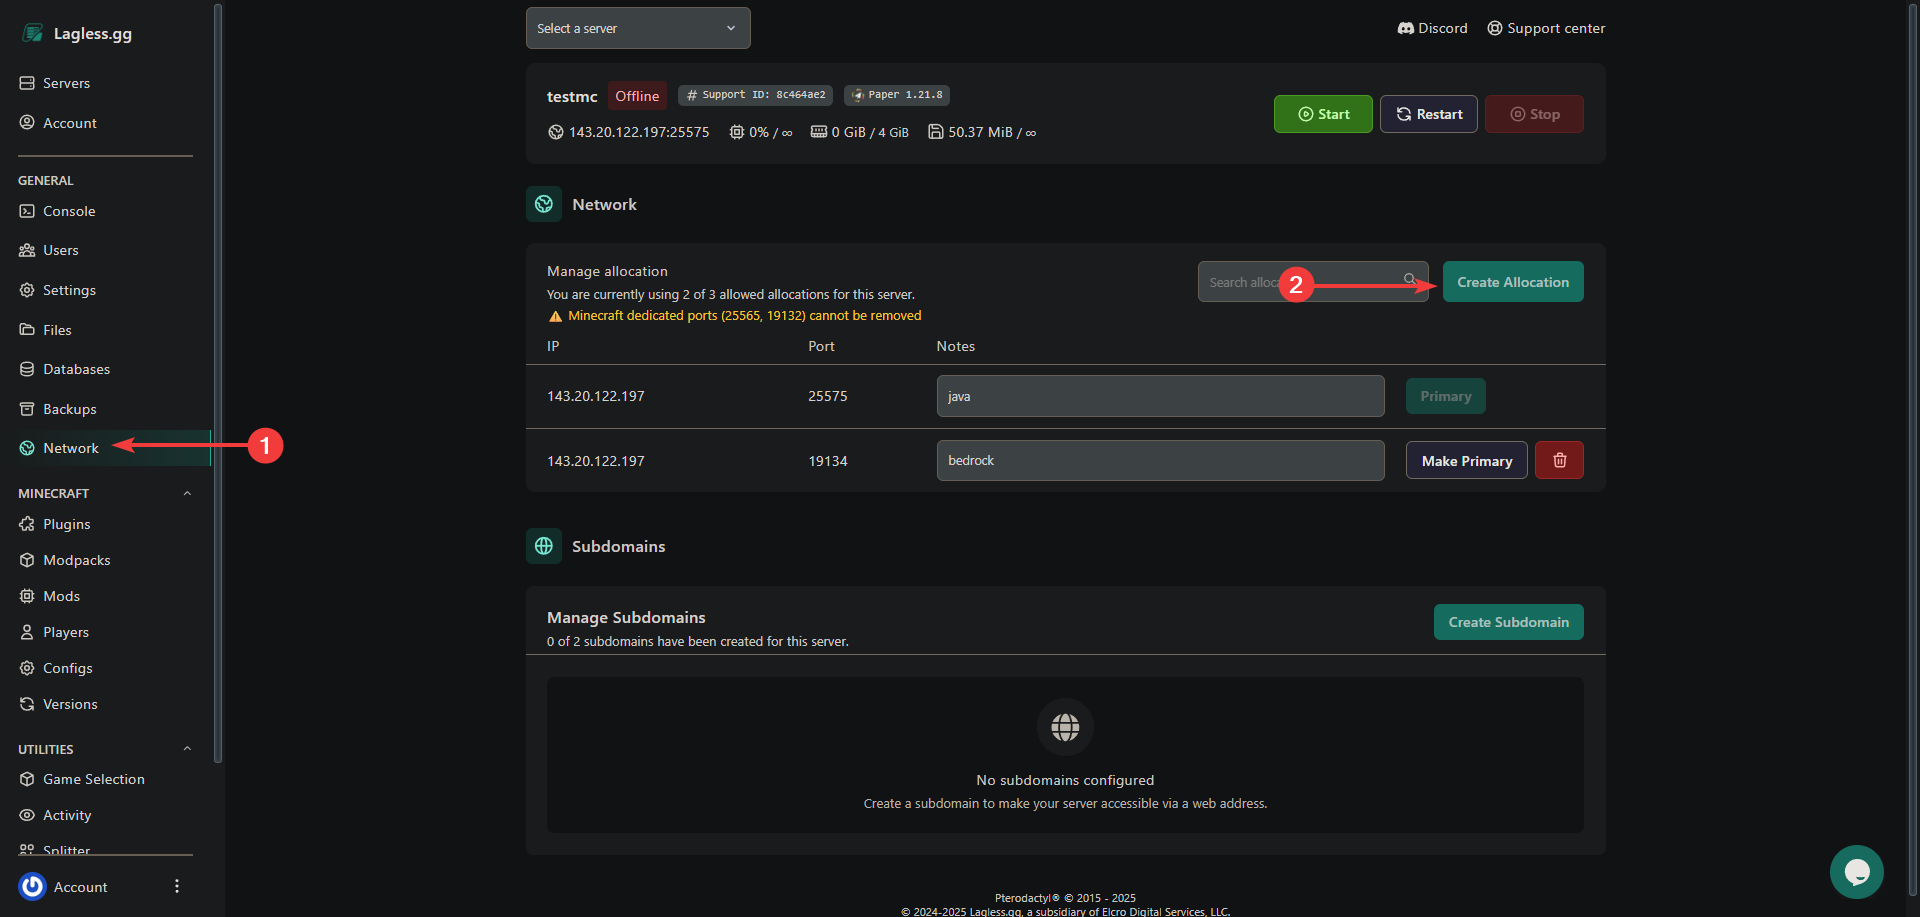
Navigate to the **Templates** tab on the left.
Select **GeyserMC**
Make sure **Include Floodgate** is selected. (it's enabled by default)
Select **GeyserMC Type** by default this is spigot and works on all forks.
Select the **Bedrock Port** you assigned earlier from the list.
Press **Install** and click **Okay** on the new window that appears.
Go to the files tab and to this file **/plugins/Geyser-Spigot/config.yml** and change your java port if it's not 25565. We selected the bedrock port before.
```yaml
remote:
# The IP address of the remote (Java Edition) server
# If it is "auto", for standalone version the remote address will be set to 127.0.0.1,
# for plugin versions, it is recommended to keep this as "auto" so Geyser will automatically configure address, port, and auth-type.
# Leave as "auto" if floodgate is installed.
address: auto
# The port of the remote (Java Edition) server
# For plugin versions, if address has been set to "auto", the port will also follow the server's listening port.
port: 25575
```
### Installing on a Server(Spigot/Paper) manually.
Download [Geyser](https://geysermc.org/download?project=geyser) and [Floodgate](https://geysermc.org/download?project=floodgate) Pay attention to which version you download. Typically you want the **Spigot/Paper** version.
Navigate to the **Files** tab and go to the plugin folder. From here, drag the plugins you just downloaded onto the panel. You can also upload via SFTP
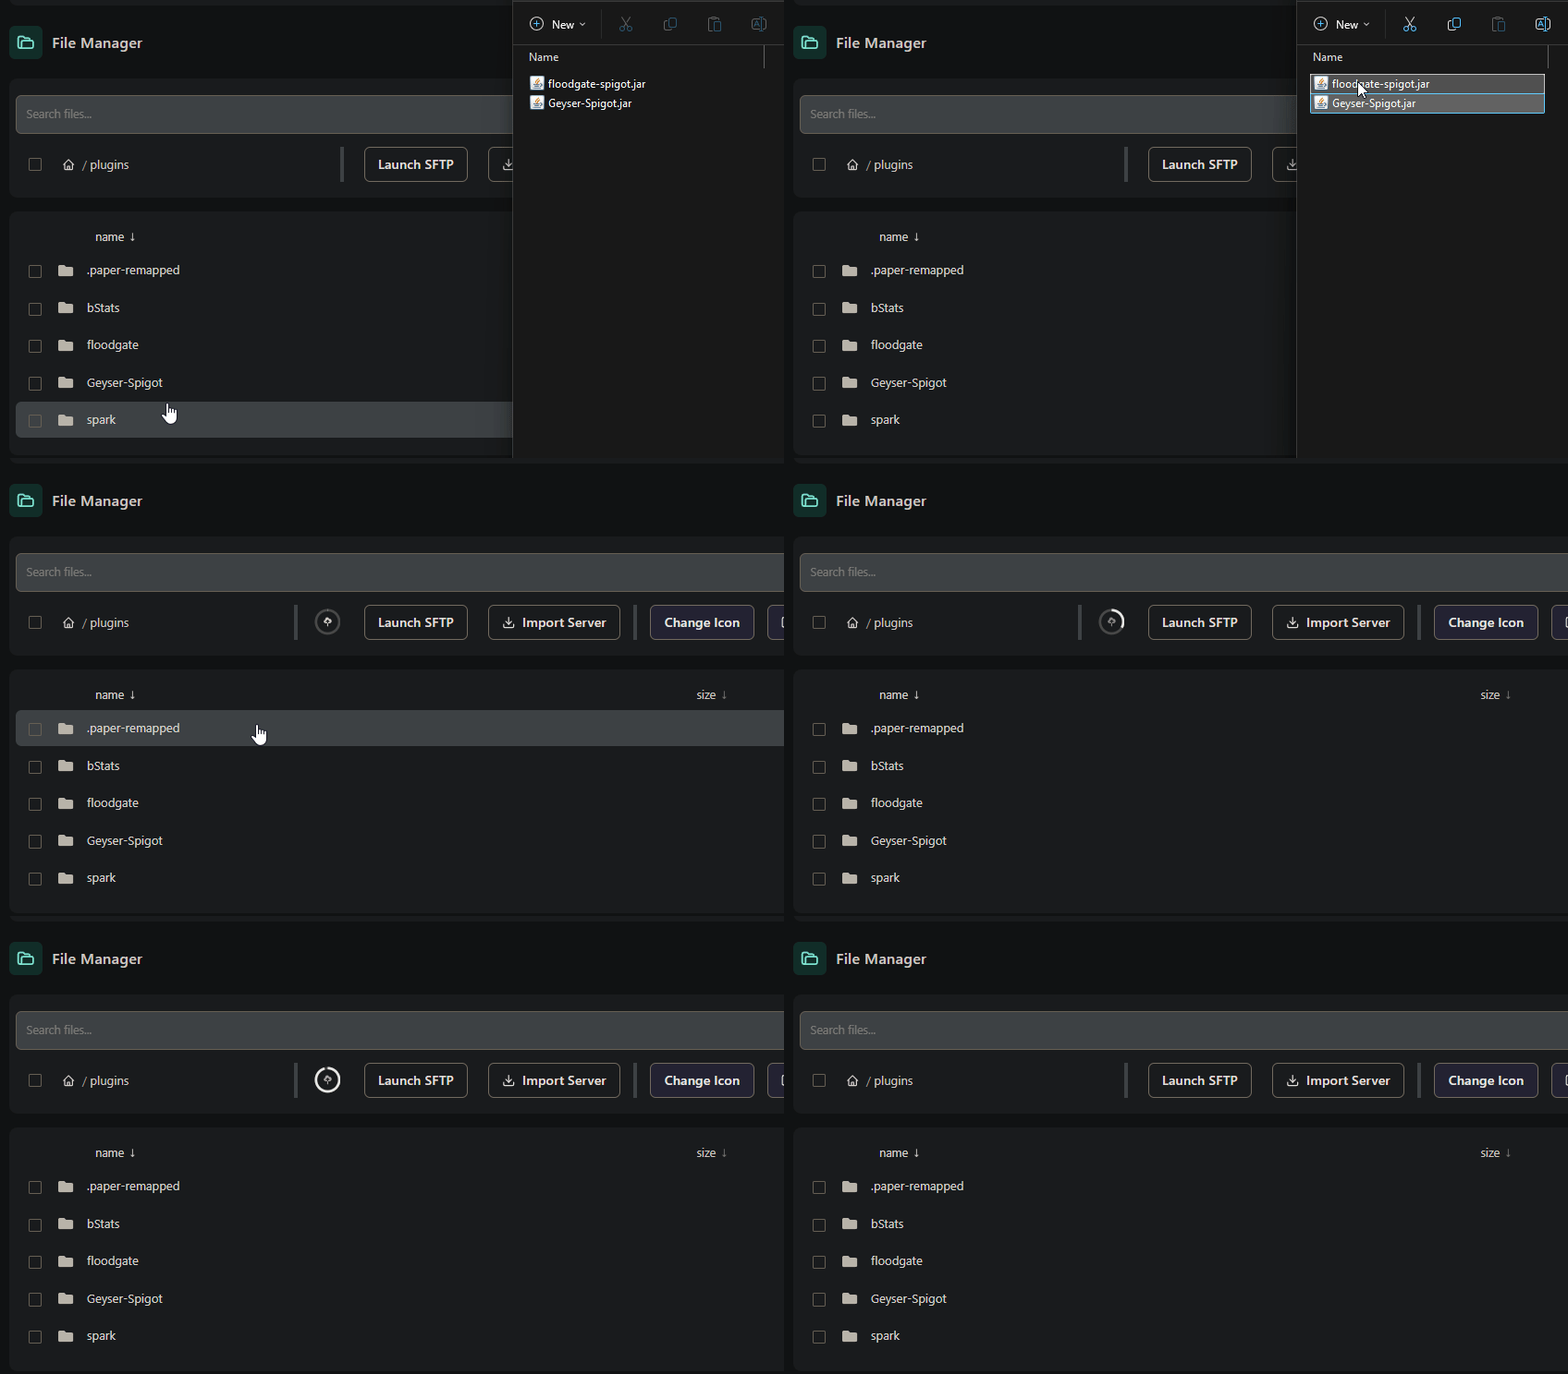
wait for the upload to complete.
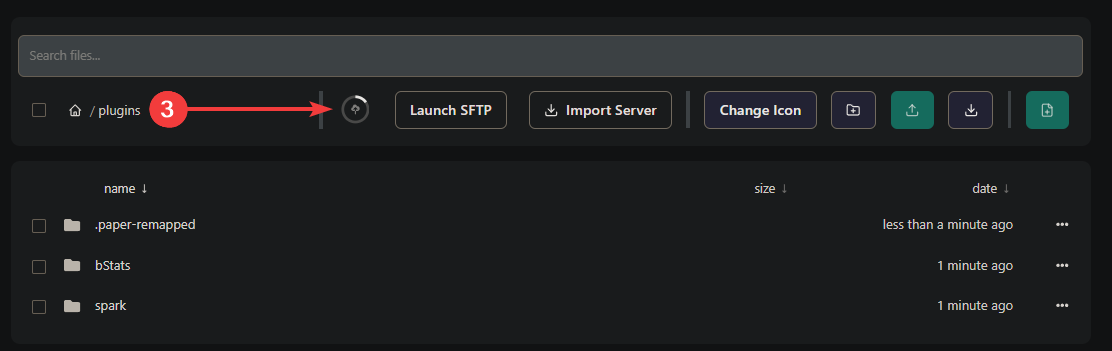
Restart the server.
Then go to this file **/plugins/Geyser-Spigot/config.yml** and change your bedrock and java port if it's different from default.
## Installing on a Proxy(Velocity)
Login to your game panel and navigate to the **Network** tab
Your proxy is already using an assigned port. We can use this. You need to find one additional port for Bedrock players.
If you do **HAVE** dedicated ports (25565, 19132) you can move to the next step.
If you do **NOT** have dedicated ports, Find one free port in your allocation list for Bedrock players. If none are free, click **Create Allocation** to add a new port. Remember this port number.
Navigate to the **Templates** tab on the left.
Select **GeyserMC**
Make sure **Include Floodgate** is selected. (it's enabled by default)
Select **GeyserMC Type** by default this is spigot, change this to velocity.
Select the **Bedrock Port** you assigned earlier from the list.
Press **Install** and click **Okay** on the new window that appears.
Go to the files tab and to this file **/plugins/Geyser-velocity/config.yml** and change your java port if it's not 25565. We selected the bedrock port before.
### Installing on a Proxy(Velocity) manually
Download [Geyser](https://geysermc.org/download?project=geyser) and [Floodgate](https://geysermc.org/download?project=floodgate) Pay attention to which version you download. Typically you want the **Velocity** version.
Navigate to the **Files** tab and go to the plugin folder. From here, drag the plugins you just downloaded onto the panel. You can also upload via SFTP

wait for the upload to complete.

Restart the server.
Then go to this file **/plugins/Geyser-Velocity/config.yml** and change your bedrock and java port if it's different from default.
Install Geyser only on the proxy server! You can install Floodgate on all servers for better skin support & network-wide Floodgate API availability for other plugins.
All servers on the network must accept 1.21.7-1.21.8 Java clients, as Geyser imitates one.
---
# LuckPerms
URL: https://lagless.gg/docs/games/minecraft/plugins/luckperms
Description: Control features/permissions between servers
# What is LuckPerms?
LuckPerms is a plugin that manages permissions to certain groups across multiple servers.
You can use LuckPerms to enforce what commands players can use.
# Installing Plugin
Find Luckperms under Plugins and select on download.
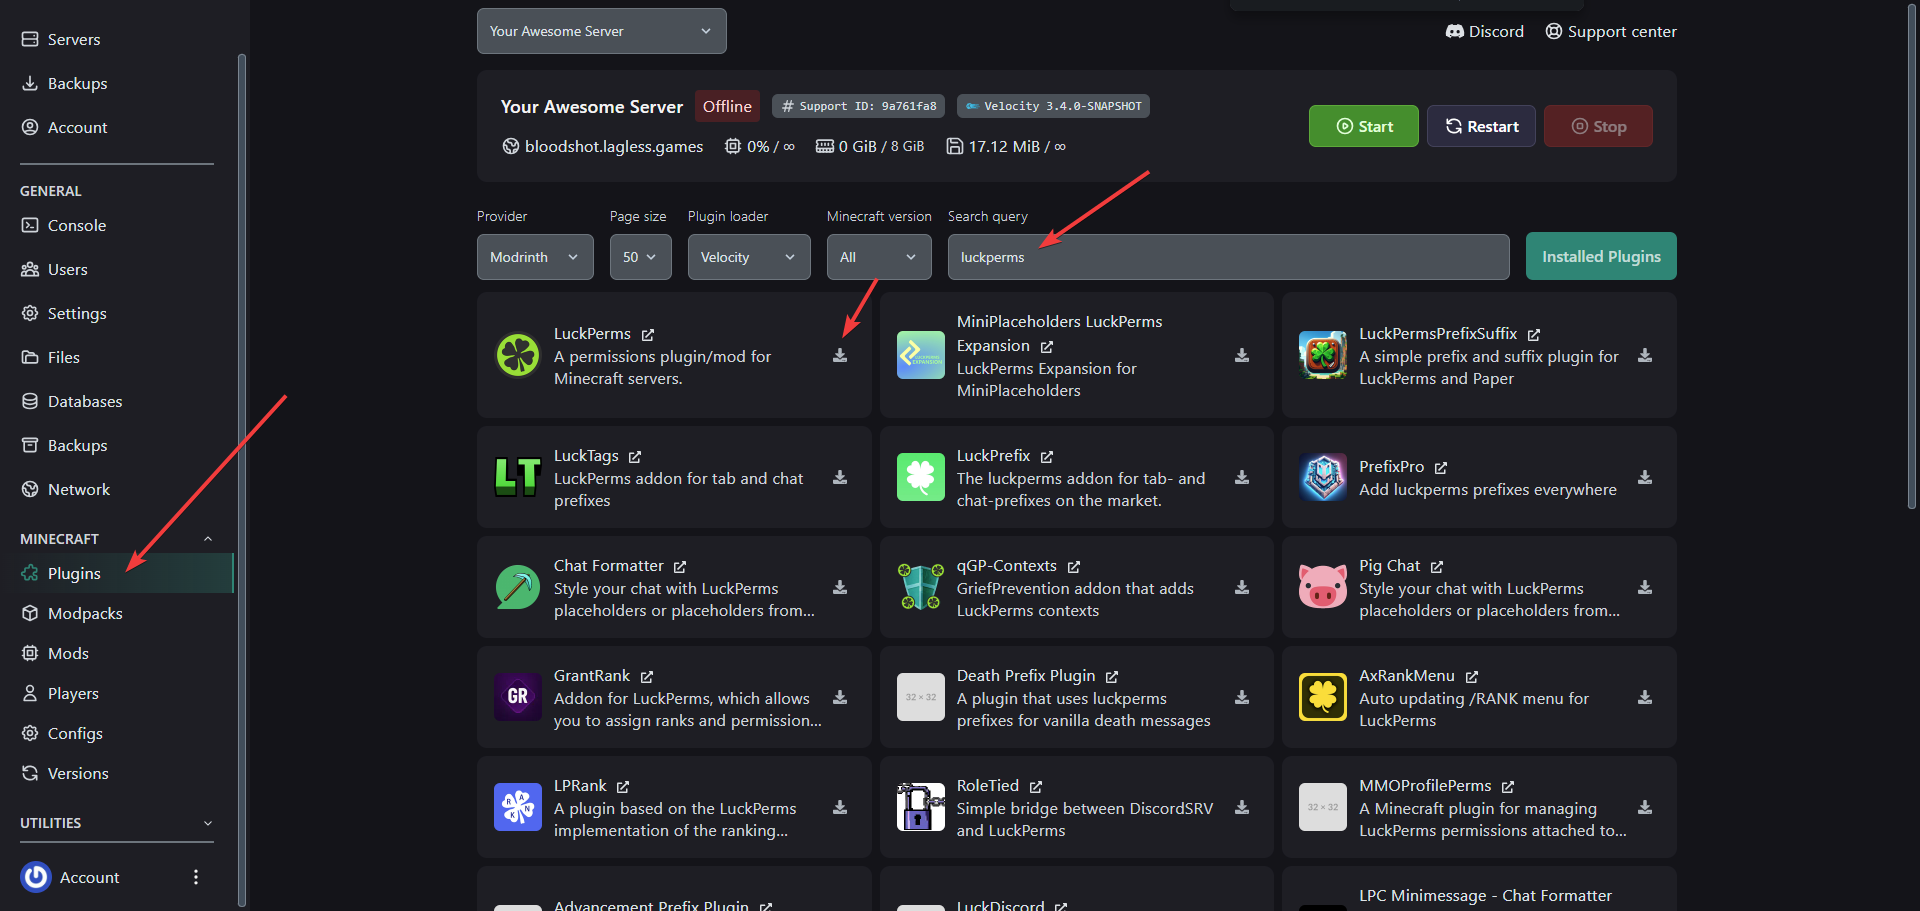
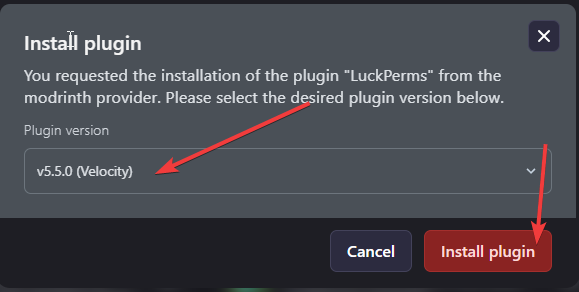
Depending on your what version of Minecraft is running, you may need to switch plugin versions.
For this example, I'm using Velocity so I'll install v5.5.0 (Velocity). After selecting the version, you can select Install Plugin
Make sure to install the plugin on every server you intend to enforce permissions across.
### Verify it's working
To confirm LuckPerms is running, start your server.
You should see log entries similar to the output below, confirming the plugin loaded successfully.
```bash
container@pterodactyl~ java -Dterminal.jline=false -Dterminal.ansi=true -Xms256M -Xmx7372M -jar server.jar
[04:35:06 INFO]: Booting up Velocity 3.4.0-SNAPSHOT (git-d2d333a9-b528)...
[04:35:06 INFO]: Loading localizations...
[04:35:07 INFO]: Connections will use epoll channels, libdeflate (Linux x86_64) compression, OpenSSL 3.x.x (Linux x86_64) ciphers
[04:35:07 WARN]: Player info forwarding is disabled! All players will appear to be connecting from the proxy and will have offline-mode UUIDs.
[04:35:07 INFO]: Loading plugins...
[04:35:07 INFO]: Loaded plugin luckperms 5.5.0 by Luck
[04:35:07 INFO]: Loaded 2 plugins
[04:35:08 INFO]: __
[04:35:08 INFO]: | |__) LuckPerms v5.5.0
[04:35:08 INFO]: |___ | Running on Velocity - Velocity
[04:35:08 INFO]:
[04:35:08 INFO] [luckperms]: Loading configuration...
[04:35:08 INFO] [luckperms]: Loading storage provider... [H2]
[04:35:08 INFO] [luckperms]: Loading internal permission managers...
[04:35:08 INFO] [luckperms]: Performing initial data load...
[04:35:08 INFO] [luckperms]: Successfully enabled. (took 1363ms)
container@hydra-dal~ Server marked as running...
[04:35:08 INFO]: Listening on /[0:0:0:0:0:0:0:0]:25566
[04:35:08 INFO]: Done (1.77s)!
```
# Configuring LuckPerms
In File Manager, you can find the config files under plugins/luckperms/
- `config.yml` is your config file for Bukkit, Spigot, etc
- `luckperms.conf` is your config file for Sponge or Fabric
When configuring LuckPerms, make sure you DO NOT delete luckperms-h2-v2.mv.db. By default, LuckPerms
stores its data locally. If you intend on only having one server, you can keep this for your permission data.
### Local Database Files
By default, Luckperms uses H2. Depending on your preference, you can set `storage-method` in config.yml
to SQLite. If you plan on using H2 or SQLite, modifying data outside Minecraft may be harder since you'll need a program
that can read the data.
If you want to read and edit quicker, you can use `yaml`, `json`, `hocon`, or `toml` based on your preference.
Remember that these options are better if you only have one server. Do not use any of these options if you are running more servers.
### Switching to MariaDB/MySQL
Planning on running multiple servers? You can setup LuckPerms to run with MySQL so you can sync data back and forth.
Looking for more information about databases? Click on me to read our dedicated article.
Once you create your database, copy the information and plug into the config file as so. After filling in your information, your file should look similar to ours.
```yml
storage-method: mariadb
# The following block defines the settings for remote database storage methods.
#
# - You don't need to touch any of the settings here if you're using a local storage method!
# - The connection detail options are shared between all remote storage types.
data:
# Define the address and port for the database.
# - The standard DB engine port is used by default
# (MySQL: 3306, PostgreSQL: 5432, MongoDB: 27017)
# - Specify as "host:port" if differs
address: cantura.stelhosting.com:3306
# The name of the database to store LuckPerms data in.
# - This must be created already. Don't worry about this setting if you're using MongoDB.
database: s327_luckperms
# Credentials for the database.
username: u327_2wFDR152FG
password: 'RMUJH+kjXEWzFpL4EU.1=q5W'
```
Save your file and then restart. When looking at your console, it should say `SQL` instead of `H2`
```bash
[04:55:43 INFO]: Loading plugins...
[04:55:43 INFO]: Loaded plugin luckperms 5.5.0 by Luck
[04:55:43 INFO]: Loaded 2 plugins
[04:55:44 INFO]: __
[04:55:44 INFO]: | |__) LuckPerms v5.5.0
[04:55:44 INFO]: |___ | Running on Velocity - Velocity
[04:55:44 INFO]:
[04:55:44 INFO] [luckperms]: Loading configuration...
[04:55:44 INFO] [luckperms]: Loading storage provider... [MARIADB]
[04:55:44 INFO] [me.lucko.luckperms.lib.hikari.HikariDataSource]: luckperms-hikari - Starting...
[04:55:44 INFO] [me.lucko.luckperms.lib.hikari.HikariDataSource]: luckperms-hikari - Start completed.
[04:55:44 INFO] [luckperms]: Loading messaging service... [SQL]
[04:55:44 INFO] [luckperms]: Loading internal permission managers...
[04:55:44 INFO] [luckperms]: Performing initial data load...
[04:55:44 INFO] [luckperms]: Successfully enabled. (took 736ms)
container@hydra-dal~ Server marked as running...
[04:55:44 INFO]: Listening on /[0:0:0:0:0:0:0:0]:25566
[04:55:44 INFO]: Done (1.18s)!
```
Repeat this for as many servers you have. Remember, you only need one database to share across all your servers.
# Debugging
If you get an error similar to this:
```bash
[04:54:56 WARN] [me.lucko.luckperms.lib.mariadb.message.server.ErrorPacket]: Error: 1045-28000: Access denied for user 'u327_2wFDR152FG'@'23.129.100.66' (using password: YES)
```
Go back and make sure your database password is the same as whats in the config.

After selecting the eye icon, your password along with the rest of your connection information is there.

---
# Simple Voice Chat
URL: https://lagless.gg/docs/games/minecraft/plugins/voicechat
Description: Your step by step way of making voice chat work!
# Getting Started
Under your server, go to Plugins and select the Install button for Simple Voice Chat mod.
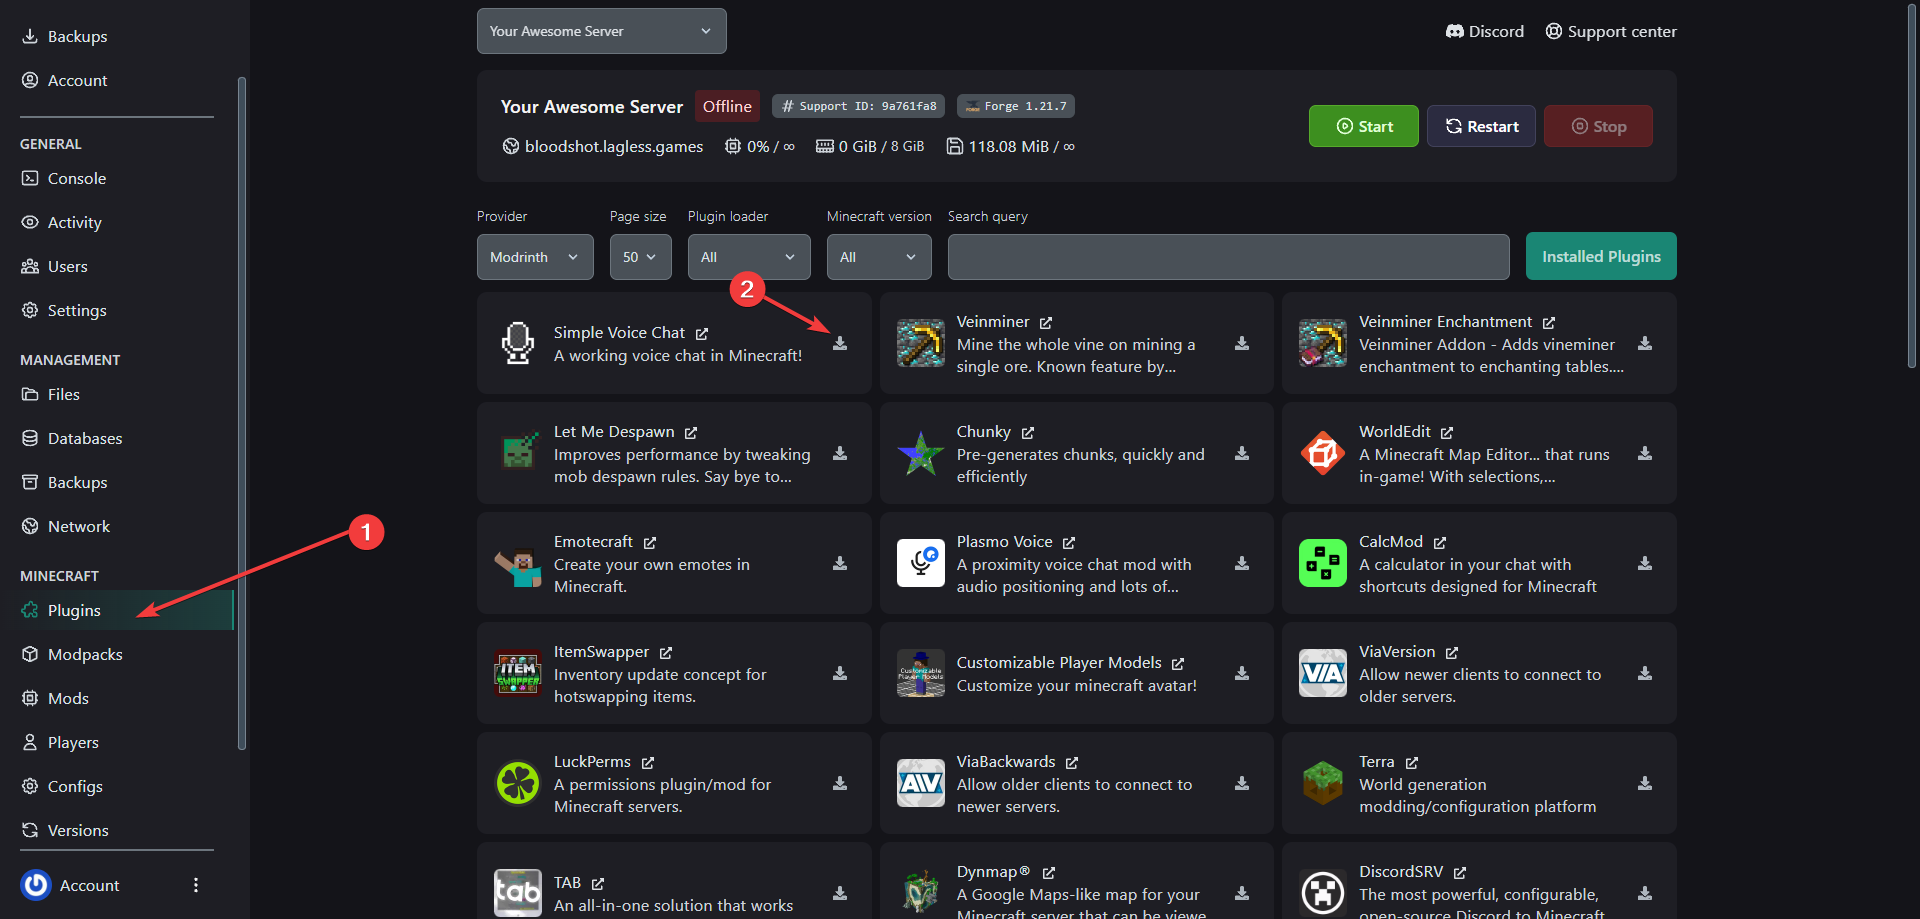
Select the build and Install Plugin
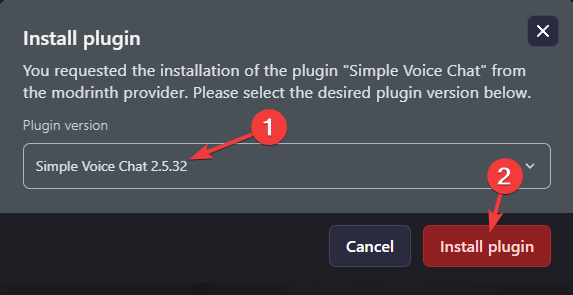
# Configuring the plugin
You'll need to create a new allocation under Network and use that port for the plugin to work accordingly.

Make sure to only select Create Allocation and NOT Make Primary. Using the same port for Minecraft and the plugin will
cause issues.
Next, go into Files and find your config file.
```bash tab
config/voicechat/voicechat-server.properties
```
```bash tab
plugins/voicechat/voicechat-server.properties
```
Anything within the selection is customizable, however make sure to change the port to the allocation you created earlier.
```bash
# Simple Voice Chat server config v2.5.32
# The port number to use for the voice chat communication.
# Audio packets are always transmitted via the UDP protocol on the port number
# specified here, independently of other networking used for the game server.
# Set this to '-1' to use the same port number that is used by the Minecraft server.
# However, it is strongly recommended NOT to use the same port number because UDP on
# it is also used by default for the server query. Doing so may crash the server!
port=50127
```
Afterwards, restart your server and make sure the plugin is running on the right port.
```bash
[02:56:36 INFO]: Done (5.630s)! For help, type "help"
container@hydra-dal~ Server marked as running...
[02:56:36 INFO]: [voicechat] Loading plugins
[02:56:36 INFO]: [voicechat] Loaded 0 plugin(s)
[02:56:36 INFO]: [voicechat] Initializing plugins
[02:56:36 INFO]: [voicechat] Initialized 0 plugin(s)
[02:56:36 INFO]: [voicechat] Using server-ip as bind address: 0.0.0.0
[02:56:36 INFO]: [voicechat] Voice chat server started at 0.0.0.0:50127
```
---
# Server Software
URL: https://lagless.gg/docs/games/minecraft/server-software
Description: A detailed guide on which server software is right for you
# Introduction
Everybody has different requirements when setting up their server. This guide will help you decide which server software is right for you.
Each server software has its own uses and features, so it's important to choose the right one for your needs.
Server Software is commonly referred to as "Server Jar(s)". This is
because server software are usually distributed as a `.jar` file.
## Backend Servers
Backend servers are the most common type of server software.
There are an incomprehensible amount of backend servers available, however this section will cover the most recommended, stable, and widely-used software.
A "fork" is a copy of a server software that is modified in some way.\
They typically share the same codebase but have modified (or additional) features and optimizations.\
An example of "forks" include: CraftBukkit -> Spigot -> Paper -> Pufferfish -> etc.
### Vanilla
Vanilla is the official server software for Minecraft. As the name implies, it is the most basic server software available and has no modifications whatsoever.\
It is ideal for those who wish to host a small server for a couple of friends or family, **without** altering any mechanics.\
This server software is **not** recommended for larger servers.
Download a copy of the latest Vanilla server software via minecraft.net
### Forge
Forge is a modded server (and API) that allows for the use of mods on your server, which can add new content, mechanics and features to the game (Unlike Vanilla, Spigot, Paper, etc).\
Unlike Paper, it contains **no optimizations** and is often very laggy when on larger modpacks.
Download a copy of Forge via [minecraftforge.net](https://files.minecraftforge.net/).
### NeoForge
NeoForge is a fork of Forge, maintained by most of the original Forge development team - excluding LexManos (see [this post](https://neoforged.net/news/theproject/)).\
It aims to fix the issues surrounding the community and provide a better development experience for modders and more recent versions of Minecraft itself.
Due to NeoForge being a relatively new server software, there are not as many mods that completely support it compared to the likes of Forge and Fabric.
However, many mods are slowly being updated to support NeoForge, and many popular modpacks exist for it.
Download a copy of the latest NeoForge server software via [neoforged.net](https://neoforged.net/).
### Fabric
Similar to Forge and NeoForge, Fabric is a modded server software (and API). Like Forge & NeoForge, it allows you to add new content (such as mobs, biomes, generation etc) to the game with ease.\
It is known for being more lightweight with a more extensive array of performance mods compared to Forge, such as Lithium, Moonrise, Starlight, etc.
Download a copy of the latest Fabric server software (installer) via [fabricmc.net](https://fabricmc.net/use/installer/).
## Bukkit Server Software
Bukkit is an API that allows programmers to make plugins for server software.
The server software detailed below all uses Bukkit in some shape or form.
### CraftBukkit
CraftBukkit is a slightly modified version of the [Vanilla](#vanilla) server software, allowing it to run Bukkit plugins.\
It also adds many more configurable options and features which Vanilla does not have whatsoever.\
Additionally, it is more optimized that Vanilla making it less laggy and fixes certain known Vanilla bugs, errors and exploits.
To legally obtain CraftBukkit, you must compile it yourself with BuildTools via [spigotmc.org](https://www.spigotmc.org/).
Click here to download BuildTools and learn how to use it.
### Spigot
Spigot is a fork of CraftBukkit that adds many more improvement and some optimizations, making it far better than CraftBukkit.\
However it does not contain *many* optimizations and their plugin API is notorious for being slowly updated and not as extensive as Paper's API.
To legally obtain Spigot, you must compile it yourself with BuildTools via [spigotmc.org](https://www.spigotmc.org/).
Click here to download BuildTools and learn how to use it.
### Paper (recommended)
[Paper](https://papermc.io/) is arguably the most widely used server software today. It is a fork of the Spigot project (with its own API), featuring **numerous optimizations** alongside numerous bug fixes, making it the main choice for many aspiring server owners.
Additionally, it has support for plugins which bring new features, QOL improvements and other enhancements to the game.\
You can find plugins on platforms such as [SpigotMC](https://www.spigotmc.org/resources/categories/spigot.4/), [Modrinth](https://modrinth.com/plugins), [Hangar](https://hangar.papermc.io/), etc.
While Paper features many optimizations and features, many of these affect vanilla gameplay mechanics.\
This makes it unsuitable for servers that wish to maintain a vanilla experience or those who make complex farms that utilize intricate vanilla mechanics.\
For those who wish to maintain a vanilla experience, consider using [Vanilla](#vanilla), [Forge](#forge), or [Fabric](#fabric), with performance mods such as Lithium which do not sacrifice vanilla functionality for performance.
Download a copy of the latest PaperMC server software via
[papermc.io](https://papermc.io).
### Pufferfish
Pufferfish is a [fork](#backend-servers) of [Paper](#paper-recommended) that adds significant optimizations to the game without much impact to normal gameplay.
These optimizations include entity, hopper, SIMD and other performance improvements, making it better than Paper's performance in most cases.\
This is different from [Purpur](#purpur) which adds additional configuration options and mechanics to the game, and have removed some of Pufferfish's patches (however still contains the wide majority of them).
This is highly recommended for all servers due to the significant performance improvements it provides.
Download a copy of the latest Pufferfish server software via pufferfish.host.\
**Do not attempt to use Pufferfish+ or Pufferfish+ (Purpur). This is a paid
server software and is mostly used only by the customers of Pufferfish Host
itself**.
### Purpur
[Purpur](https://purpurmc.org/) is another fork of Paper that adds additional configuration concerning different mechanics of the game, removing the need to download or create additional plugins.\
It also features some performance patches from [Pufferfish](#pufferfish).
It is recommended to use Pufferfish over Purpur, unless you require the additional features and configuration that Purpur provides.
Download a copy of the latest Purpur server software via
[purpurmc.org](https://purpurmc.org/).
### Folia
[Folia](https://papermc.io/software/folia) is a fork of Paper that splits the worlds up into "regions" which all run relatively independently.\
Each region features its own tick loop (ticking at Minecraft's regular 20TPS), running on a thread pool in parallel.\
This allows for better performance on servers with many players and entities, who are spread far out.
Folia was created because Minecraft's tick loop is single-threaded - The majority of processing is done on this tick loop, with a few exceptions such as Netty which handles networking - meaning it cannot take advantage of all of your CPU, and instead can only use a small portion of it.\
Software such as Paper already help to alleviate this issue, but Folia takes it a step further by splitting the world up into regions.
**Folia is not completely usable!**\
You must consider whether you need to use it. Folia is not completely stable yet, although it is stable enough to be used in production, one famous example being 2b2t.\
You must be prepared to deal with bugs and issues and a high hardware requirement of a (recommended) minimum of 16 CPU cores.
Consider using other (more stable) software such as [Paper](#paper-recommended) or [Pufferfish](#pufferfish) beforehand.
**Ensure you thoroughly test every feature, command and mechanic in your server while using this software.**
Additionally, **Folia does not fix lag**, and requires a very specific playerbase where everyone is spread out relatively far.
If your players are not spread out then there will be more entities in each region, which will cause more lag, making the experience identical if not worse than using a software such as Paper.
Download a copy of the latest Folia server software via
[mcjars.app](https://mcjars.app/FOLIA/versions).
### MultiPaper
[MultiPaper](https://github.com/MultiPaper/MultiPaper) is a 1.20.1 fork of [Purpur](#purpur) that splits your world(s) into multiple servers, running independently.\
Each world is split into regions (similar to Folia), and each region runs on its own server.\
This server software is often known as "sharding", where each server is a "shard".\
Each server communicates with each other and is able to transfer players between servers, allowing for a seamless experience.
**MultiPaper is highly unstable!**\
You must consider whether you need to use it. MultiPaper is notorious for being unstable and is not recommended for production use.\
Although many public servers such as DonutSMP use a sharding solution, they are often custom-made and are not available to the public.
Consider using / testing other (more stable) software such as [Pufferfish](#pufferfish-recommended) or [Purpur](#purpur) beforehand.
**Ensure you thoroughly test every feature, command and mechanic in your server if you decide to use this software.**
Download a jarfile for MultiPaper here.
### Legacy Server Software
Legacy server software are server software that use older versions of Minecraft. 1.8.x is the most common version for legacy server software, as it is the most popular version for PvP servers, etc.
There are some spigot / paper forks that are actively maintained for 1.8.x.\
We would recommend against using 1.8.x or arguably any version below latest, due to the presence of security vulnerabilities or other exploits.\
One of the main reasons for choosing to run a 1.8.x fork is for good performance on older hardware, or for pre-1.9 PvP.\
See below for some 1.8.x forks that are actively maintained:
## Proxy Servers
Proxies are server software that allow you to connect multiple servers together, making it more seamless for switching between servers / gamemodes.\
These are known as **"networks"**.\
Proxies are also incredibly lightweight, with small CPU and RAM usage (typically less than 1-2GB of RAM) however this can vary depending on your player count and proxy plugins.
### Velocity (recommended)
[Velocity](https://papermc.io/software/velocity) is a modern, high-performance, and extremely flexible Minecraft proxy, maintained by the [PaperMC Team](https://papermc.io/).
It is relatively new, but has quickly become the most popular proxy server software due to its performance and flexibility.
Velocity makes use of its own API, meaning all Bungeecord plugins do **not** function on Velocity, although there are workaround plugins that introduce some degree of compatibility between the two plugin platforms.\
One example of this is [Snap](https://hangar.papermc.io/Phoenix616/Snap).
Ultimately Velocity is a far more modern and more performant proxy software compared to Waterfall and Bungeecord, unless you make use of plugins that only have Bungeecord support.
Read our guide on how to install Velocity for your server.
### Velocity-CTD
[Velocity-CTD](https://github.com/GemstoneGG/Velocity-CTD) is a fork of [Velocity](#velocity-recommended) that adds additional features and optimizations to the software.\
It is fully open source and adds Quality of Life commands and more support for backend server software - particularly modded servers which are notoriously difficult when within a network.
Installing Velocity-CTD is as simple as replacing the normal Velocity jarfile with the new Velocity-CTD one.
Download a copy of the latest Velocity-CTD proxy software via [github.com](https://github.com/).
### Bungeecord
[Bungeecord](https://www.spigotmc.org/wiki/bungeecord/) is a "legacy" proxy server software that is still widely used today.\
Like all other proxy software, it allows individual backend servers to be connected together allowing for easy transfer between servers.\
However, Bungeecord is not as performant as Velocity and their API is not as extensive as Velocity's, although many plugin developers still support it.
Download a copy of the latest Bungeecord proxy software via [ci.md-5.net](https://ci.md-5.net/).
### Waterfall
[Waterfall](https://papermc.io/software/waterfall) is a fork of Bungeecord that aims to improve performance and stability, focusing on Stability, Features, and Scalability.
The PaperMC development team has announced that Waterfall is no longer maintained and is End of Life.\
They strongly recommend that you use Velocity instead of Waterfall, see their [announcement](https://forums.papermc.io/threads/announcing-the-end-of-life-of-waterfall.1088/) for more information.
Download a copy of the latest Waterfall proxy software via [papermc.io](https://papermc.io/).
## Non-Java Server Software
Some individuals have created implementations of vanilla Minecraft in different programming languages.\
This is often done to improve performance (to improve accessibility to those with lower-end hardware or reduce overall resource usage), or to add new features or APIs that do not exist in existing software.
There are many non-Java server software available, however this section will mention the most developed and actively maintained software.
A C++ Minecraft Server implementation, designed with efficiency in mind.\
Has most features implemented and provides a flexible Lua Plugin API.
A Minecraft Server built entirely in rust.\
Has many features implemented and is highly performant.
An implementation of the Minecraft server protocol in C#.\
Has several implemented features, with a custom plugin framework.
A Minecraft Server built in Rust.\
A relatively new project aiming to be a drop-in replacement for Vanilla, with an extensive API.
Most of these server softwares should not be used in a production environment, as they are may contain bugs, exploits and unfinished features.
---
# Velocity
URL: https://lagless.gg/docs/games/minecraft/server-software/velocity
Description: Setting up Velocity
# Preparing Your Server
For Velocity to properly work, you need to disable online-mode. Lagless.gg may not be able to
provide support for offline mode servers however it's needed in this scenario to function properly.
Under Utilities, select on Splits and create a sub-server to install Velocity on.
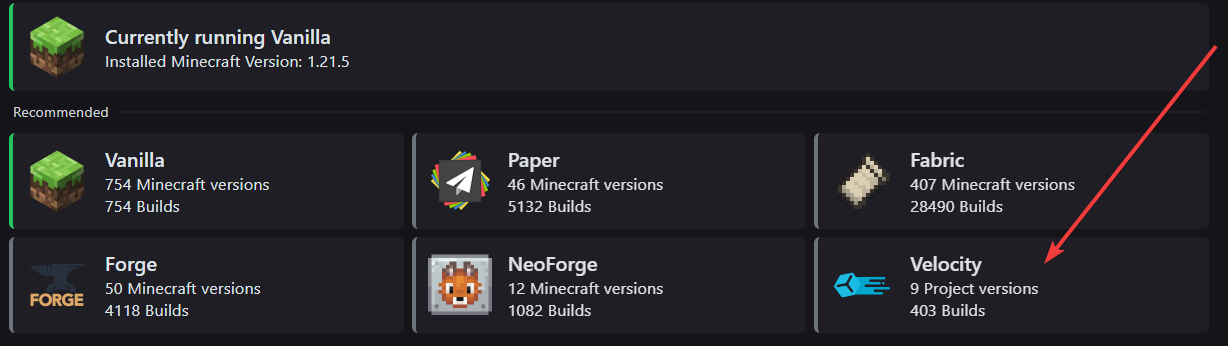
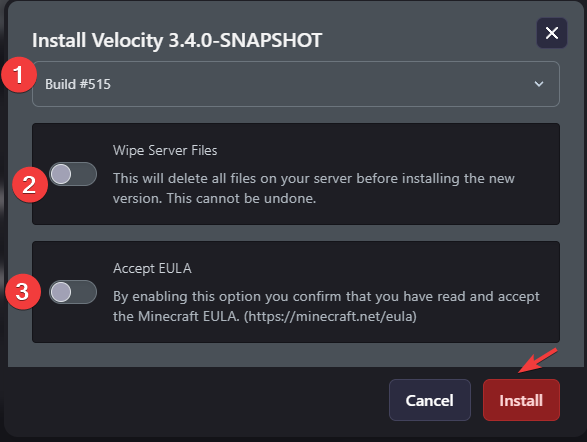
# Modifying the Velocity Config
The power of velocity is in the config file, `velocity.toml` which tells where to send players. You can view this example config to start connecting other servers together.
To make velocity properly work, make sure you are using the Server's UUID along with the port as shown below instead of the IP and port.
If you are trying to send players to another server hosted in other regions that Lagless supports, you can use the IP and port instead.
Your server's UUID is under Settings, scroll all the way down and look for Server ID under the Debug Information header.
```bash
[servers]
lobby = "be24d008-b233-4a67-be65-b5702f13c3c5:25567"
hcf = "be24d008-b233-4a67-be65-b5702f13c3c5:25566"
prison = "be24d008-b233-4a67-be65-b5702f13c3c5:26678"
try = [
"lobby"
]
```
The `try` section of this config will tell Velocity where to try sending players once they first connect or if a server unexpectedly closes,
Velocity will send the player back here as well. The `try` block also goes down in order so if you had `try = ["lobby", "hcf"]`, players will
automatically connect to `lobby` but if `lobby` is down, it'll try sending your players to `hcf` instead.
# Configure Player Information Forwarder
Inside your velocity config, make sure you set your mode to `modern`.
```bash
# Should we forward IP addresses and other data to backend servers?
# Available options:
# - "none": No forwarding will be done. All players will appear to be connecting
# from the proxy and will have offline-mode UUIDs.
# - "legacy": Forward player IPs and UUIDs in a BungeeCord-compatible format. Use this
# if you run servers using Minecraft 1.12 or lower.
# - "bungeeguard": Forward player IPs and UUIDs in a format supported by the BungeeGuard
# plugin. Use this if you run servers using Minecraft 1.12 or lower, and are
# unable to implement network level firewalling (on a shared host).
# - "modern": Forward player IPs and UUIDs as part of the login process using
# Velocity's native forwarding. Only applicable for Minecraft 1.13 or higher.
player-info-forwarding-mode = "modern"
```
# Configuring Backend Servers
Under your servers, go to Files and find your `server.properties` file. Open it and find the line that says:
```bash
online-mode: true
```
Change true to false then restart your server to apply the changes.
## Forwarding Secret
You'll need the forwarding secret from your proxy server to put into your Paper server.
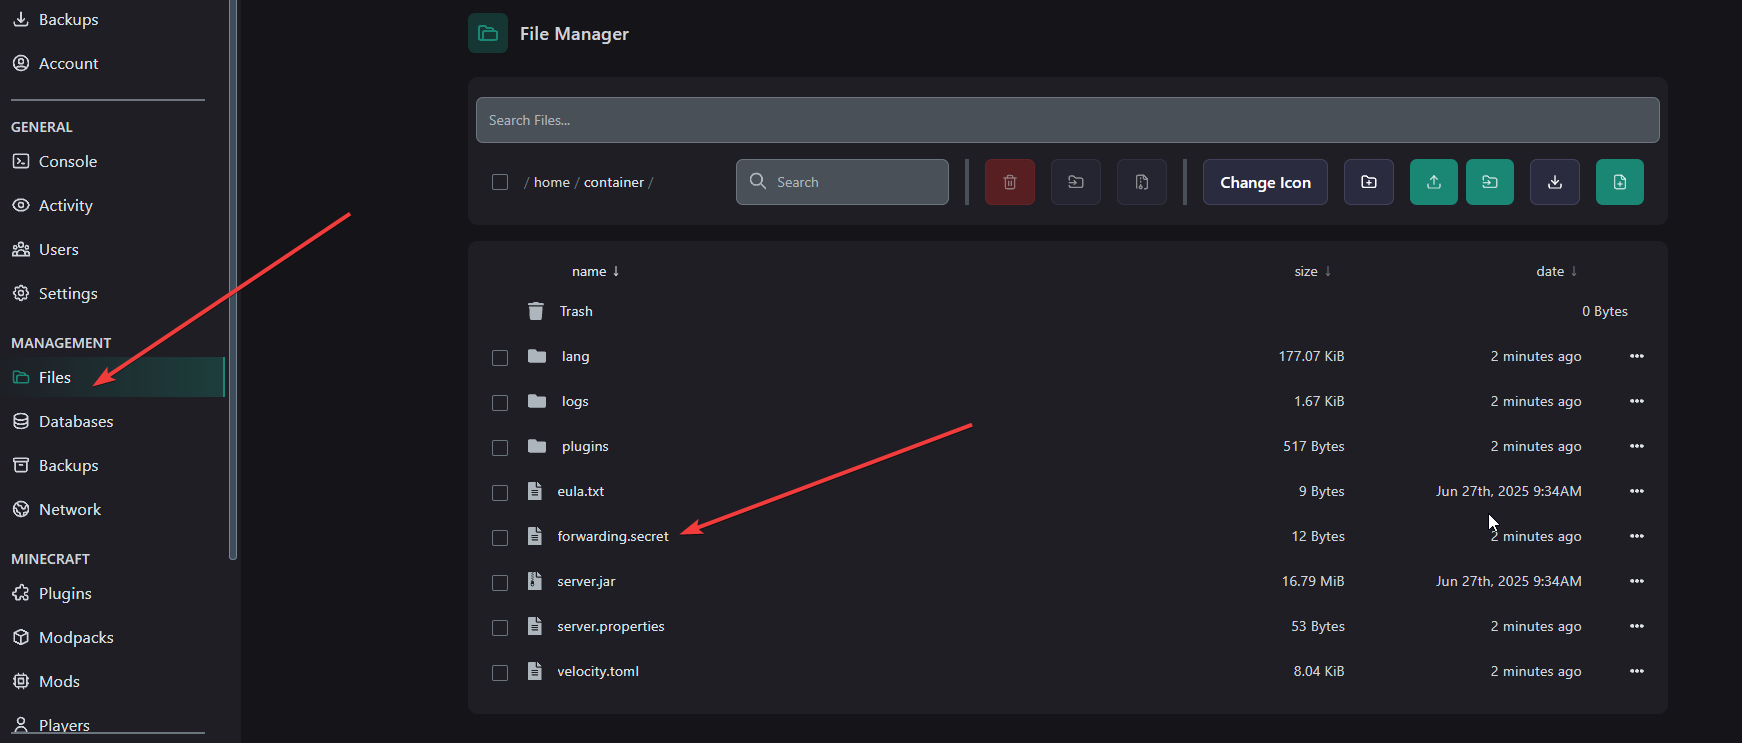
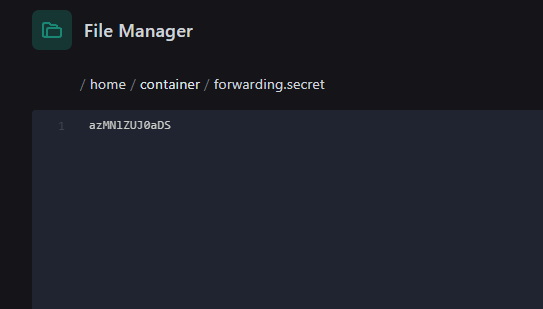
Inside of File Manager, open `config/paper-global.yml` and scroll down to proxies. Make sure you set `bungee-cord`'s `online-mode` to false after enabling
velocity and pasting your secret key there.
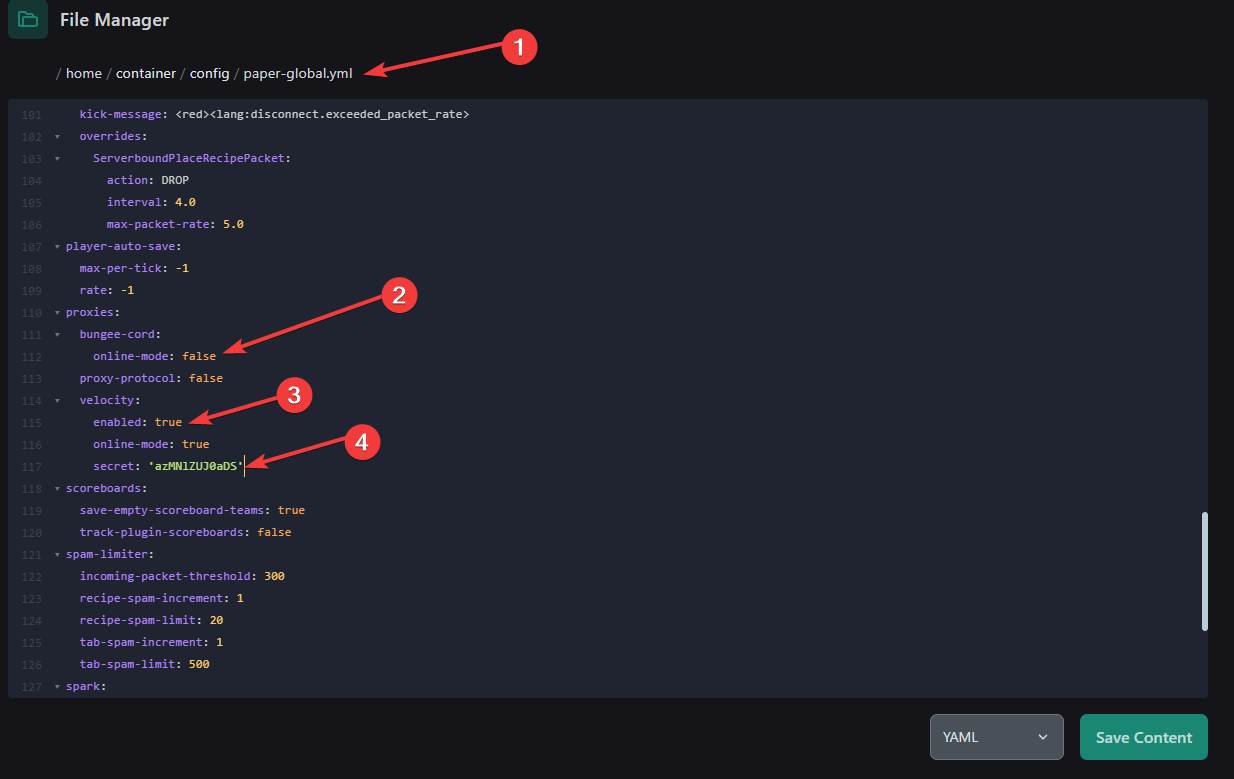
# Testing Velocity
Inside of Minecraft, you should be able to connect through your velocity proxy and be routed to the proper server. Thus taking you to the server you inputted prior.
```bash
[21:30:12 INFO]: [connected player] ondrya (/127.0.0.1:59292) has connected
[21:30:12 INFO]: [server connection] ondrya -> lobby has connected
[21:30:19 INFO]: [connected player] ondrya (/127.0.0.1:59292) has disconnected
[21:30:19 INFO]: [server connection] ondrya -> lobby has disconnected
```
If you receive an error called This server requires you to connect with Velocity., make sure that you have offline-mode set properly on your backend
servers and your forwarding secret is correct. Should you need further assistance, you can submit a ticket for one of our staff to review your setup.
---
# Minecraft Java Exception In Tick Loop Fix
URL: https://lagless.gg/docs/games/minecraft/troubleshooting/exception-in-server-tick-loop
Description: How to fix the exception in server tick loop crash on your Minecraft server.
## Introduction
If your Minecraft server is crashing with a "java.lang.NullPointerException: Exception in server tick loop" error, this is usually caused by corrupted player data files. Here's how to fix it.
## Prerequisites
- Access to the [Lagless Panel](https://panel.lagless.gg).
- A running Minecraft Java Edition server managed through Lagless Panel.
- Basic understanding of server management.
## Steps to Fix Session Lock errors
### 1. Log in to the Lagless Panel
1. Open your web browser and go to the [Lagless Panel](https://panel.lagless.gg).
2. Log in with your Lagless Panel credentials.
### 2. Navigate to Your Server
1. From the Lagless Panel dashboard, select the Minecraft server you want to configure.
2. Click on the server name to access its management page.
### 3. Stop your server (if running)
1. Press the "Stop" button on the top right of the panel.
### 4. Access the File Manager
1. In the server management interface, navigate to the **File** tab.
2. Delete the `ops.json`, `usercache.yml`, and `whitelist.json` files
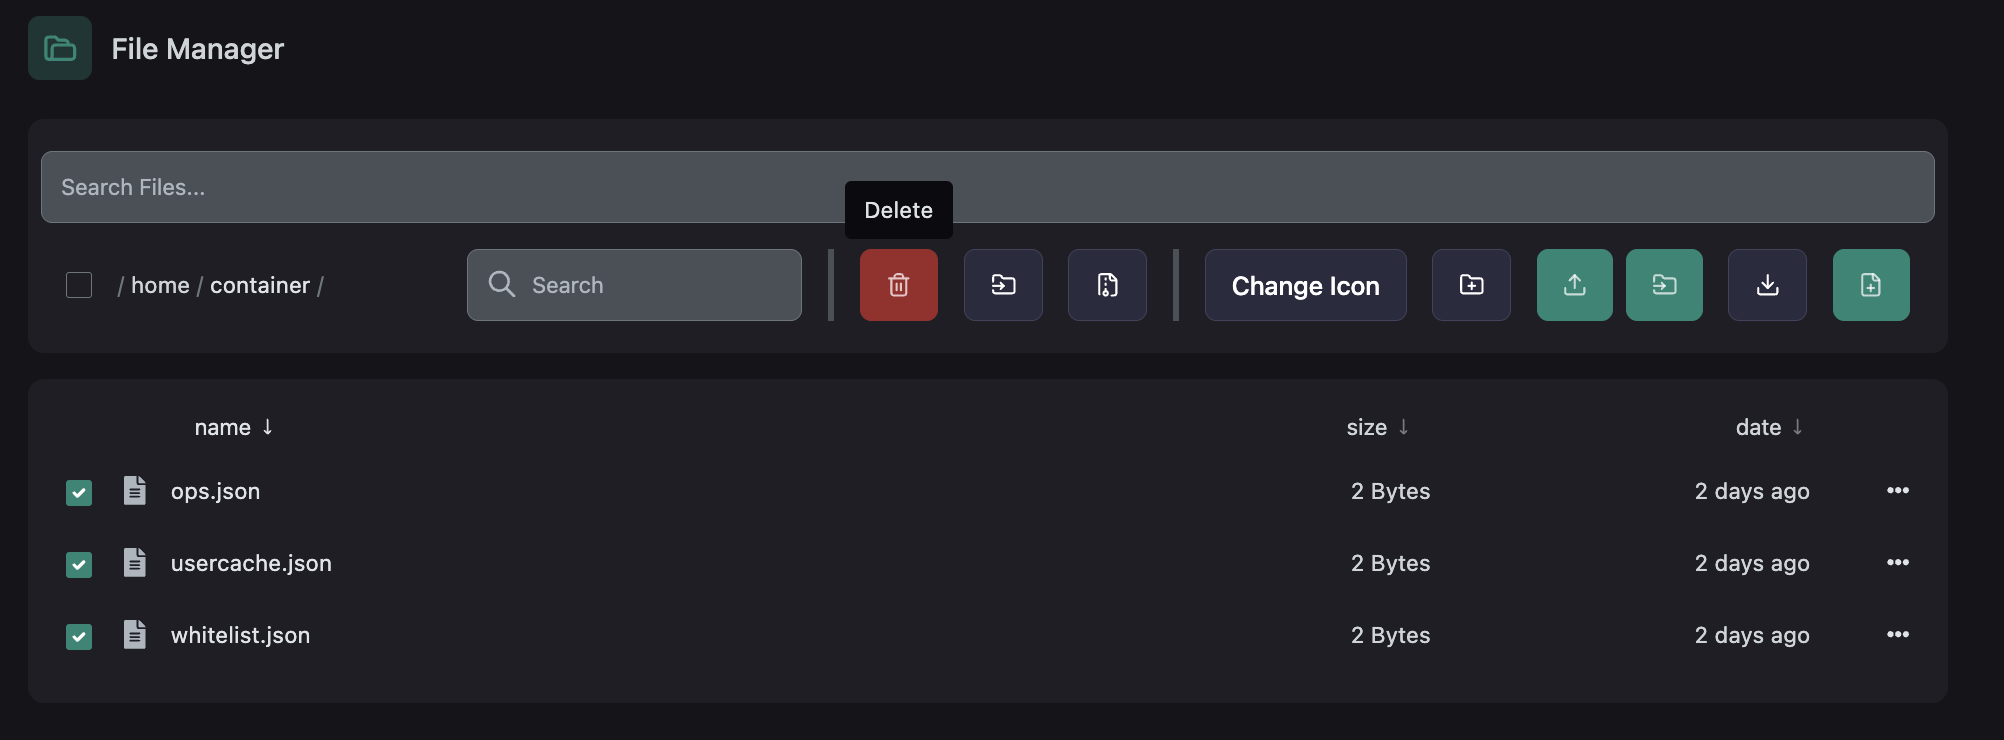
### 5. Start your server
1. After making the necessary changes
2. Go back to the server management interface and start the server.
## Conclusion
By fixing the "java.lang.NullPointerException: Exception in server tick loop at net.minecraft.server.v1_7_R3.JsonList.load(JsonList.java:171)" crash, you can now start your server without a crash.
---
# Invalid Chat Signature
URL: https://lagless.gg/docs/games/minecraft/troubleshooting/invalid-chat-signature
Description: Fixing the invalid chat signature error.
# Relogging
If you’ve seen this message, it likely means your client isn’t sending your chat signature.
> Failed to update secure chat state for Steve: 'Chat disabled due to missing profile public key. Please try reconecting'
Relogging is a simple way that can possibly fix your issue, due to the nature of the problem.
If this doesn’t resolve the issue, please continue reading.
# Secure profiles
To fix this, open the file manager and go to `server.properties`\
Find `enforce-secure-profile=true` (line 15) and change its value from true to false.\
Success! You and your players can now send messages without Minecraft interfering.
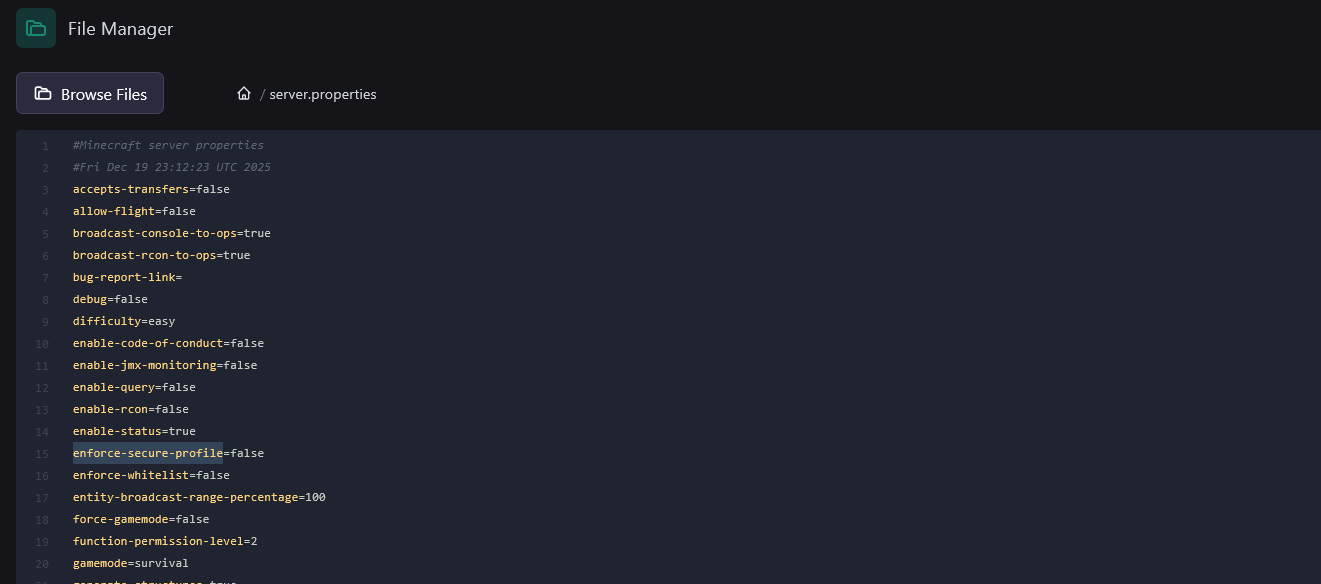
# Disabling chat reporting
**Note:** In 1.19.1, Mojang introduced chat reporting. Some players prefer this feature to be disabled so conversations remain moderated solely by the server rather than by Mojang.
## Steps
1. Download the plugin: https://www.spigotmc.org/resources/no-chat-reports.102990/
2. Put the `.jar` file into your `/plugins` folder.
3. Restart the server.
Chat messages are now unreportable and Minecraft chat reporting is effectively disabled.
---
# Minecraft server optimization guide
URL: https://lagless.gg/docs/games/minecraft/troubleshooting/optimization-guide
Description: Comprehensive guide to optimize your Minecraft server performance, reduce lag, and improve TPS. Covers Paper, Purpur, Spigot configuration and best practices.
## Introduction
This is a work in progress article. This will be updated over time.
🚧 Coming Soon
- JVM Argument Optimization Guide
- Spark Profiler Setup & Usage
- Troubleshooting Common Issues
This article is actively being expanded. Check back weekly for updates!
Before you start, make a backup first before making changes.
Do you have a Minecraft server but your playerbase complains about lag, low TPS? chunks loading slow? and general bad performance? then this article may be for you.
In this guide, we're going over a great many things to optimize your server. Use the Table of content(TOC) to quickly navigate.
If you're using a fork of other software, also check the software it's forked from as they may still provide optimization settings.
Even though many things are covered, not everything will or can be covered. Also, Individual version may have differences as well. So keep that in mind.
### Server Jarfile
There are many versions of server software, each one doing something different, some great some not so much. Here are a few good options.
| Server software| Description | Link |
|-----------|-------------|-----------|
| Vanilla Minecraft | no mods, no plugins. | https://www.minecraft.net/en-us/download/server |
| Spigot | Spigot allows plugins, not recommended and requires buildtools to download | https://www.spigotmc.org/ |
| universespigot | allows some of the best performance, at a price. ($70 or monthly) | https://universespigot.com/ |
| Paper | The go to for many, fairly well optimised | https://papermc.io/ |
| Folia | Folia is a fork of Paper that adds multithreading to the server for high playercounts (100+), but breaks most plugins | https://papermc.io/software/folia/ |
| Purpur | drop in replacement for paper adding new gameplay features | https://purpurmc.org/#projects |
| Forge| Modding software that's widely known | https://files.minecraftforge.net/net/minecraftforge/forge/ |
| Fabric| Fast modding software | https://fabricmc.net/ |
| NeoForge | Fork of forge with a community focussed API | https://neoforged.net/ |
There are many other forks, but these are some of the most known ones.
Recommended:
[Paper](https://papermc.io/) - The most popular fork that aims to improve performance while fixing gameplay and mechanics inconsistencies.
[Purpur](https://purpurmc.org/#projects) - Paper fork focused on features, great for SMP's.
### General optimisation
If you are using vanilla, Fabric or Spigot (or anything below Paper) , go to your `server.properties` and make sure you have `sync-chunk-writes=false`.
Many forks already have this set to false. This allows the server to save chunks off the main thread, lessening the load on the main tick loop.
#### server.properties
Most values here don't need to be changed for optimization.
`network-compression-threshold=256` if you got plenty of bandwith, but need more CPU resources you could up the value. `512` is a pretty good number if you want to go up.
`entity-broadcast-range-percentage=100` not something that would help a server a lot, but clients may get a few more FPS due to entity numbers visible.
`view-distance` this is how far you can see chunks in the world, higher number means more stress on a server. Lower to get better performance. A value between 6-10 is recommended.
`simulation-distance` This is the distance things will "tick". This includes crops growing, smelters burning and entities moving. Keep this lower than `view-distance`. Typically about at about 50%
#### Map pregen
Pre-generating, AKA pregen, is highly recommended to lag removal. Even though hardware has gotten a lot faster, this is still a recommended.
If you want to pregen the world, you can use a plugin such as **Chunky**. Read our [Chunky plugin guide](/docs/games/minecraft/plugins/chunky).
This can use a lot of storage space, so don't go overboard. A site like [world size calculator](https://onlinemo.de/world) may give you a estimate of that. The difference between 10k and 20k is about 50GB storage.
### Purpur
#### purpur.yml
`use-alternate-keepalive: false` the default is false. However, If you have players being timed out this setting this to true may help as it does not kick players unless they have not responded to the server for 30 seconds.
### Spigot
#### spigot.yml
`view-distance: default` When set to default, the server reads the view-distance set in server.properties. This is best kept default to avoid confusion.
`simulation-distance: default` When set to default, the server reads the view-distance set in server.properties. This is best kept default to avoid confusion.
`mob-spawn-range` Lowering this value may give the sense of having more mobs because they spawn closer. Generally recommend to keep close to your simulation range or lower. Never go above hard despawn range (16) as you would get stuck in a spawn/despawn loop, expect a crash.
`entity-activation-range` ticking, aka "doing something" for entities is not that important the further away they are. Especially if you can't see them. Lowering this may help quite a bit.
Good starting values
```
animals: 16
monsters: 24
raiders: 48
misc: 8
water: 8
villagers: 16
flying-monsters: 48
```
` entity-tracking-range` when will entities be visible? this setting controls it. The recommended setting is below. Don't go to low unless you want to get jumpscares. Recommend to be kept above `entity-activation-range`.
```
players: 48
animals: 48
monsters: 48
misc: 32
other: 64
```
`tick-inactive-villagers` Can be disabled for performance, but if you have a lot of farms you may see side affects.
`nerf-spawner-mobs: false` setting this to true will disable their AI. Which means less ticking.
### Paper
#### paper-world-defaults.yml
`delay-chunk-unloads-by: 10s` this setting will help with unloading chunks. Lower means fast unload, but may also mean the chunk has to be loaded more often. This comes down to each induvidual server. This is great for lobby servers that need to be loaded for a long time. Although permanent loading solutions may be desired.
`prevent-moving-into-unloaded-chunks: false` when `true` prevents players from moving into unloaded chunks, causing more main thread load.
`entity-per-chunk-save-limit` the reasons for limiting are pretty obvious, some of these can even be used for lag machines.
```
area_effect_cloud: 8
arrow: 16
breeze_wind_charge: 8
dragon_fireball: 3
egg: 8
ender_pearl: 8
experience_bottle: 3
experience_orb: 16
eye_of_ender: 8
fireball: 8
firework_rocket: 8
llama_spit: 3
splash_potion: 8
lingering_potion: 8
shulker_bullet: 8
small_fireball: 8
snowball: 8
spectral_arrow: 16
trident: 16
wind_charge: 8
wither_skull: 4
```
`despawn-ranges:` for most things you don't need the default hard despawn of 128. This will help a lot with performance and how many mobs are visible. Soft range not recommended to change.
```
ambient:
hard: 72
soft: 30
axolotls:
hard: 72
soft: 30
creature:
hard: 72
soft: 30
misc:
hard: 72
soft: 30
monster:
hard: 72
soft: 30
underground_water_creature:
hard: 72
soft: 30
water_ambient:
hard: 72
soft: 30
water_creature:
hard: 72
soft: 30
```
`per-player-mob-spawns: true` Have a lot of mob farms? often this hits the mobcap on servers, setting this setting to true may help with that as it checks for each player.
### bukkit
#### bukkit.yml
`spawn-limits` This is for the whole server, so you may want to increase this as the server get's more players. Less mobs less lag. But also with more players less visible mobs per players. Also take a look at `per-player-mob-spawn` setting.
```
monsters: 20
animals: 5
water-animals: 2
water-ambient: 2
water-underground-creature: 3
axolotls: 3
ambient: 1
```
The `ticks-per` Settings this higher will mean the server attempts to spawn a mob every x ticks, but that's okay for many mobs as they don't despawn fast. Below are some recommended starting points.
```
monster-spawns: 10
animal-spawns: 400
water-spawns: 400
water-ambient-spawns: 400
water-underground-creature-spawns: 400
axolotl-spawns: 400
ambient-spawns: 400
```
---
# Outdated Server Type
URL: https://lagless.gg/docs/games/minecraft/troubleshooting/outdated-server
Description: How to fix outdated minecraft server error
# Steps to installing a newer version
## 1. Login and select your server
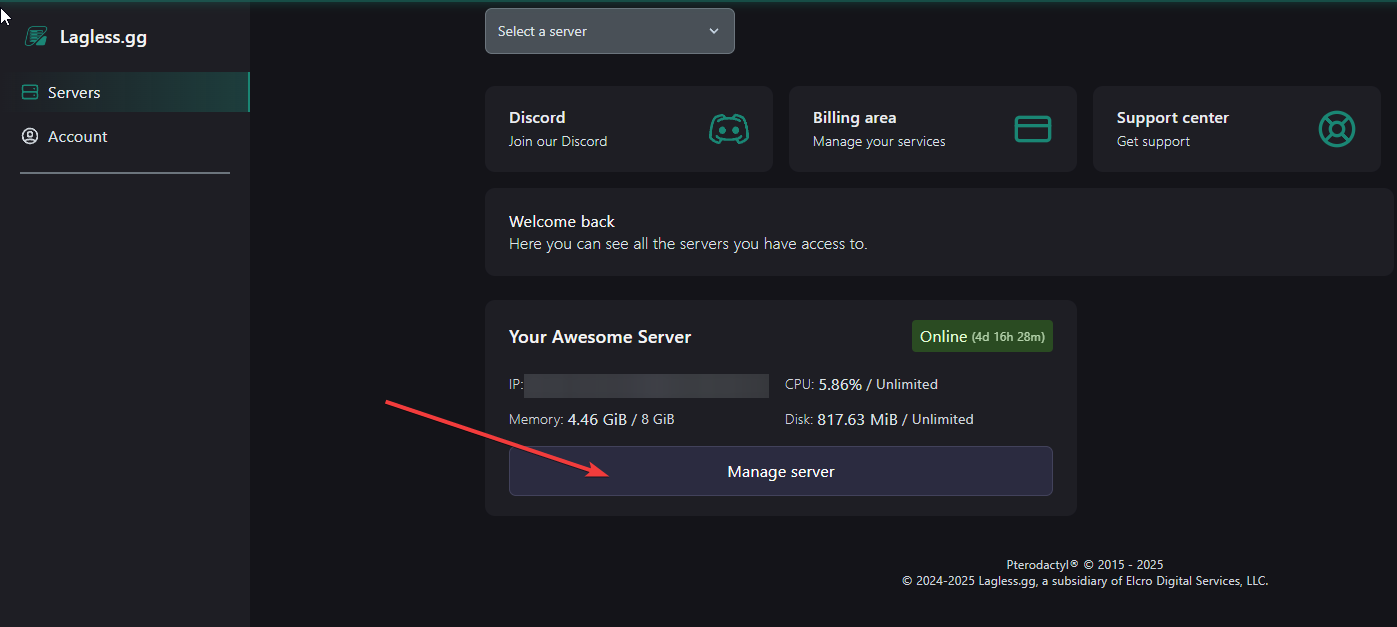
## 2. Pick Version Selector
Depending on the device, you may need to scroll down to see Versions
under the Minecraft category. This section will also tell you the current version and build
your server is running and if you are running an outdated build.
You can pick any version but in this example, we'll be using Fabric.
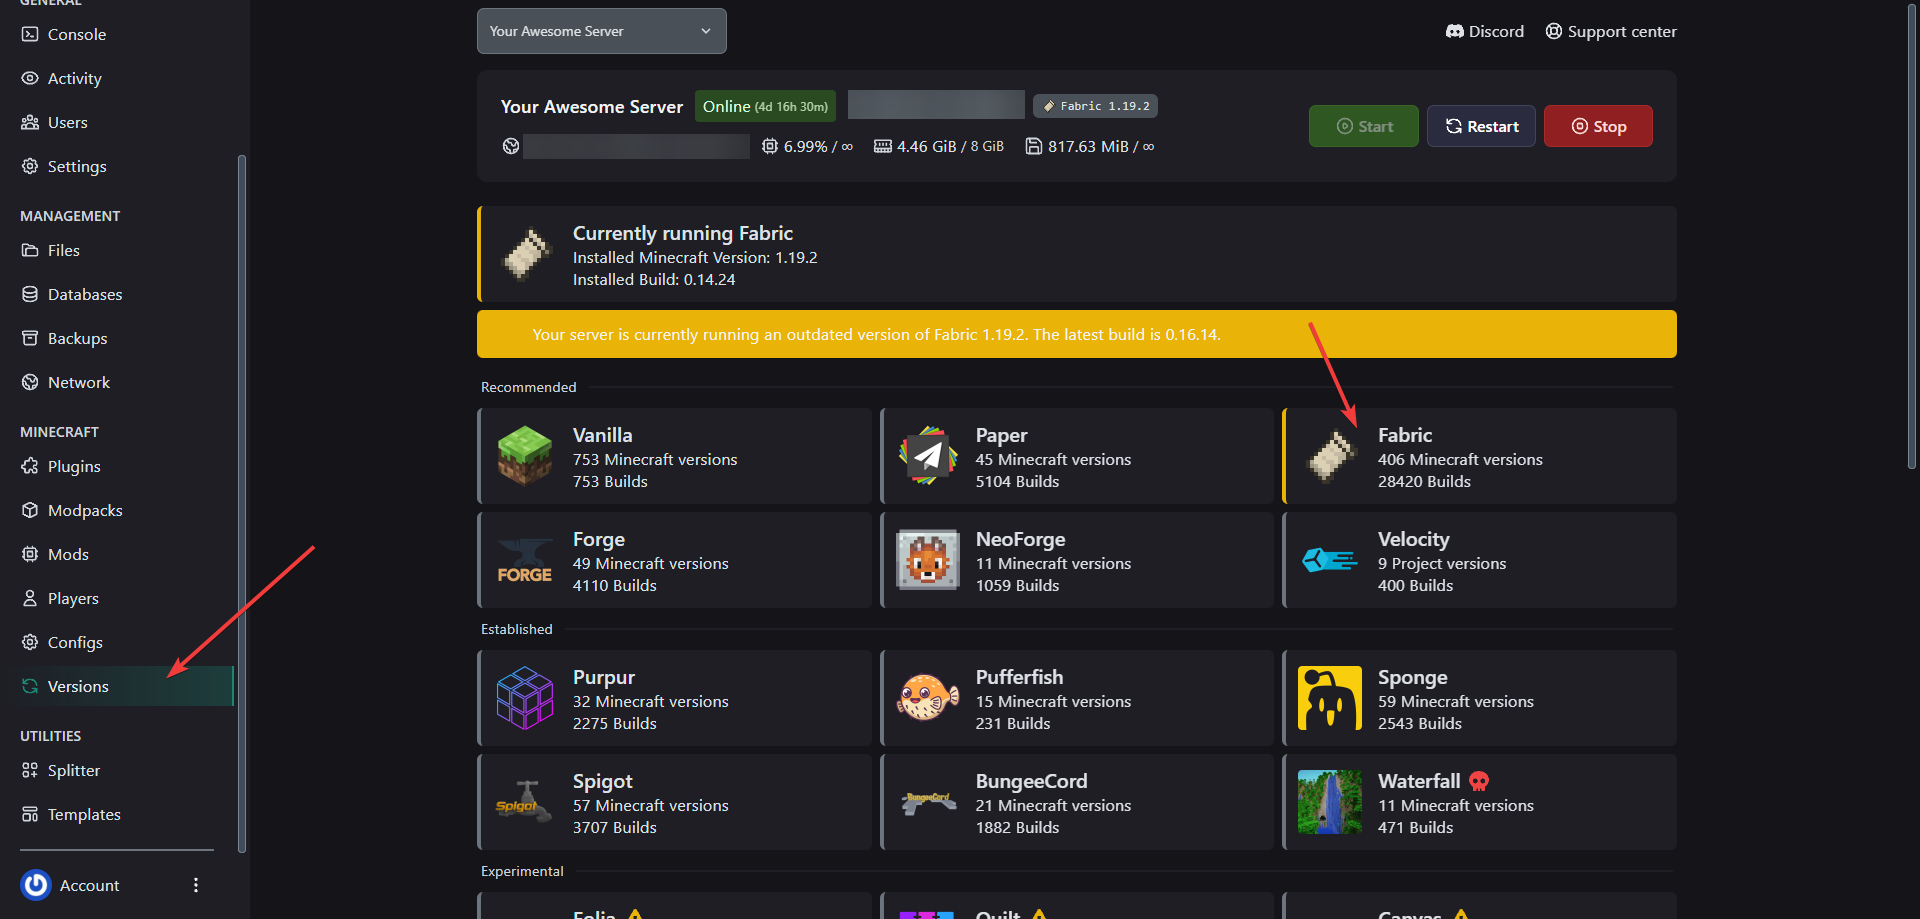
## 3. Install New Server
Now you can pick your version then build. We'll install the latest version and patch
but here you can back track to a specific build in case you are experiencing issues.
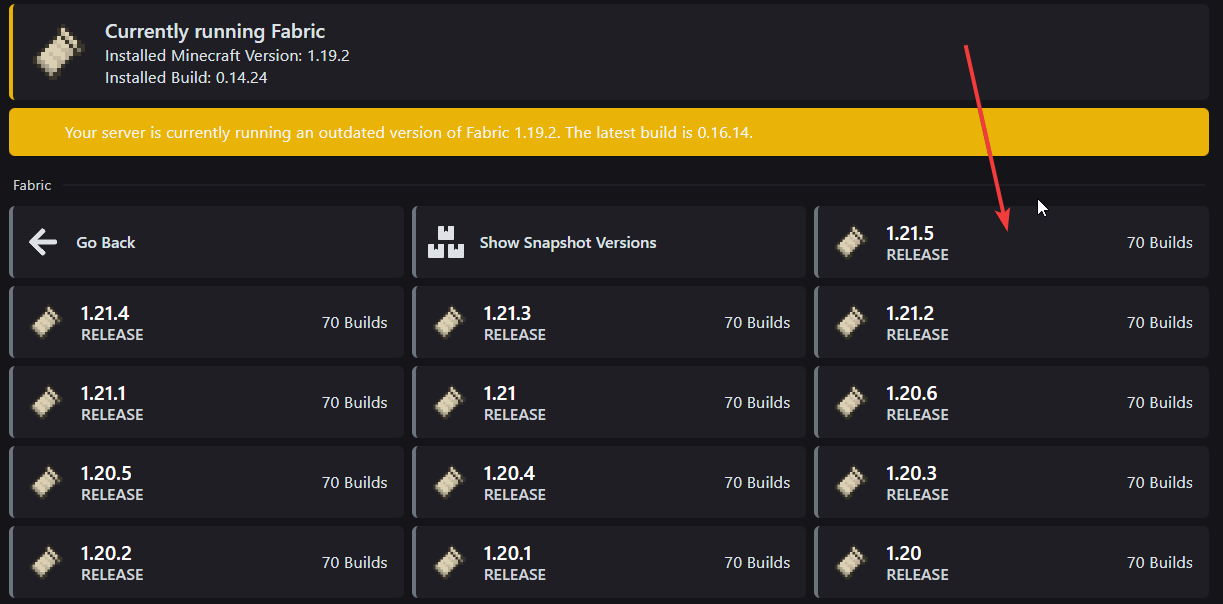
While the Lagless panel does have automatic backups, they may not be the most recent.
Make a backup prior to changing your version in case of corruption.
Furthermore, if you are starting over, you can disregard this step.
Only select "Wipe Files" if you want to completely start over with a fresh server.
This will delete all your existing world data, plugins, and configurations permanently.
You'll also need to tick to agree the EULA.
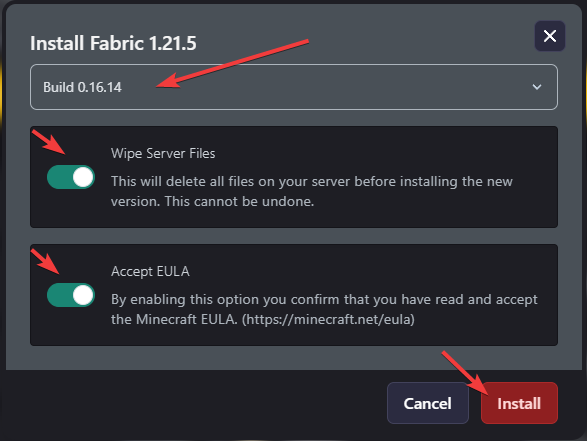
## 4. Wait for Reinstallation
Once you hit install, you'll need to wait a few minutes for the reinstallation to complete.
You can also go to Console on the navigation to view your progress.
---
# Server Timed Out
URL: https://lagless.gg/docs/games/minecraft/troubleshooting/server-timed-out
Description: Fixing Connection Issues between your server
# Restarting Your Server
Sometimes, a simple restart can fix any connection issues whether your server might be hung up.
Once restarting, ensure that the container is marked as running. From there, you can try reconnecting.
If you can't connect then, check your console and make sure there aren't any errors.
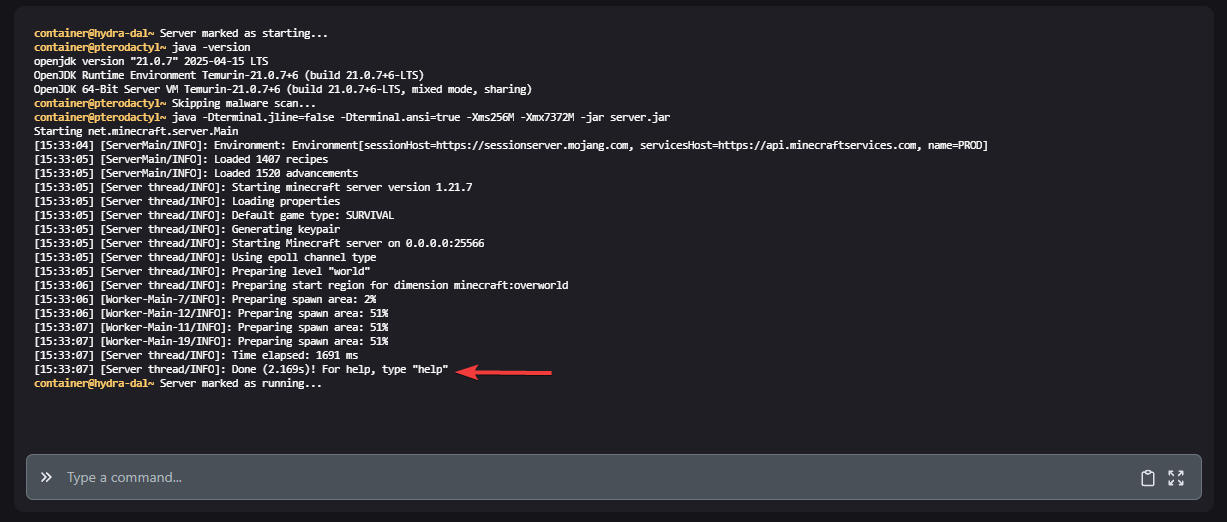
# Direct Connect
Inside of Minecraft, you have the option to directly connect to a server instead of
adding it to your server list.
- Login to Minecraft
- Select on Multiplayer
- Click on Direct Connection
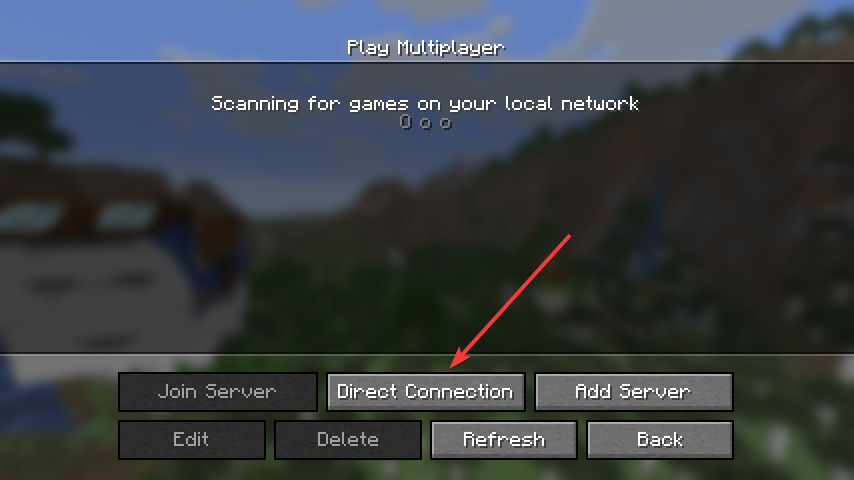
- Paste your IP and hit Join Server
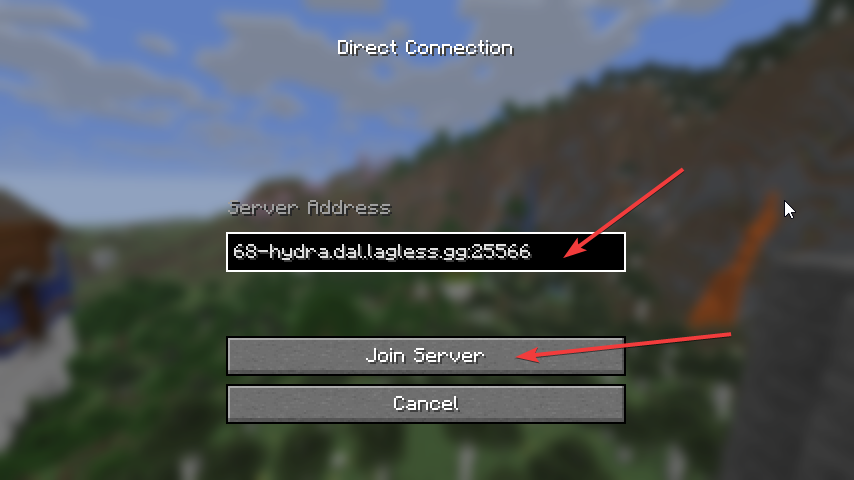
# MC Server Status
To verify your server is operational, you can plug the IP of your server in mcsrvstat.us. This website
read your server version and other information that may be necessary.
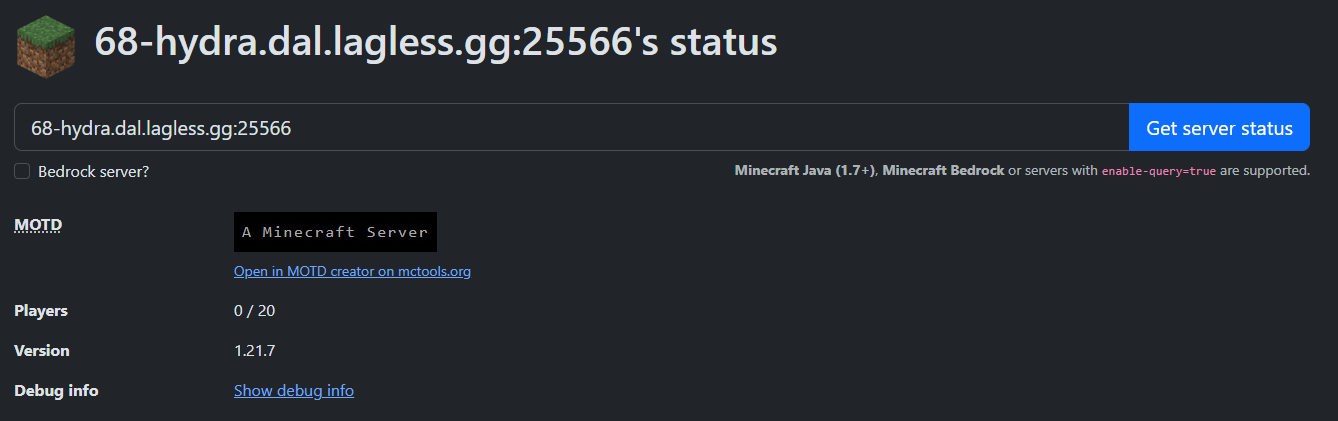
---
# Using a Custom World Seed
URL: https://lagless.gg/docs/games/minecraft/world-management/custom-seed
Description: A custom level-seed allows you to play in the world you want.
## Introduction
Sometimes we don't want a random seed, but a custom one. Once we find it, we can use it on a server, this will tell you how.
## How to Set Custom Seed
**Log in** to our lagless game panel
Navigate to the **Files** tab and search for the **server.properties** file.
Your server must be started at least once for this file to be generated.
Search for the field
`level-seed=`
Insert a seed string of your choosing after the equals sign. For example:
`level-seed=2231252140388046750`
Click **Save Content** of the file.
**Stop** the server completely.
Delete the existing world folder to make space for the new world
This will permanently erase all buildings, items, and player data from the current world. Make sure you have a backup if you wish to keep anything.
**Start** the server. Your new world should now be generated with the new seed.
---
# Importing a World
URL: https://lagless.gg/docs/games/minecraft/world-management/import-world
Description: Uploading a single player world to multiplayer for a better experience
# Zipping Software
We recommend using 7-Zip for uploading. Other clients such as Win-Rar may suffice.
# Zipping your World
Select your world under Singleplayer and hit Edit
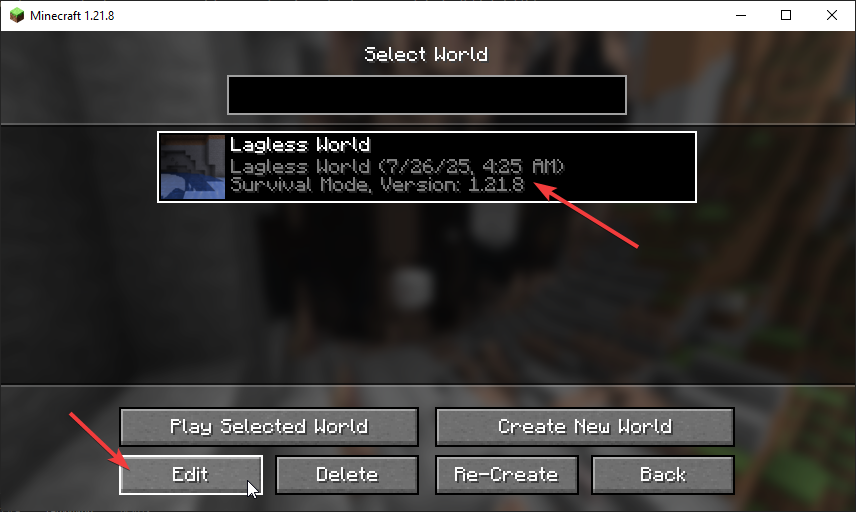
Next, you'll select on Open World Folder
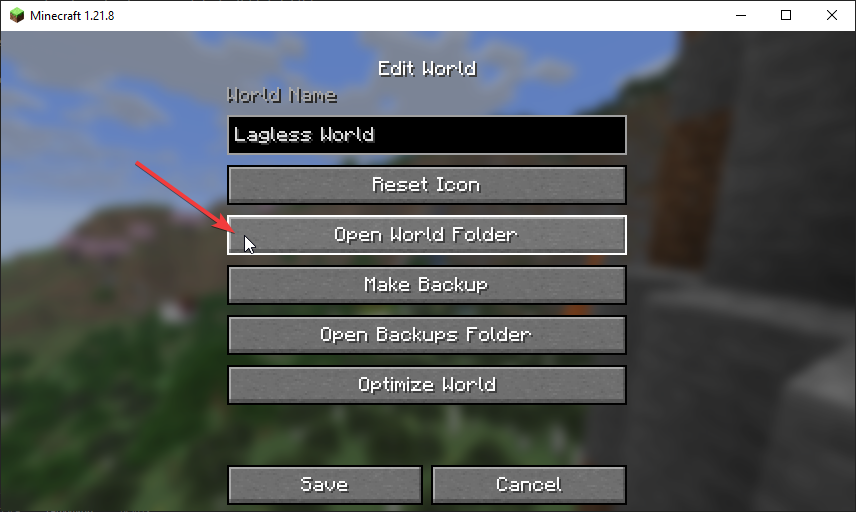
From here, you'll see your world folder. Now, select everything and hit Add to .zip
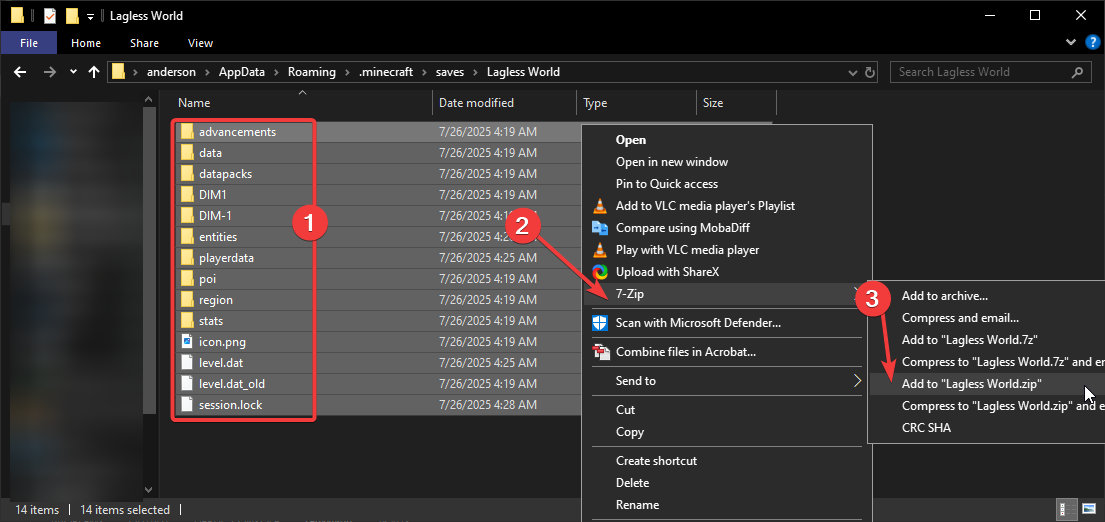
Depending on your world size, it may take some time. Once it's complete, you'll see a new zip file in that same folder
containing your world.
# Uploading to Lagless
If you already have a world file, remember to delete it before uploading. If you are starting from scratch, you can skip this step.
We recommend using an SFTP client such as WinSCP or FileZilla.
To launch an SFTP session, go to Files and click on Launch SFTP.
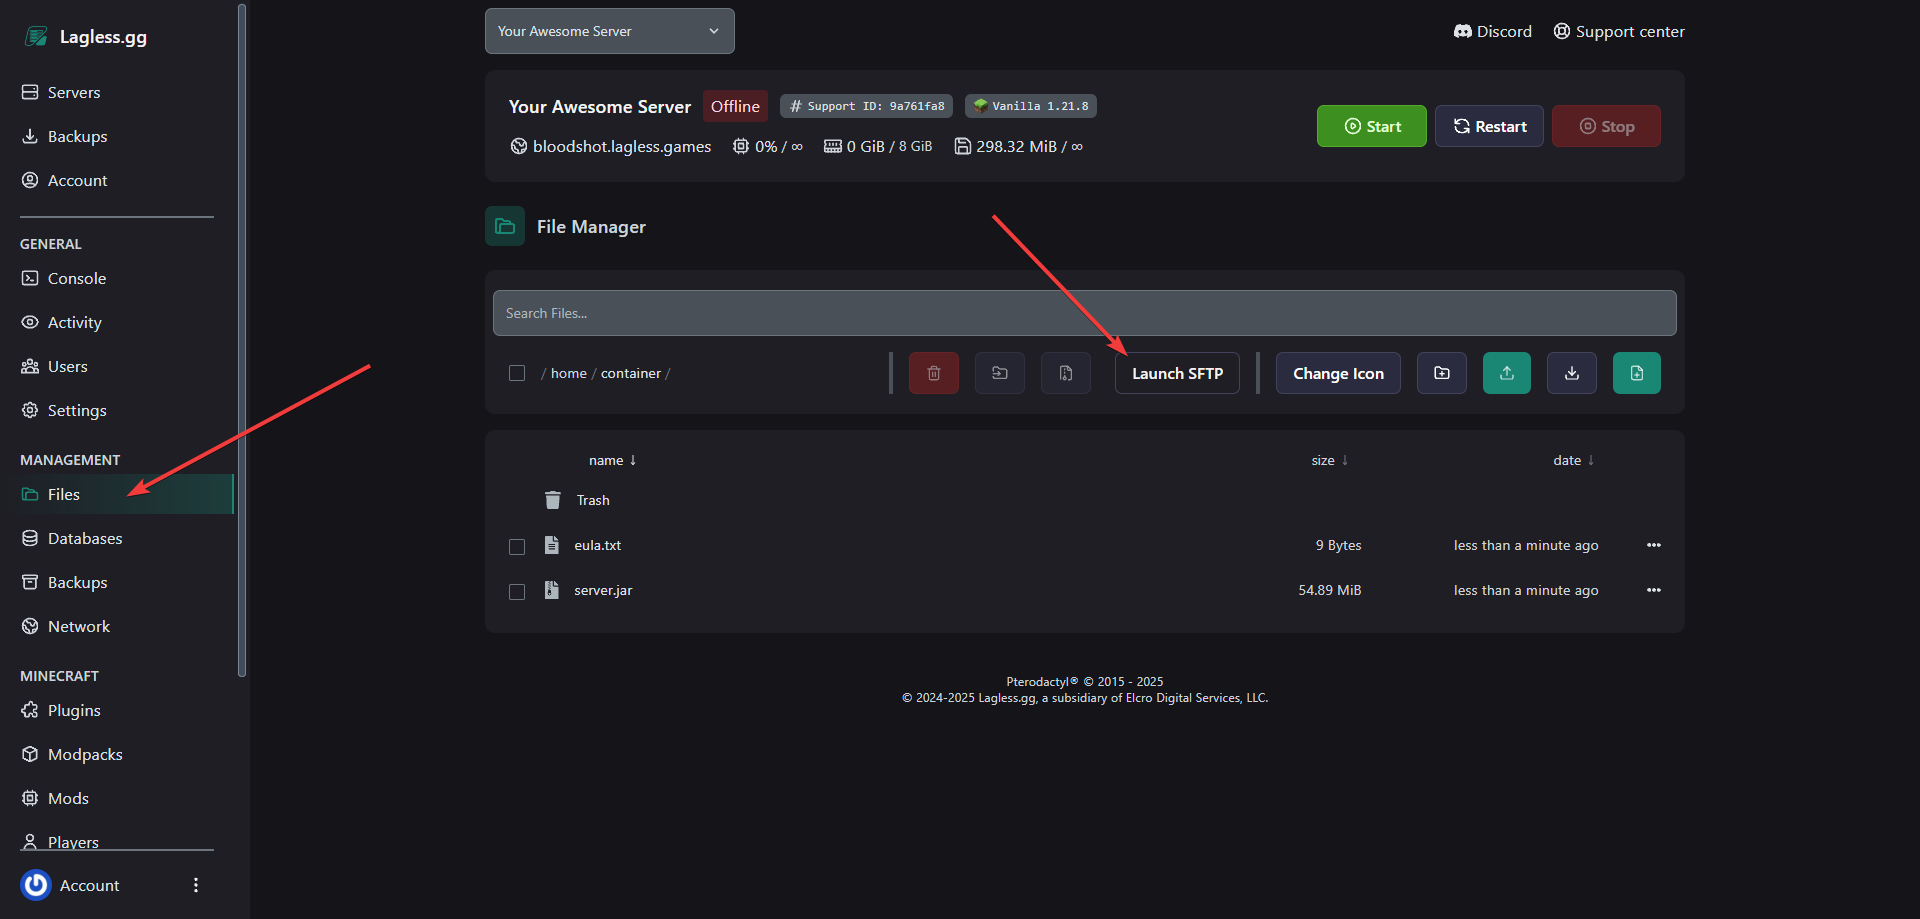
Create a folder, we recommend naming it `world`. Remember if you choose to name it something else, you will need to change `world-name` in `server.properties`
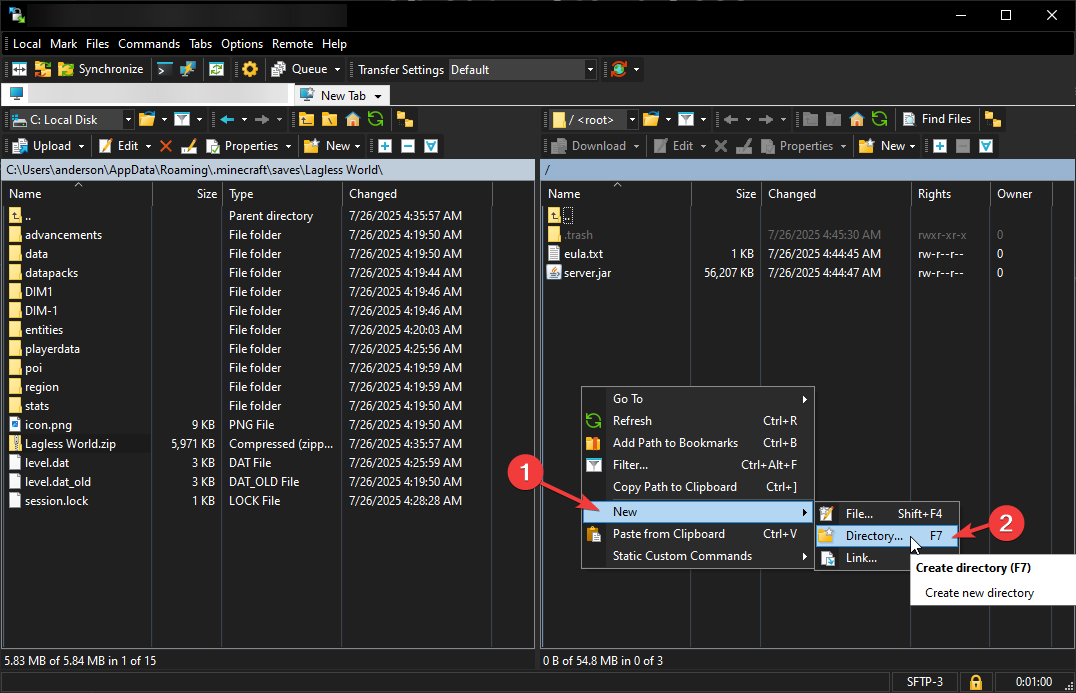
Enter the folder you just created, then drag and drop your file over. Depending on your internet speed, this may take some time.
# Unzipping
Finally, go back to your File Manager and unzip the world.

You can delete the zipped folder uploaded previously. Now, you can start your server and play with friends.
---
# Reset World
URL: https://lagless.gg/docs/games/minecraft/world-management/reset-world
Description: How to reset your worlds for a new adventure.
# Backing Up Data
If you'd like to keep your world to restore at a later point, you can zip them and download via File Manager or SFTP.
Make sure to shut down your server prior to archiving and downloading your worlds.
This ensures you have the latest files before wiping everything clean.
## Zipping Files
- On your server, select Files on the left.
- Select the world folders (world, world_nether, world_the_end) and select Archive
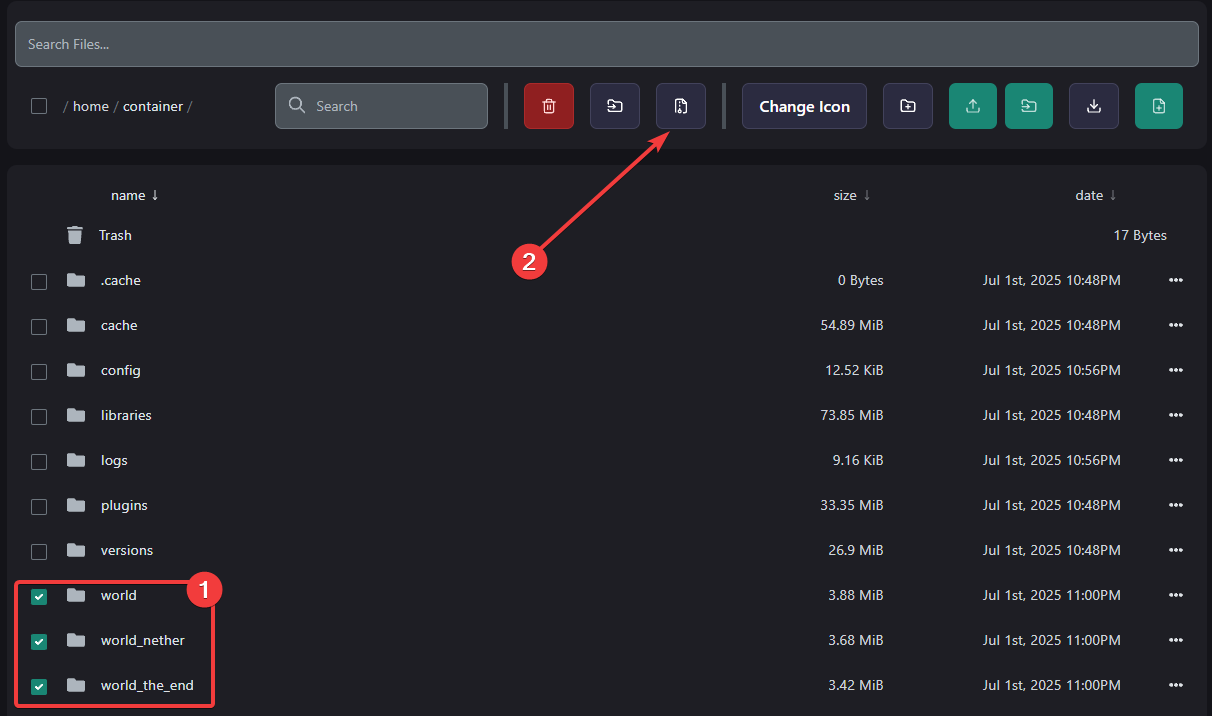
Depending on your world size, you may need to wait a few minutes for the worlds to zip.
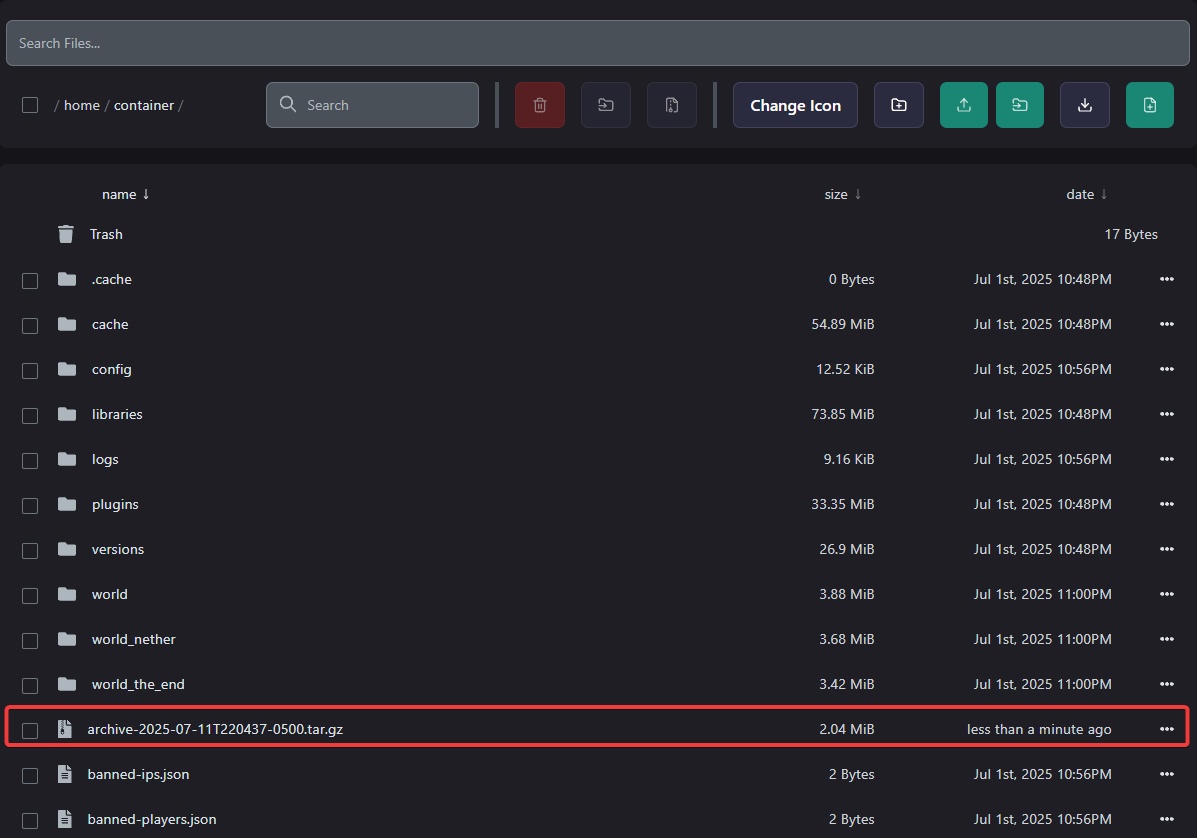
# Downloading Archive
Now, you can choose to download it directly from the browser or through an SFTP client (such as FileZilla or WinSCP).
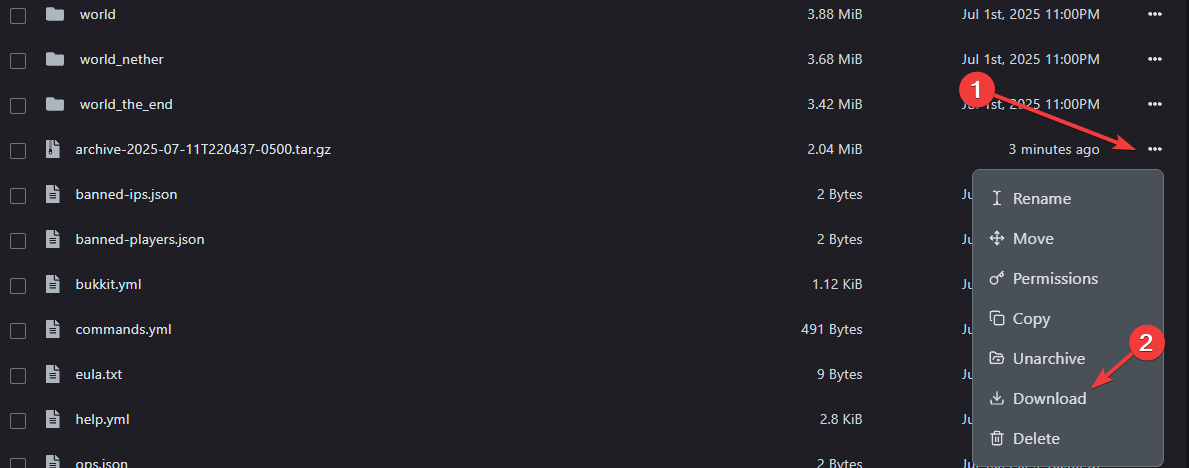
Alternatively, you can connect via SFTP. Your SFTP details can be found under the File Manager and picking Launch SFTP from the context menu.

After you downloaded your files, you can delete the world folders and start your server as normal. Be aware that this may take a minute or two as it is generating a new spawn area.
# Different World Names
Depending on if you are using a custom modpack, your world folders may be named something different. To find the
proper name, go to Files and select your `server.properties` file. You're looking for the `level-name` line.
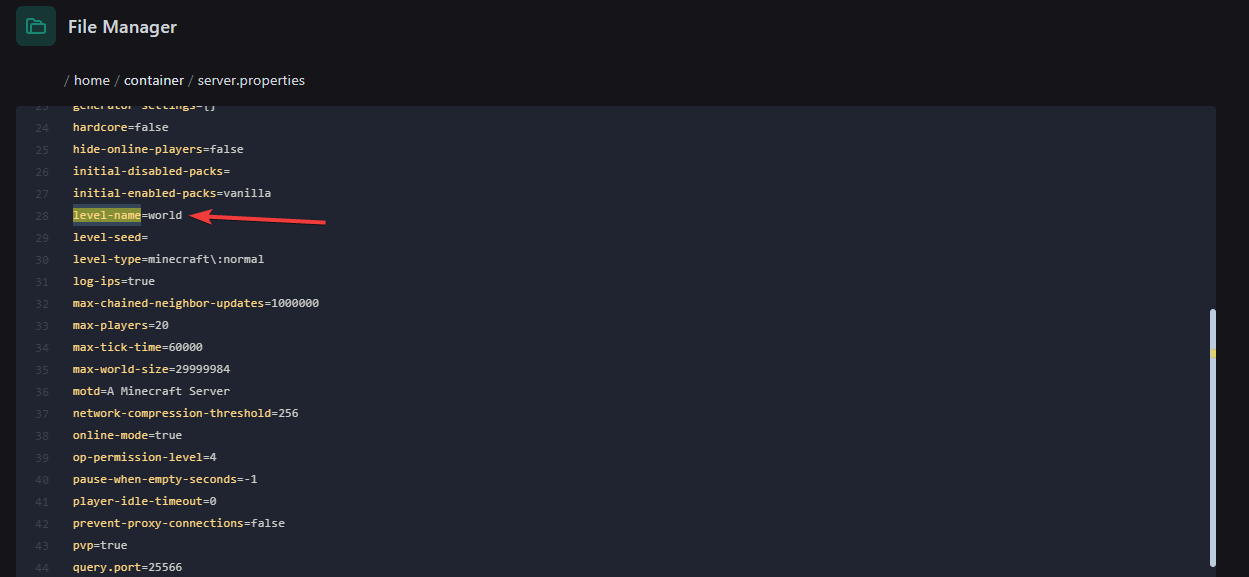
---
# Palworld
URL: https://lagless.gg/docs/games/palworld
Description: Low-latency Palworld server hosting
## Palworld Server Hosting
Everything you need to know about hosting your own Palworld dedicated server on Lagless.
---
# Admin Commands
URL: https://lagless.gg/docs/games/palworld/admin-commands
Description: Full list of in-game admin commands for your Palworld server.
## Palworld Admin Commands
After you set up an admin password, you can use commands in the in-game chat to manage your Palworld server.
---
### Using Commands
1. Join your Palworld server
2. Press `Enter` to open the chat
3. Type `/AdminPassword YourPassword` to unlock admin mode
4. Type any command from the list below
You must unlock admin mode with `/AdminPassword` each time you join. Admin privileges reset when you disconnect.
---
### Admin Access
| Command | Description |
| :--- | :--- |
| `/AdminPassword [password]` | Obtain administrator privileges using the password set in the panel. |
---
### Server Management
| Command | Description |
| :--- | :--- |
| `/Shutdown [Seconds] [MessageText]` | Shut down the server. If `[Seconds]` is specified, the server shuts down after that delay. `[MessageText]` displays to all players before shutdown. |
| `/DoExit` | Force stop the server immediately. |
| `/Broadcast [MessageText]` | Send a message to all players on the server. |
| `/Save` | Save the world data. |
| `/Info` | Show server information. |
`/DoExit` stops the server with no warning and no save. Use `/Shutdown` or `/Save` first if you want to preserve world data.
---
### Player Management
| Command | Description |
| :--- | :--- |
| `/ShowPlayers` | Show information for all connected players. |
| `/KickPlayer [SteamID]` | Kick the specified player from the server. |
| `/BanPlayer [SteamID]` | Ban the specified player from the server. |
| `/UnBanPlayer [SteamID]` | Unban the specified player. |
You need the player's **SteamID** to kick or ban them. Use `/ShowPlayers` to find it.
---
### Teleportation
| Command | Description |
| :--- | :--- |
| `/TeleportToPlayer [SteamID]` | Teleport to the specified player. |
| `/TeleportToMe [SteamID]` | Teleport the specified player to your location. |
---
### Spectator Mode
| Command | Description |
| :--- | :--- |
| `/ToggleSpectate` | Switch to Spectator Mode after obtaining admin privileges with `/AdminPassword`. |
---
### Common Issues
#### "You don't have permission"
- Ensure you've typed `/AdminPassword` with the exact password from the panel
- Check that the admin password is set in the **Variables** tab
- Re-log and try again
#### Command not recognized
- Check for typos
- Commands are case-sensitive
- Make sure you're typing in the **in-game chat** (not the panel console)
#### Player not found
- Use `/ShowPlayers` to get the exact SteamID
- SteamIDs are case-sensitive
#### Can't switch to Spectator Mode
- You must unlock admin mode with `/AdminPassword` first
---
# Admin Setup
URL: https://lagless.gg/docs/games/palworld/admin-setup
Description: Set your Palworld admin password and gain admin privileges in-game.
## Palworld Admin Setup
Setting up an admin password on your Palworld server lets you manage the server, kick and ban players, and run admin commands.
---
### How Admin System Works
Palworld uses a single **Admin Password** to grant admin privileges. You set the password in the panel, then type `/AdminPassword` in-game with that password to unlock admin commands.
Without setting an admin password in the panel, no one can use admin commands. The password acts as the key to unlock all admin functionality.
---
### Set the Admin Password
1. Open your Palworld server in the Lagless control panel
2. Navigate to the **Settings** tab
3. Find the **variables** section.
4. Find the **ADMIN PASSWORD** field
5. Enter a strong password
6. Save the changes
7. Restart your server
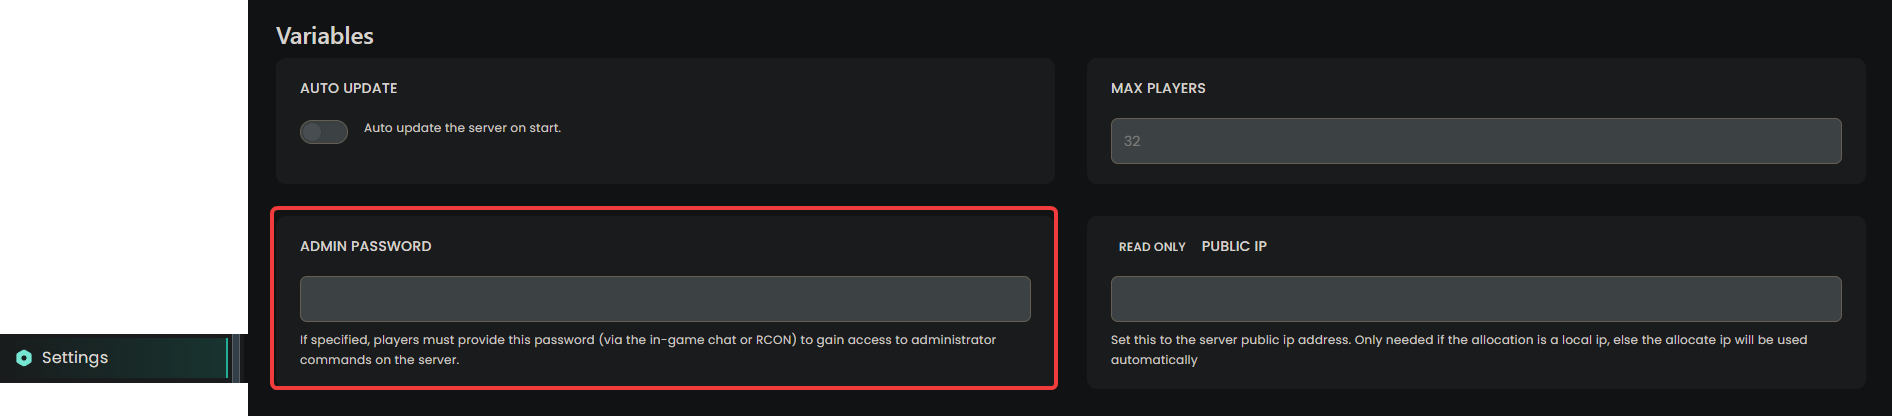
Choose a strong, unique password. Anyone with this password can use admin commands on your server.
---
### Gain Admin Privileges In-Game
Once the server is running with your admin password set:
1. Join your Palworld server
2. Press `Enter` to open the in-game chat
3. Type:
/AdminPassword YourPasswordHere
4. Press Enter
5. You'll see a confirmation that you're logged in as admin

You only need to enter the admin password once per session. It resets when you reconnect.
---
### Multiple Admins
Any player who knows the admin password can gain admin privileges by typing `/AdminPassword` in the in-game chat. Share the password only with trusted players.
| Action | How |
| :--- | :--- |
| **Grant admin** | Share the password with the player |
| **Revoke admin** | Change the password in the panel |
| **Remove all admins** | Clear the password field in the panel |
---
### Common Issues
#### "You don't have permission"
- Ensure you've typed `/AdminPassword` with the exact password from the panel
- Check that the admin password is set in the **Settings** tab, under **variables** in the control panel
#### Unknown command
- Check for typos
- this command is **NOT** case-sensitive
- Make sure you're typing in the **in-game chat** (not the panel console)
#### Changed the password but old one still works
- Restart your server after changing the admin password
---
# Getting Started
URL: https://lagless.gg/docs/games/palworld/getting-started
Description: Deploy your Palworld server, find your connection details, and join the game.
## Palworld Getting Started
This guide walks you through deploying your Palworld server and connecting for the first time.
---
### Step 1: Deploy Your Server
1. Head over to [Palworld hosting plans](https://lagless.gg/plans?game=palworld) to **Build your server**.
2. Choose your preferred server location.
3. Choose your server RAM.
4. Click the deploy button to start your server.
Your server will be online in under 60 seconds.
---
### Step 2: Find Your Connection Details
Once your server is deployed, find your IP address and port in the control panel:
1. Open your Palworld server in the panel
2. Navigate to the **Network** tab
3. Copy the **IP:Port** shown there

You must use the numeric IP address to connect. Subdomains like `palworld.lagless.games` will not work for Palworld.
---
### Step 3: Connect in Palworld
1. Launch Palworld
2. Click **Join Multiplayer Game**
3. Select the **Join via IP** option
4. Enter your server's IP and port:
123.456.789.0:8211
5. Click **Connect**
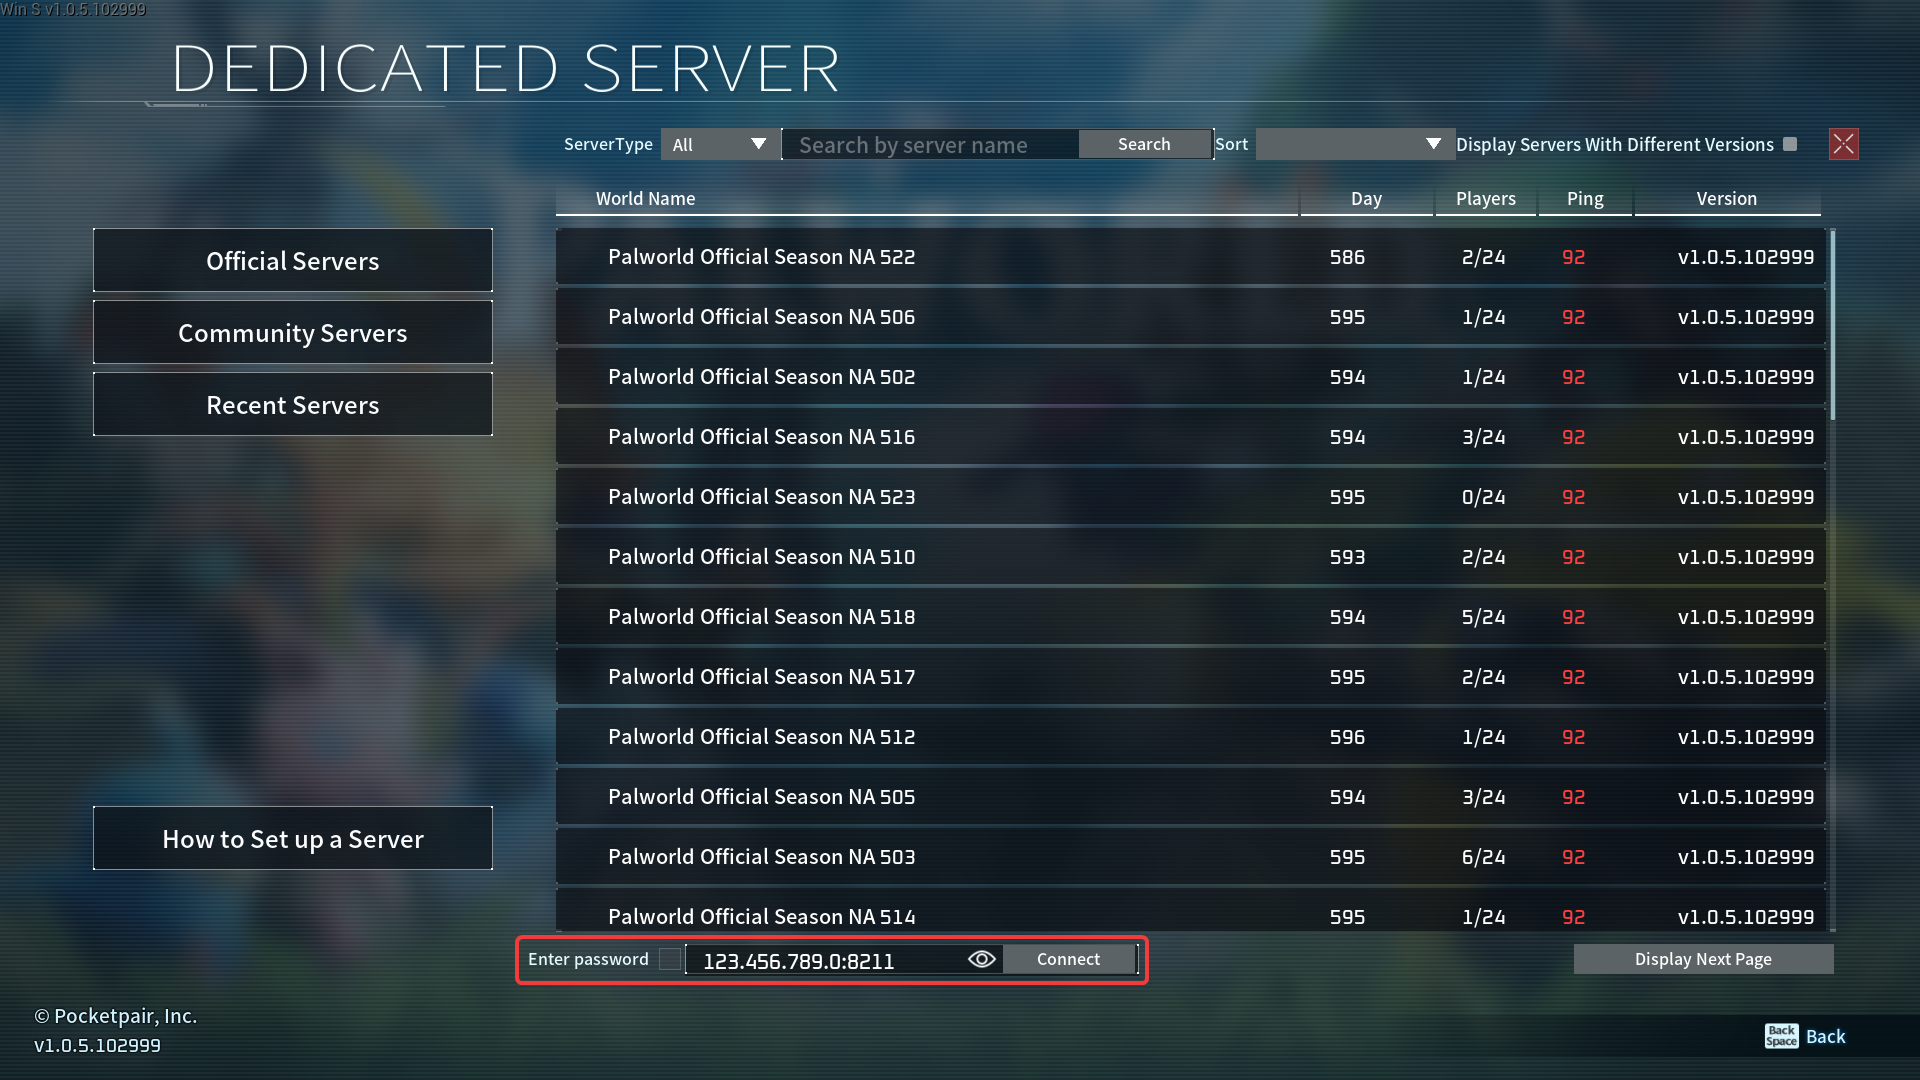
6. Enter your server password if prompted
Console players (Xbox, PS5) can only join via the **Community Servers** list. Direct IP entry is not supported on consoles. Set a servername that is easy to search for in the Community Servers list.
---
### Common Issues
#### "Failed to connect"
- Verify the IP and port are correct
- Use the **numeric IP** from the Network tab — not a subdomain
- Confirm the server is running
- Check that the server password is correct
#### Server not showing in browser
- Use **Join via IP** instead of searching in the server browser
- Console players must use the Community Servers list
- double check that the server is running and has a unique name
#### World not generating
- Wait a few minutes, the first join takes longer
- Check that the server has enough storage space
#### Join from console
- Console players must use the Community Servers list, as direct IP entry is not supported on consoles. Make sure your server has a unique name that is easy to search for in the Community Servers list.
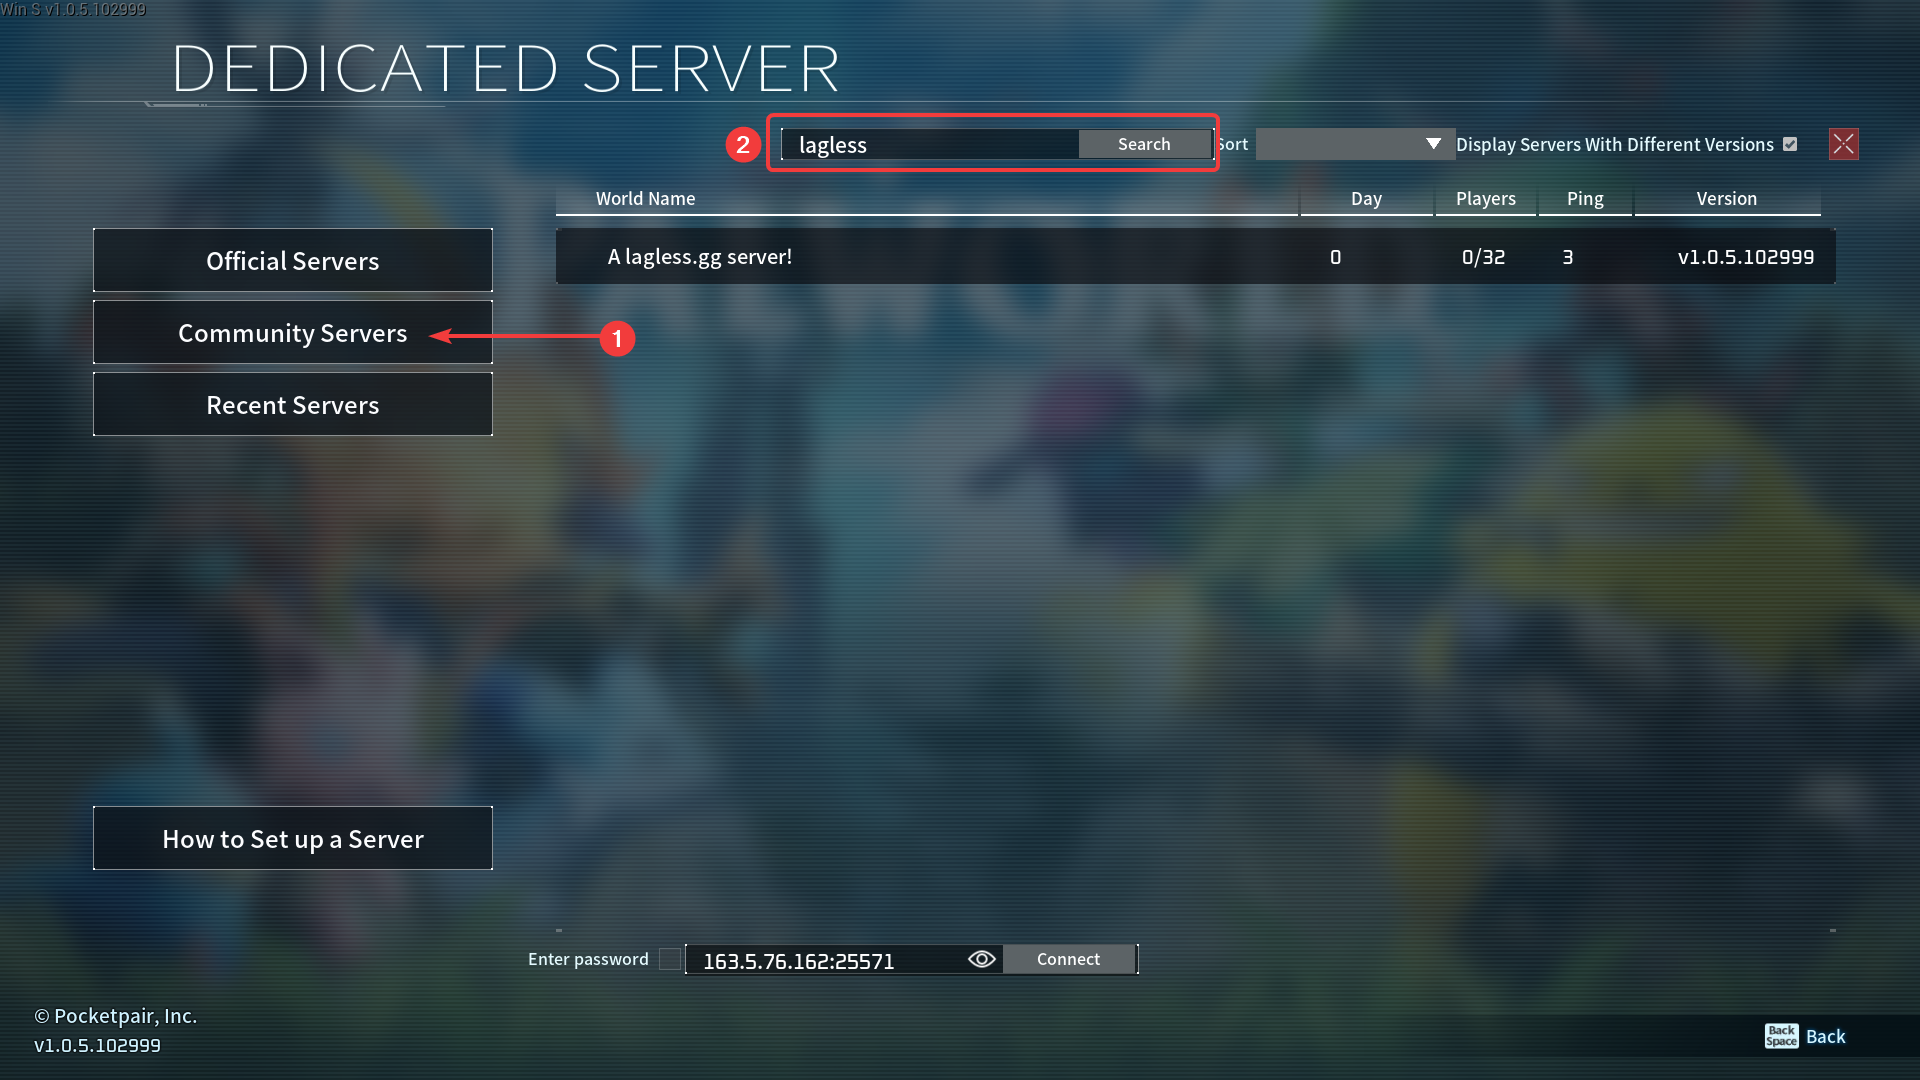
---
# Valheim
URL: https://lagless.gg/docs/games/valheim
Description: Low-latency Valheim server hosting
## Valheim
Valheim is a survival and sandbox video game developed by Iron Gate Studio. It is set in a procedurally generated world inspired by Norse mythology. Players take on the role of a Viking warrior tasked with defeating powerful enemies and building their own settlements.
With [lagless](https://lagless.gg/) Valheim server hosting, you can enjoy a smooth and responsive gaming experience with your friends. Our servers are optimized for low latency, ensuring that your actions are registered in real-time.
Use our Valheim configuration tool to easily set up and manage your server.
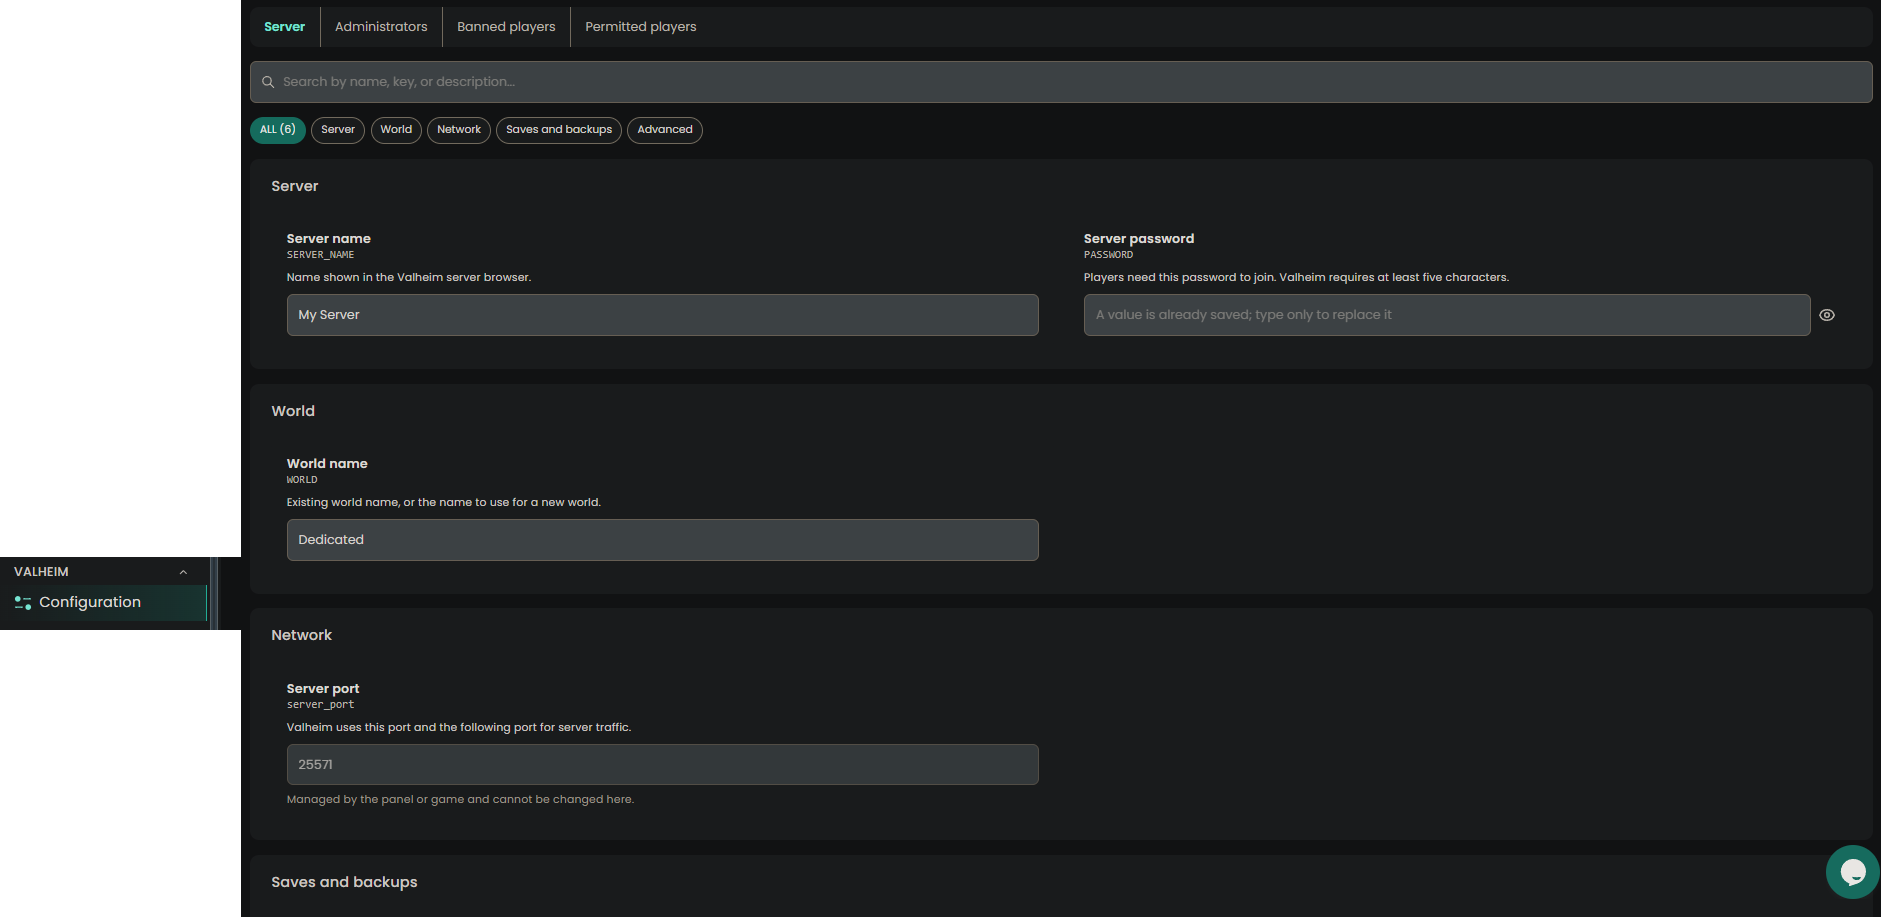
---
# Admin Commands
URL: https://lagless.gg/docs/games/valheim/admin-commands
## Valheim Admin Commands
After you set up admin access, they can use commands to manage your Valheim server.
These become available after you set up admin access on your server. See [Admin Setup](/docs/games/valheim/admin-setup) for instructions.
---
### Using Commands
Admins have two ways to use commands:
#### Method 1: In-Game Chat (Always Available)
1. Press `Enter` to open the chat
2. Type your command
3. Press `Enter` again to execute
#### Method 2: Console (Requires Setup)
The console (F5) is **disabled by default** for all Valheim clients.
You can enable it by adding `-console` to your Valheim launch options in Steam:
1. Right-click Valheim in your Steam library
2. Select **Properties**
3. Under **Launch Options**, add:
-console
4. Launch the game – F5 will now work!
These commands work in both **in-game chat** and the **console** (if enabled). They do not work in the server console. You must be logged in as an admin to use them.
---
### Available Commands
| Command | Effect | Note |
| :--- | :--- | :--- |
| `ban [name/ip/userID]` | Bans the named user. | - |
| `banned` | Shows a full list of banned users. | - |
| `kick [name/ip/userID]` | Kicks the named user. | - |
| `resetworldkeys` | Resets all world modifiers to default. | This does not reset gameplay progression keys. |
| `save` | Forces the game to save. | - |
| `setworldmodifier [name] [value]` | Sets a world modifier slider value. | - |
| `setworldpreset [name]` | Resets all world modifiers to a named preset. | - |
| `unban [name/ip/userID]` | Unbans the named user. | - |
---
### Common Issues
#### "You are not admin"
- Ensure you're listed as an admin
- Verify the SteamID has the `V_` prefix
Console will show clearly when a command is executed successfully or if it fails.
Not an admin? See [Admin Setup](/docs/games/valheim/admin-setup) to get started.
#### Command not recognized
- Check for typos
- Commands are not case-sensitive
- Make sure you're typing in the chat or console (not the server console or panel)
#### F5 console doesn't work
The console is disabled by default. Enable it via Steam launch options (`-console`).
#### "No feedback from chat"
- Admin or not, you will not receive feedback from the chat when executing commands. Check the server console for confirmation.
- F5 will show feedback in the console window.
---
# Admin Setup
URL: https://lagless.gg/docs/games/valheim/admin-setup
## Valheim Admin Setup
Setting up admins on your Valheim server lets trusted players manage the server, kick and ban players, and run admin commands.
---
### How Admin System Works
Valheim uses **SteamID64** to identify players. This unique 17-digit number belongs to every Steam account. You need this number to grant admin privileges.
When adding a SteamID, prefix it with `V_` (for example, `V_76561198000000000`). Without this prefix, the admin system won't recognize the player.
---
### Find a Player's SteamID64
#### Method 1: Use steamid.io (Easiest)
1. Go to [steamid.io](https://steamid.io/)
2. Enter the player's Steam profile URL or username
3. Copy the **SteamID64** number (17 digits)
You don't have to restart your server after adding an admin. The changes take effect immediately.
#### Method 2: In-Game with F2
1. Join your Valheim server
2. Press `F2` to open the player list
3. Find the player's **SteamID64** in the list
4. Copy the 17-digit number
### Making you admin
Once you have the SteamID64, format it and add it to the admin list file: `/.config/unity3d/IronGate/Valheim/adminlist.txt`
// List admin players ID ONE per line
V_12345678901234567
---
# World Modifiers
URL: https://lagless.gg/docs/games/valheim/world-modifiers
## Valheim World Modifiers
World Modifiers let you customize Valheim's difficulty and gameplay rules. You can adjust combat difficulty, death penalties, resource rates, raid frequency, and portal behavior.
These become available after you set up admin access on your server. See [Admin Setup](/docs/games/valheim/admin-setup) for instructions.
The modifiers become visible in the F2 menu under **World Modifiers**.
You must be an admin to change world modifiers. See [Admin Setup](/docs/games/valheim/admin-setup) if you haven't set up admin access yet.
---
### Using Modifier Commands
Admins change world modifiers by typing commands in the **in-game chat**. These commands require admin privileges.
---
### Set a Preset
Presets apply a complete set of modifier values at once. Use `setworldpreset` to apply one:
setworldpreset [name]
#### Available Presets
| Preset | Description |
| :--- | :--- |
| `Casual` | No skill loss, relaxed combat. |
| `Easy` | Weaker enemies, reduced skill loss. |
| `Normal` | Default Valheim experience. |
| `Hard` | Stronger enemies, increased skill loss. |
| `Hardcore` | Permadeath. You lose all items and skills on death. |
| `Immersive` | No map, no portals, harder combat. |
| `Hammer` | No build cost, creative-style building. |
Setting a preset overwrites all previously set world modifiers. Apply presets before individual modifiers if you want to combine them.
---
### Set a Single Modifier
Use `setworldmodifier` to change one modifier without affecting others:
setworldmodifier [name] [value]
#### Combat
Adjusts enemy difficulty, damage, and speed.
| Value | Effect |
| :--- | :--- |
| `veryeasy` | Enemies deal 50% damage, you deal 125%. |
| `easy` | Enemies deal 75% damage, you deal 110%. |
| `normal` | Default damage values. |
| `hard` | Enemies deal 150% damage, you deal 85%. |
| `veryhard` | Enemies deal 200% damage, you deal 70%. |
Example:
setworldmodifier combat hard
#### Death Penalty
Controls what you lose when you die.
| Value | Effect |
| :--- | :--- |
| `casual` | Keep equipped gear, lose 1% skill. |
| `veryeasy` | Drop everything, lose 1% skill. |
| `easy` | Drop everything, lose 2.5% skill. |
| `normal` | Drop everything, lose 5% skill. |
| `hard` | Drop equipped, destroy inventory, lose 7.5% skill. |
| `hardcore` | Destroy everything, lose 100% skill (permadeath). |
Example:
setworldmodifier deathpenalty casual
#### Resources
Controls how many resources you get from mobs and lootable objects.
| Value | Effect |
| :--- | :--- |
| `muchless` | 0.5x drop rate. |
| `less` | 0.75x drop rate. |
| `more` | 1.5x drop rate. |
| `muchmore` | 2x drop rate. |
| `most` | 3x drop rate. |
Example:
setworldmodifier resources muchmore
Resource rate does not affect fish, trophies, or boss drops. The game rounds up, so 1.5x effectively equals 2x for many drops.
#### Raids
Controls how often enemies raid your base.
| Value | Effect |
| :--- | :--- |
| `none` | Disable raids entirely. |
| `muchless` | Raids happen rarely. |
| `less` | Raids happen occasionally. |
| `more` | Raids happen often. |
| `muchmore` | Raids happen very often. |
Example:
setworldmodifier raids none
Night raids still occur even when you set raids to `none`.
#### Portals
Controls how portals behave.
| Value | Effect |
| :--- | :--- |
| `casual` | Allow all items through portals. |
| `hard` | Disable portals near bosses. |
| `veryhard` | Disable portals entirely. |
Example:
setworldmodifier portals casual
---
### Reset All Modifiers
Use `resetworldkeys` to reset every world modifier to its default value:
resetworldkeys
This resets all modifiers, not just the ones you changed. Use it only when you want to start fresh with default settings.
This does not reset gameplay progression keys like boss kills or world events.
---
### Common Issues
#### "You are not admin"
- Ensure you're listed as an admin
- Verify the SteamID has the `V_` prefix
#### Command not recognized
- Check for typos
- Commands are not case-sensitive
- Make sure you're typing in the chat or console (not the server console or panel)
#### Can't reset a single modifier
Valheim does not support resetting one modifier at a time. Use `resetworldkeys` to reset everything, or `setworldpreset Normal` to restore defaults.
---
# Vintage Story
URL: https://lagless.gg/docs/games/vintage-story
Description: Low-latency Vintage Story server hosting with mod support
# Vintage Story
---
# Admin Permissions
URL: https://lagless.gg/docs/games/vintage-story/admin-permissions
Description: How to add and manage admins on your Vintage Story server
## Introduction
This guide explains how to assign admin permissions to players on your Vintage Story server. Admins have access to moderation commands for managing the server.
## What Admins Can Do
Admins in Vintage Story have permission to use various commands that help with server moderation, including:
- Kicking and banning players
- Changing game modes
- Teleporting players
- Using cheat commands
- Managing server settings
## Assigning Admin Permissions
You can grant admin permissions using the `op` command through your server's console.
1. **Access your control panel** and navigate to your Vintage Story server.
2. **Start your server** if it's not already running.
3. **Go to the Console** section in your control panel.
4. **Enter the command**: `/op `
- Replace `` with the exact username of the player you want to make an admin.
5. **Press Enter** to execute the command.
The player will now have admin permissions the next time they join the server.
## Removing Admin Permissions
To remove admin permissions from a player:
1. **Go to the Console** in your control panel.
2. **Enter the command**: `/player role suplayer`
- Replace `` with the player's exact username.
This command changes the player's role to "suplayer" (super player), which removes their admin privileges. The player will lose admin permissions on their next login.
## Using Admin Commands In-Game
Once a player has admin permissions, they can use commands directly in the game chat by typing them with a `/` prefix.
For a full list of available admin commands, refer to the [Vintage Story Wiki](https://wiki.vintagestory.at/index.php/List_of_server_commands#Commands_for_Moderators_and_Admins).
## Best Practices
- **Grant admin sparingly**: Only give admin permissions to trusted players.
- **Monitor usage**: Keep an eye on server logs for admin command usage.
- **Regular reviews**: Periodically review who has admin access and remove it if needed.
---
# Connecting to Your Vintage Story Server
URL: https://lagless.gg/docs/games/vintage-story/connecting
Description: Learn how to connect to your Vintage Story server via direct connect or the in-game server list
## Introduction
Once you have finished configuring your Vintage Story server, you can start your server for players to connect and play. Vintage Story allows players to connect via direct connection or via the in-game server list.
## Obtaining Server Information
You'll find the required information from your Vintage Story server's control panel to join your server.
- **IP Address**: Can be found on the home page of the control panel

- **Server Name**: Configured in your `serverconfig.json` (see [Server Setup Guide](/docs/games/vintage-story/server-setup#initial-server-configuration))
## Direct Connect
You can connect to your server using direct connect by adding the server to your favorites.
Launch Vintage Story and click **Multiplayer** from the main menu
Click **Add New Server** to create a new server entry
Enter your server's IP address and port (format: `IP:Port`)
Optionally, give it a custom name for easy identification
*Note: This is for your reference only and doesn't need to match the server's actual name*
Click **Add Server** to save the entry
Select your server from the list and click **Connect**
## Browsing Server List
You can use your server name to search the server list for your Vintage Story server.
Launch Vintage Story and click **Multiplayer** from the main menu
Click **Browse Public Servers** to open the server browser
Use the search bar to enter your server's name
Locate your server in the results list
Click your server and then click **Connect**
---
# Mod Installation
URL: https://lagless.gg/docs/games/vintage-story/mod-installation
Description: How to install and manage mods on your Vintage Story server
# Vintage Story Mod Installation Guide
Learn how to install, configure, and manage mods on your Vintage Story server. This guide covers everything from basic mod installation to advanced modpack management.
## Understanding Vintage Story Mods
Vintage Story mods come in different formats:
- **`.cs` files** - Source code mods
- **`.dll` files** - Compiled mods
- **`.zip` files** - Asset mods (textures, sounds, etc.)
## Correct Installation Location
**Critical**: Install mods in the correct directory for proper functionality.
### Server-Side Mods
**Install in**: `data/Mods` folder
- **✅ Correct**: `data/Mods`
- **❌ Wrong**: `/Mods/` (root folder)
The `data/Mods` folder is where the server looks for mods during startup.
## Installing Mods
### Method 1: File Manager (Recommended)
1. **Access File Manager** in your server panel
2. **Navigate** to `data/Mods`
3. **Upload** your mod files directly to this folder
4. **Restart** your server to load the mods
### Method 2: FTP/SFTP
1. **Connect** to your server via FTP/SFTP
2. **Navigate** to `data/Mods`
3. **Upload** mod files
4. **Restart** server
### Installation Steps
**Download mods** from reputable sources like the [Vintage Story Mod Database](https://mods.vintagestory.at/)
**Upload to server** - Place files in `data/Mods`
**Install configs** - Add any required configuration files
**Restart server** - Allow mods to load properly
**Test functionality** - Join server and verify mods work
## Mod Configuration
### Installing Mod Configs
Many mods require configuration files:
1. **Locate config files** - Usually named `ModConfig` or similar
2. **Upload to server** - Place in `data/Mods`
3. **Match file names** - Ensure configs match mod requirements
4. **Restart server** - Load new configurations
### Transferring Singleplayer Configs
If you have working configs from singleplayer:
1. **Find local configs** - Check your Vintage Story installation folder
2. **Copy ModConfig files** - Transfer to your server
3. **Upload via panel** - Place in `data/Mods`
4. **Verify settings** - Check that configs applied correctly
## World Generation Mods
⚠️ **Important**: Mods that affect world generation must be installed **before** creating a new world.
### Installation Order
1. **Install world-gen mods first**
2. **Delete existing world data** (if needed)
3. **Start server** to generate new world
4. **Verify generation** - Check that modded content appears
### Common World-Gen Mods
- **Terrain generation** - New biomes, structures
- **Ore distribution** - Additional minerals
- **Plant/tree mods** - New flora
- **Weather systems** - Climate modifications
## Client-Side Considerations
### Automatic Mod Distribution
- **Server-side mods** are automatically provided to clients
- **Players don't need** to manually install most mods
- **Clients download** required mods when connecting
### Manual Client Installation
Some mods may require client-side installation:
- **Check mod documentation** for requirements
- **Inform players** of manual installation needs
- **Provide download links** for required mods
## Modpack Management
### Creating a Modpack
1. **Plan your modpack** - List all desired mods
2. **Check compatibility** - Ensure mods work together
3. **Test locally** - Verify modpack in singleplayer
4. **Document versions** - Keep track of mod versions
### Installing Modpacks
1. **Download all mods** from the modpack list
2. **Upload to server** - Place all files in `data/Mods`
3. **Install configs** - Add all configuration files
4. **Generate new world** - Create world with modpack content
## Troubleshooting Mods
### Common Issues
#### Mods Not Loading
**Check:**
- Files are in correct directory (`data/Mods`)
- Server has been restarted after installation
- Mods are compatible with server version
#### Server Crashes
**Solutions:**
- Check server logs for specific error messages
- Remove recently added mods to isolate issues
- Verify mod compatibility with each other
#### Config Errors
**Fix:**
- Ensure config files are properly formatted
- Check for typos in configuration values
- Restore default configs if needed
### Performance Issues
**Optimization:**
- Remove unnecessary mods to reduce load
- Check for resource-heavy mods
- Monitor server performance metrics
- Consider upgrading server resources
## Best Practices
### Before Installing Mods
1. **Backup your server** - Always backup before making changes
2. **Research mods** - Read documentation and reviews
3. **Check compatibility** - Verify mod versions match server
4. **Test individually** - Install mods one at a time for testing
### Mod Management
1. **Keep documentation** - Maintain a list of installed mods
2. **Regular updates** - Check for mod updates periodically
3. **Monitor logs** - Watch for mod-related errors
4. **Backup configs** - Save working configuration files
## Popular Mod Categories
### Gameplay Enhancement
- **Quality of life** improvements
- **User interface** modifications
- **Inventory management** tools
### Content Expansion
- **New items** and recipes
- **Additional creatures** and entities
- **Extended crafting** systems
### World Modification
- **Terrain generation** changes
- **New biomes** and structures
- **Weather and climate** systems
## Getting Help
### Mod-Specific Issues
1. **Check mod documentation** - Read the mod's instructions
2. **Visit mod forums** - Look for community solutions
3. **Contact mod author** - Report bugs to developers
### Server Issues
1. **Check server logs** - Look for error messages
2. **Contact support** - Include your Support ID
3. **Provide details** - List installed mods and error messages
## Additional Resources
- [Vintage Story Mod Database](https://mods.vintagestory.at/)
- [Official Modding Wiki](https://wiki.vintagestory.at/index.php?title=Adding_mods)
- [Modding Community Discord](https://discord.gg/vintagestory)
- [Mod Development Guide](https://wiki.vintagestory.at/Modding:Getting_Started)
Remember to always test mods in a development environment before installing them on your production server!
---
# Server Setup Guide
URL: https://lagless.gg/docs/games/vintage-story/server-setup
Description: Complete guide to setting up and configuring your Vintage Story server
# Vintage Story Server Setup Guide
This guide will walk you through setting up your Vintage Story server on Lagless.gg, including version management and initial configuration.
## Changing Game Version
Vintage Story servers default to the **latest version**. If you need a specific version (like 1.20.10 for modpack compatibility):
1. Navigate to your server's **Settings** page
2. Scroll down to find the version settings
3. Enter your desired version (e.g., `1.20.10`)
4. **Important**: Scroll down and click **"Re-install"** to actually change the version
5. Wait for the reinstallation process to complete
Starting from version 1.21 Vintage Story requires the .net 8 Desktop Runtime, while older requires 7.
### Verifying Your Version
To confirm your server is running the correct version:
1. Start your server
2. Join the game
3. Use the command: `/info created version`
4. This will show you what version the world was created with
## Initial Server Configuration
### Basic Settings
After installing Vintage Story, you'll want to configure basic server settings:
1. Navigate to **File Manager** in your panel
2. Open `serverconfig.json`
3. Configure the following key settings:
```json
{
"ServerName": "Your Server Name",
"WelcomeMessage": "Welcome to our server!",
"MaxClients": 16,
"Password": "",
"WorldName": "MyWorld",
"OnlyWhitelisted": false,
"AdvertiseServer": false
}
```
#### Server Visibility
To make your server appear on the public server list (so players can find it via the in-game browser), set `"AdvertiseServer": true` in `serverconfig.json`. If you want a private server, set it to `false`.
### World Generation Settings
Configure world generation in the `WorldConfig` section of `serverconfig.json`:
- **WorldType**: `standard` or `creative`
- **WorldSize**: Size of the world (larger = more exploration)
- **MapSizeY**: World height (affects mountain height)
## Starting Your Server
1. **Start the server** from your control panel
2. **Monitor the console** for any startup errors
3. **Check server logs** if issues occur
4. **Test connection** by joining with your client
### First-Time Setup
When starting for the first time:
1. The server will generate a new world (this takes time)
2. Wait for the message "Server started" in console
3. Join the server to test connectivity
4. [Configure admin permissions](/docs/games/vintage-story/admin-permissions) if needed
## Performance Optimization
### Memory Allocation
For optimal performance:
- **Small servers (1-4 players)**: 2-4GB RAM
- **Medium servers (5-8 players)**: 4-6GB RAM
- **Large servers (9+ players)**: 6GB+ RAM
### JVM Arguments
Vintage Story runs on .NET, but you can optimize performance through server settings:
```json
{
"TickTime": 50,
"MaxChunkRadius": 8,
"MaxConcurrentSaves": 2
}
```
## Best Practices
### Before Going Live
1. **Test locally** - Verify your configuration works
2. **Set up backups** - Configure automatic backups in the panel
3. **Plan your world** - Decide on world settings before generating
4. **Document settings** - Keep notes on your configuration
### Server Management
1. **Regular restarts** - Schedule daily restarts for stability
2. **Monitor logs** - Watch for errors or warnings
3. **Update carefully** - Test updates on a backup first
4. **Backup frequently** - Use the panel's backup feature
## Common Issues
### Server Won't Start
**Check for:**
- Invalid JSON in `serverconfig.json`
- Insufficient memory allocation
- Port conflicts
- Missing files after version change
### Connection Issues
**Troubleshoot:**
- Verify server is running
- Check firewall settings
- Confirm version compatibility
- Test with different clients
### Performance Problems
**Solutions:**
- Reduce max chunk radius
- Lower max concurrent players
- Increase memory allocation
- Check for resource-heavy mods
## Getting Help
If you encounter issues:
1. **Check server logs** - Look for specific error messages
2. **Join our Discord** - Get help from staff and community
3. **Contact support** - Open a ticket with your Support ID
4. **Include details** - Provide logs, error messages, and reproduction steps
For immediate assistance, mention your **Support ID** when contacting staff.
## Next Steps
Once your server is running:
- [Install mods](/docs/games/vintage-story/mod-installation) to customize gameplay
- [Configure advanced settings](/docs/games/vintage-story/troubleshooting) for optimal performance
- Invite friends and start your Vintage Story adventure!
---
# Troubleshooting
URL: https://lagless.gg/docs/games/vintage-story/troubleshooting
Description: Common issues and solutions for Vintage Story servers
# Vintage Story Troubleshooting Guide
This guide covers common issues you may encounter with your Vintage Story server and provides step-by-step solutions.
## Server Configuration Errors
### JSON Parsing Errors
If you encounter errors like:
```
Failed to read serverconfig.json
Exception: After parsing a value an unexpected character was encountered: ". Path 'WorldConfig.WorldConfiguration', line 193, position 4.
```
**Common Causes:**
- Extra commas in JSON
- Missing quotes around values
- Incorrect bracket placement
- Invalid characters
**Solutions:**
1. **Validate JSON syntax** - Use an online JSON validator
2. **Check for extra commas** - Remove trailing commas
3. **Verify quotes** - Ensure all strings are properly quoted
4. **Restore backup** - Use a known working configuration
### Configuration Best Practices
Always backup your `serverconfig.json` before making changes!
## Performance Issues
### Server Overload Warnings
**Warning Message:**
```
Server overloaded. A tick took 793ms to complete.
```
### When This Is Normal
**During server startup:**
- ✅ World generation process
- ✅ Mod loading and initialization
- ✅ Asset loading
- ✅ Initial chunk generation
**Expected Duration:** 2-10 minutes depending on world size and mods
### When to Be Concerned
**During regular gameplay:**
- ❌ Persistent warnings after startup
- ❌ Warnings every few seconds
- ❌ Player lag and disconnections
- ❌ Slow response to commands
### Performance Solutions
#### Memory Optimization
**Increase server RAM:**
- Small servers (1-4 players): 2-4GB
- Medium servers (5-8 players): 4-6GB
- Large servers (9+ players): 6GB+
#### Server Settings
Optimize in `serverconfig.json`:
```json
{
"TickTime": 50,
"MaxChunkRadius": 8,
"MaxConcurrentSaves": 2,
"SaveInterval": 300
}
```
#### Mod Optimization
- **Remove unnecessary mods** - Reduce server load
- **Check mod compatibility** - Some mods conflict
- **Update mods** - Newer versions often perform better
- **Monitor resource usage** - Identify heavy mods
## Connection Issues
### Players Can't Connect
#### Version Mismatch
**Check server version:**
1. Join your server
2. Run command: `/info created version`
3. Compare with client version
**Fix version issues:**
1. Navigate to server **Settings**
2. Change version number
3. Click **"Re-install"**
4. Wait for installation to complete
#### Server Status
**Verify server is running:**
- Check control panel status
- Look for "Server started" in console
- Test connection from different clients
#### Firewall/Port Issues
**Check connectivity:**
- Verify server ports are open
- Test from different networks
- Check DDoS protection settings
### Frequent Disconnections
**Common causes:**
- Network instability
- Server overload
- Memory issues
- Mod conflicts
**Solutions:**
- Increase server resources
- Check network stability
- Review server logs for errors
- Remove problematic mods
## Startup Issues
### Server Won't Start
#### Memory Issues
**Error signs:**
- OutOfMemory exceptions
- Startup crashes
- Slow initialization
**Solutions:**
- Increase allocated RAM
- Reduce world size
- Remove heavy mods
- Clear temporary files
#### File Corruption
**Symptoms:**
- Missing file errors
- Corrupted world data
- Invalid configuration
**Recovery:**
- Restore from backup
- Verify file integrity
- Re-download server files
- Regenerate world if necessary
### Slow Startup
**Optimization tips:**
1. **Pre-generate chunks** - Reduce initial load
2. **Limit mods** - Remove unnecessary ones
3. **SSD storage** - Faster file access
4. **More RAM** - Reduce disk swapping
## World Generation Issues
### Missing Modded Content
**Problem:** Mods installed but content not appearing in world
**Solution:**
1. **Install mods BEFORE world generation**
2. **Delete existing world data**
3. **Restart server to generate new world**
4. **Verify mods are loading correctly**
### Corrupted World
**Symptoms:**
- Strange terrain generation
- Missing chunks
- Player spawn issues
**Recovery:**
1. **Restore world backup** - If available
2. **Regenerate world** - Delete world folder
3. **Check mod compatibility** - Remove conflicting mods
## Mod-Related Issues
### Mods Not Loading
**Checklist:**
- ✅ Files in `/VintagestoryData/Mods/` directory
- ✅ Server restarted after installation
- ✅ Mods compatible with server version
- ✅ No file permission issues
### Mod Conflicts
**Identifying conflicts:**
1. Check server logs for errors
2. Remove mods one by one
3. Test server stability
4. Document problematic combinations
**Prevention:**
- Research mod compatibility
- Install mods gradually
- Keep detailed mod lists
- Regular backups before changes
## Log Analysis
### Reading Server Logs
**Key locations:**
- Server console output
- Log files in server directory
- Error logs in panel
**Important log entries:**
- Startup sequence
- Error messages
- Performance warnings
- Mod loading status
### Common Error Patterns
**Memory errors:**
```
OutOfMemoryException
GC overhead limit exceeded
```
**Mod errors:**
```
Failed to load mod: [ModName]
Mod compatibility issue
```
**Configuration errors:**
```
Invalid configuration value
JSON parsing error
```
## Getting Help
### Information to Gather
Before contacting support:
1. **Server logs** - Copy relevant error messages
2. **Support ID** - Found in your panel
3. **Mod list** - Document installed mods
4. **Steps to reproduce** - How the issue occurs
5. **Server specifications** - RAM, CPU, storage
### Contact Options
**Discord Support:**
- Join the Lagless Discord
- Mention your Support ID
- Provide detailed information
**Support Ticket:**
- Open ticket through panel
- Include all relevant details
- Attach log files if requested
### Self-Help Resources
- [Official Vintage Story Wiki](https://wiki.vintagestory.at/)
- [Community Forums](https://www.vintagestory.at/forums/)
- [Modding Discord](https://discord.gg/vintagestory)
- Server console logs and error messages
## Preventive Measures
### Regular Maintenance
1. **Schedule restarts** - Daily server restarts
2. **Monitor performance** - Check resource usage
3. **Update regularly** - Keep mods and server updated
4. **Backup frequently** - Automated backup schedules
### Best Practices
1. **Test changes** - Use development server first
2. **Document configurations** - Keep notes on settings
3. **Monitor logs** - Regular log review
4. **Plan updates** - Schedule maintenance windows
Most issues can be prevented with regular maintenance and careful change management. Always backup before making significant changes!
---
# How to Whitelist a Vintage Story Server
URL: https://lagless.gg/docs/games/vintage-story/whitelist-server
Description: Learn how to whitelist in Vintage Story to create a safe and enjoyable multiplayer environment for your server
## Introduction
This guide will help you set up a whitelist for your Vintage Story server to create a safe and enjoyable multiplayer environment. By only allowing specific players to join, server admins can prevent griefing and other forms of misconduct.
**Note:** The whitelist is enabled by default on Vintage Story 1.20+.
## Prerequisites
- A Vintage Story server hosted on Lagless
- Admin access to your server
- Access to the [Lagless Panel](https://panel.lagless.gg)
## Whitelist Commands
### Console Commands
You can manage your whitelist through the server console in the Lagless Panel:
1. Log in to the [Lagless Panel](https://panel.lagless.gg)
2. Navigate to your Vintage Story server
3. Go to the **Console** tab
4. Enter the desired command
| Command | Description |
|---------|-------------|
| `/whitelist on` | Enables the server whitelist |
| `/whitelist off` | Disables the server whitelist |
| `/whitelist add [playername]` | Adds a player to the whitelist |
| `/whitelist remove [playername]` | Removes a player from the whitelist |
### In-Game Commands
If you're an admin in the game, you can also manage the whitelist from the chat:
1. **Join** the game as an admin
2. From the **chatbox**, enter the desired command
| Command | Description |
|---------|-------------|
| `/player [playername] whitelist add` | Adds the desired player to the whitelist |
| `/player [playername] whitelist remove` | Removes the player from the whitelist |
**Note:** Console commands will also work for admins in-game.
## Step-by-Step Guide
### Enabling the Whitelist
1. Access your server console through the Lagless Panel
2. Type `/whitelist on` and press Enter
3. The whitelist is now active
### Adding Players to the Whitelist
1. In the console or in-game chat, use: `/whitelist add [playername]`
2. Replace `[playername]` with the exact username of the player you want to add
3. The player will now be able to join your server
### Removing Players from the Whitelist
1. In the console or in-game chat, use: `/whitelist remove [playername]`
2. Replace `[playername]` with the exact username of the player you want to remove
3. The player will no longer be able to join your server
### Disabling the Whitelist
1. In the console, type `/whitelist off` and press Enter
2. The whitelist is now disabled and any player can join
---
# World Configuration and Generation Settings
URL: https://lagless.gg/docs/games/vintage-story/world-configuration
Description: Learn how to configure world generation settings like landcover, oceanscale, and other terrain parameters for your Vintage Story server
## Introduction
This guide will help you understand and configure world generation settings for your Vintage Story server. You'll learn how to modify terrain parameters like landcover, oceanscale, and other world generation options to create the perfect environment for your players.
## Understanding World Configuration
World generation settings in Vintage Story can be configured using console commands. This is the most reliable method for modifying terrain parameters on your server.
## Available World Generation Parameters
### Common World Configuration Options
| Parameter | Description | Default Value |
|-----------|-------------|---------------|
| `landcover` | Controls the amount of land vs ocean | 0.7 |
| `oceanscale` | Controls ocean size and distribution | 1.25 |
| `upheavalCommonness` | Frequency of terrain upheavals | 0.3 |
| `landformScale` | Scale of land formations | 1.2 |
| `temporalStability` | Temporal storm frequency | 0.5 |
| `temporalRifts` | Temporal rift frequency | 0.3 |
## Configuring World Generation
### Using Console Commands (Recommended)
The most reliable way to configure world generation is through console commands:
1. **Access your server console** through the [Lagless Panel](https://panel.lagless.gg)
2. **Use the `/worldconfig` command** to set parameters:
```
/worldconfig landcover 0.7
/worldconfig oceanscale 1.25
/worldconfig upheavalCommonness 0.3
/worldconfig landformScale 1.2
```
3. **Regenerate terrain** with the new settings:
```
/wgen regen
```
Replace `` with the number of chunks to regenerate (e.g., `100`)
**Important:** This only affects newly generated chunks, not existing ones. You may see sharp chunk seams between old and new terrain.
### Creating Custom Worlds in Single-Player
For new worlds with custom settings from the start:
1. **Open Vintage Story** in single-player mode
2. **Go to "Customize World"** in the world creation menu
3. **Set your desired values** for:
- Landcover
- Oceanscale
- Landform Scale
- Upheaval Commonness
- Temporal Stability
- Temporal Rifts
4. **Save and close** the world
5. **Copy the world files** to your server:
- Navigate to your single-player save directory
- Copy the entire world folder
- Paste it into your server's `data/Saves/` directory
6. **Start your server** - it will now use the custom generation settings
## Step-by-Step Guide: Using Console Commands
### For Existing Worlds
1. **Log into the [Lagless Panel](https://panel.lagless.gg)**
2. **Navigate to your Vintage Story server**
3. **Go to the Console tab**
4. **Set your desired world configuration**:
```
/worldconfig landcover 0.8
/worldconfig oceanscale 1.0
/worldconfig upheavalCommonness 0.2
```
5. **Regenerate terrain** to apply changes:
```
/wgen regen 50
```
### For New Worlds
1. **Create world in single-player** with custom settings
2. **Copy world files** to server's save directory
3. **Start server** with the custom world
## Troubleshooting
### Common Issues
| Issue | Solution |
|-------|----------|
| Settings not taking effect | Make sure to use `/wgen regen` after setting worldconfig values |
| Sharp terrain seams | This is normal when regenerating chunks in existing worlds |
| Can't find world files | Check the `data/Saves/` directory in your server files |
### Best Practices
- **For existing worlds**: Use console commands with `/wgen regen`
- **For new worlds**: Create in single-player mode first
- **Always backup** your world before making changes
- **Test settings** in single-player before applying to server
## Summary
| Your Situation | Best Approach |
|----------------|---------------|
| Existing world with players | Use `/worldconfig` commands + `/wgen regen` |
| Want custom world from the start | Generate in single-player, customize via UI, then move world to server |
| Modifying terrain parameters | Console commands are the most reliable method |
## Conclusion
By following this guide, you can effectively configure your Vintage Story server's world generation settings using console commands. Whether you're working with an existing world or starting fresh, these methods will help you create the perfect environment for your players.
Console commands are the most reliable and straightforward way to modify world generation parameters on your Vintage Story server.
---
# Server Troubleshooting
URL: https://lagless.gg/docs/troubleshooting
Description: Quickly resolve any server issues
# Server Troubleshooting
---
# Traceroutes
URL: https://lagless.gg/docs/troubleshooting/traceroutes
Description: A network tool used to show the routes from you to our servers (or vice versa)
# Benefits of an MTR
Nobody likes a laggy server, and in case of network issues, traceroute analysis will assist us in finding the issue between the
client (your network) and the server (Lagless infrastructure). From the MTR results, we will be able to determine if the issue
originates with an Internet Service Provider (ISP), Lagless infrastructure or another internet provider along the route.
Upon submitting a ticket, we'd ask for this information to better assist with your issues.
Most MTR outputs look similar or almost the same. For reference, you can use
the MTR from Linux to compare with yours if you are using Windows or MacOS
## Installation
### Windows
We recommend downloading and running WinMTR. Once you unzip the download, you may run the proper executable depending on your system bit (x32 vs x64).
Download a copy of WinMTR from the SourceForge website.
Upon opening the program, you would input your host (IP of Lagless server) and hit start.
### MacOS
You'll need to install Homebrew, a package manager for macOS. Paste this into Terminal and afterwards you can install MTR with the second command.
```bash
/bin/bash -c "$(curl -fsSL https://raw.githubusercontent.com/Homebrew/install/HEAD/install.sh)"
brew install mtr
```
### Linux
Depending on your distro of choice, you can use either command. Should you use snap, you can install MTR through that too.
```bash tab
sudo apt-get install mtr
```
```bash tab
sudo yum install mtr
```
```bash tab
sudo snap install mtr
```
## Output Analysis
If you are using MacOS/Linux, you can run `mtr 23.167.232.1` or your server IP and should receive something similar to this.
```bash
ams-01 (89.37.98.230) -> 23.167.232.1 (23.167.232.1) 2025-06-07T21:53:49-0400
Host Loss% Snt Last Avg Best Wrst StDev
1. 89.37.98.225 0.0% 23 0.1 0.1 0.1 0.2 0.0
2. 45.152.39.180 0.0% 23 0.5 0.6 0.5 0.7 0.0
3. ar1.ams2.backbone.direct 0.0% 23 0.6 0.6 0.6 0.8 0.0
4. neoprotect.era-ix.net 0.0% 23 0.4 0.4 0.4 0.5 0.0
5. filter.ams-02.neoprotect.as199414.net 0.0% 23 0.4 0.4 0.3 0.4 0.0
6. core.ams-01.neoprotect.as199414.net 0.0% 23 0.5 0.5 0.4 0.6 0.0
7. core.dal-01.neoprotect.as199414.net 0.0% 23 107.2 107.1 107.1 107.2 0.0
8. lo.cr1-dal1-us.as62553.net 0.0% 22 106.1 106.2 106.1 106.3 0.1
```
From here, this shows that your ISP went through Backbone.Direct to NeoProtect's infrastructure lastly ending at our Dallas network.
In this example, you can see that the latency in Amsterdam is \<1 ms however when the route goes from NeoProtect in Amsterdam to Dallas, that's where the latency jumps.
This is more common because we're traveling overseas. If you are running an MTR from the same region, that latency would be a lot better.
---
# Using the Panel
URL: https://lagless.gg/docs/using-the-panel
Description: Learn how to effectively navigate and use the Lagless.gg control panel
# Using the Panel
---
# Backups
URL: https://lagless.gg/docs/using-the-panel/backups
Description: Making backups easy with lagless. In this article we're going to explore multiple options.
## Automatic Backups.
Did you forget to make a backup? No problem, we've got you covered. Lagless makes automatic backups daily.
1. You can find these on the **backups** tab on the left.
2. From here look for a section named **Automatic Backups**. marked in red.
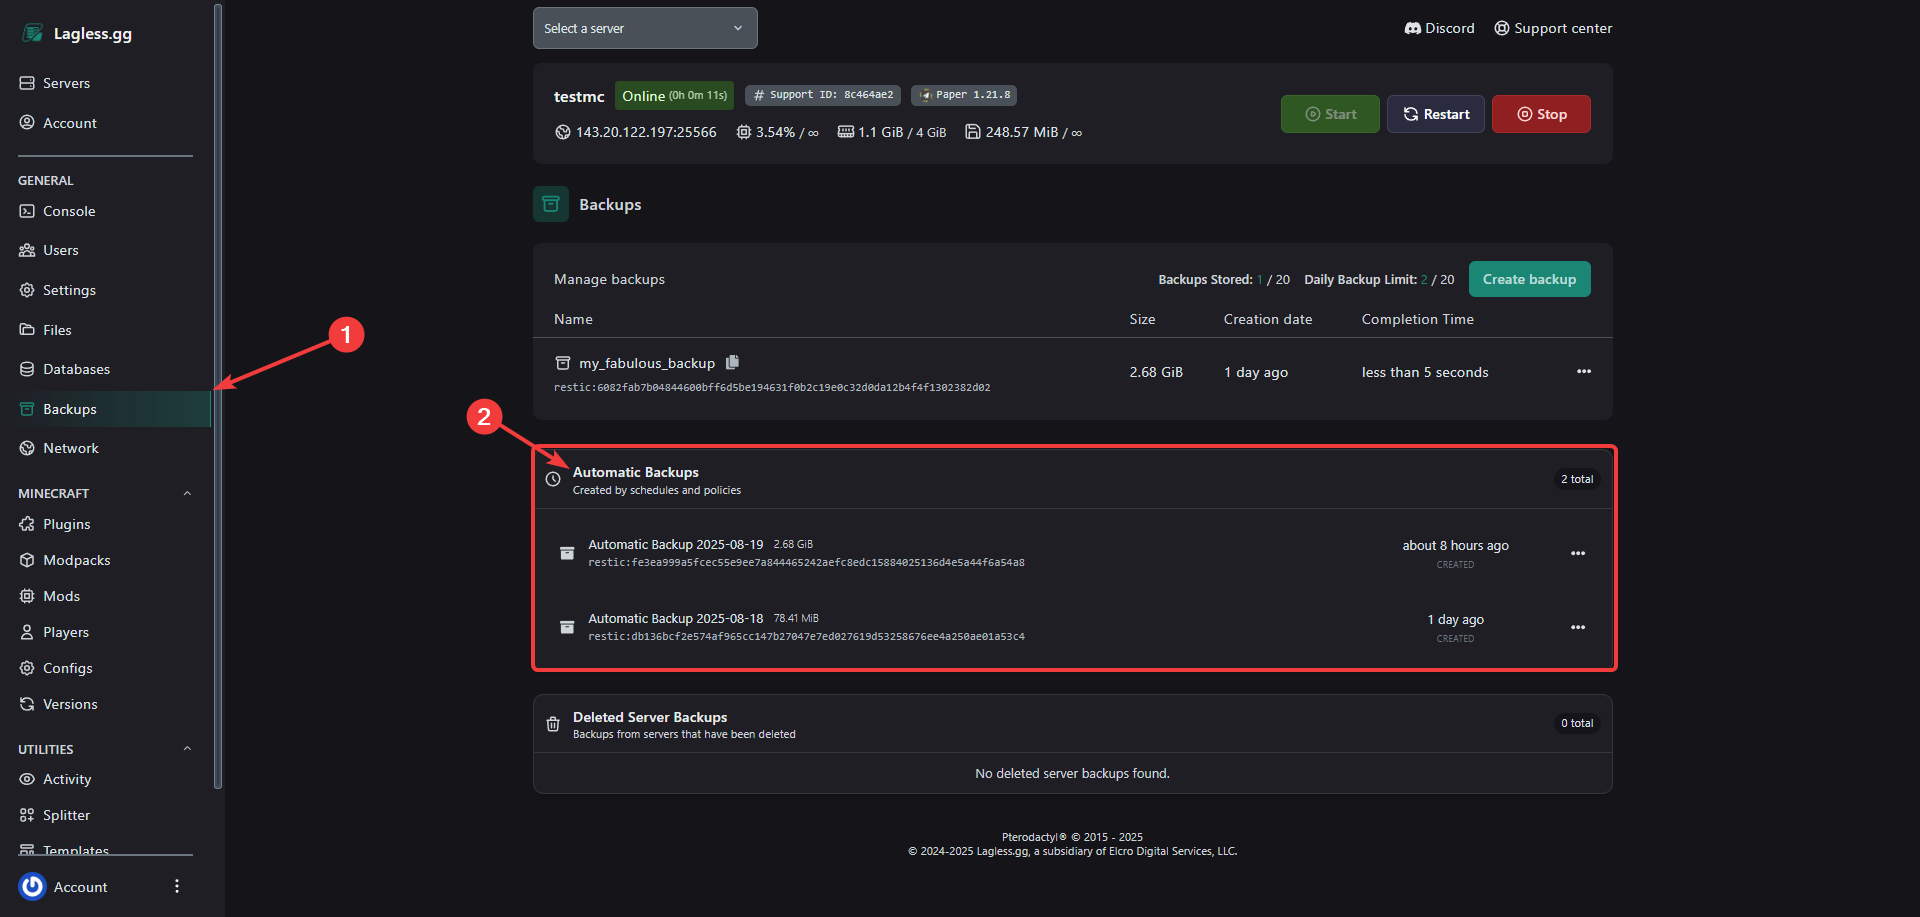
### Manual backup.
1. Select the tab **Backups** from the left side.
2. Click the **Create Backup** button.
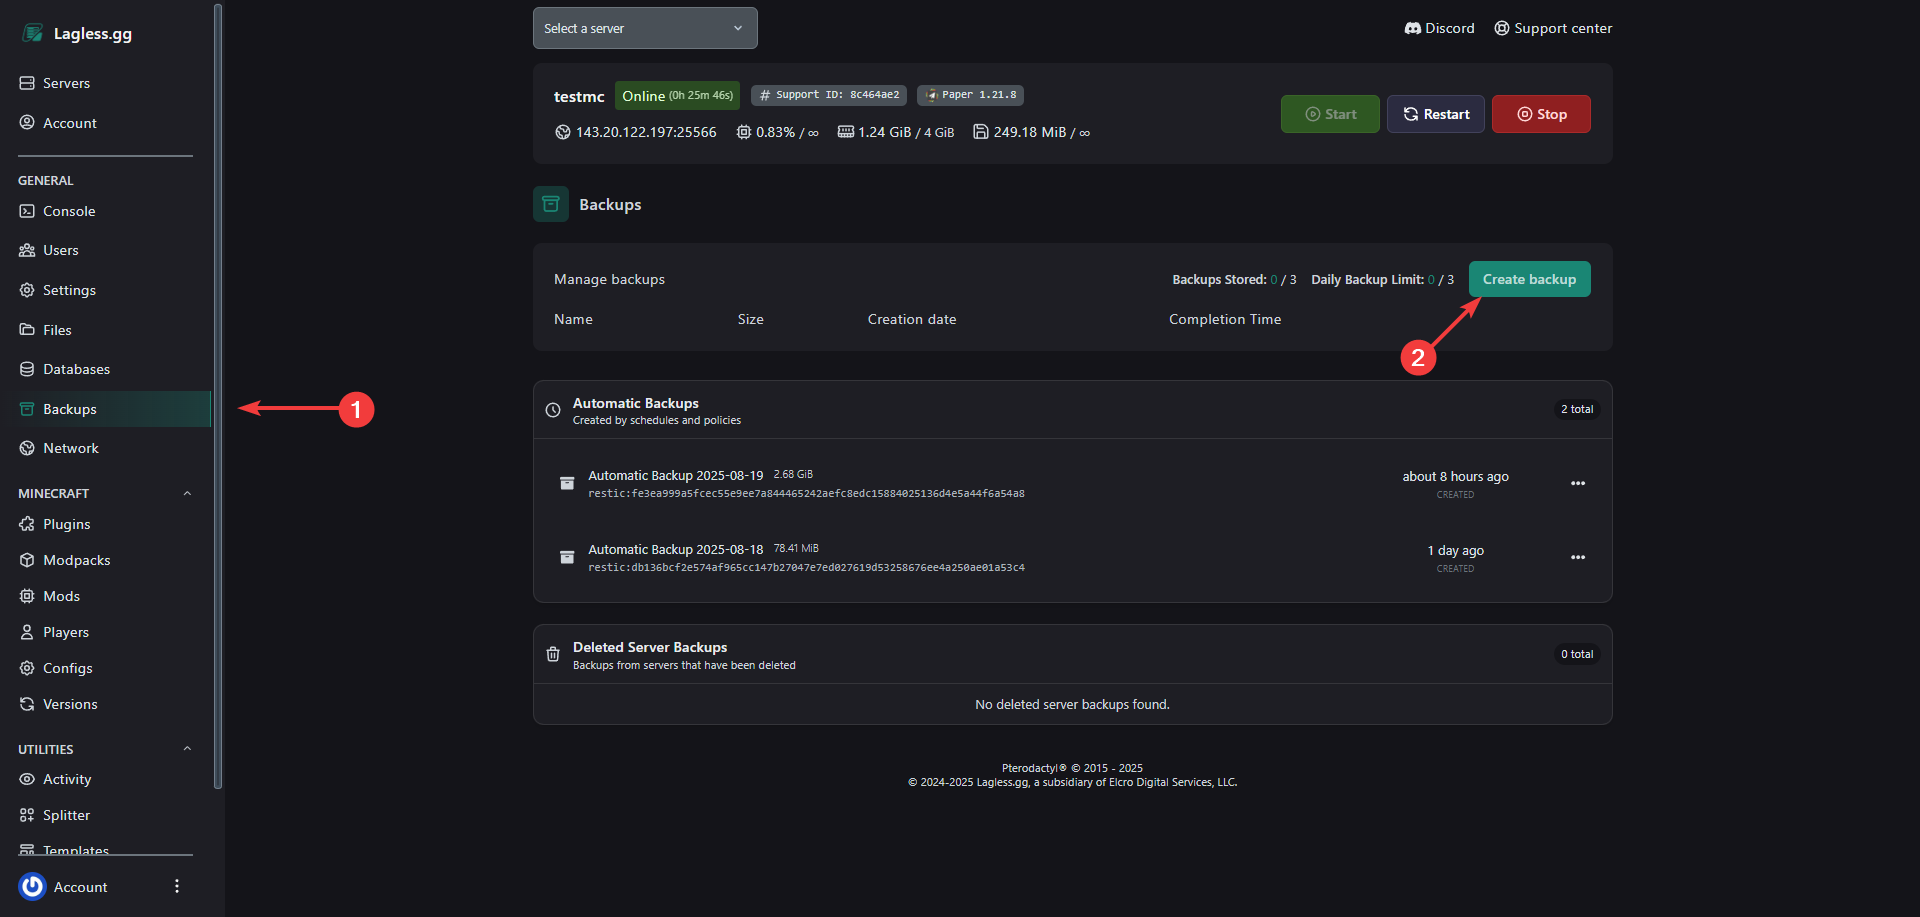
3. Name your backup, or leave it empty. In this example we named it my_fabulous_backup.
4. Click **Start backup**
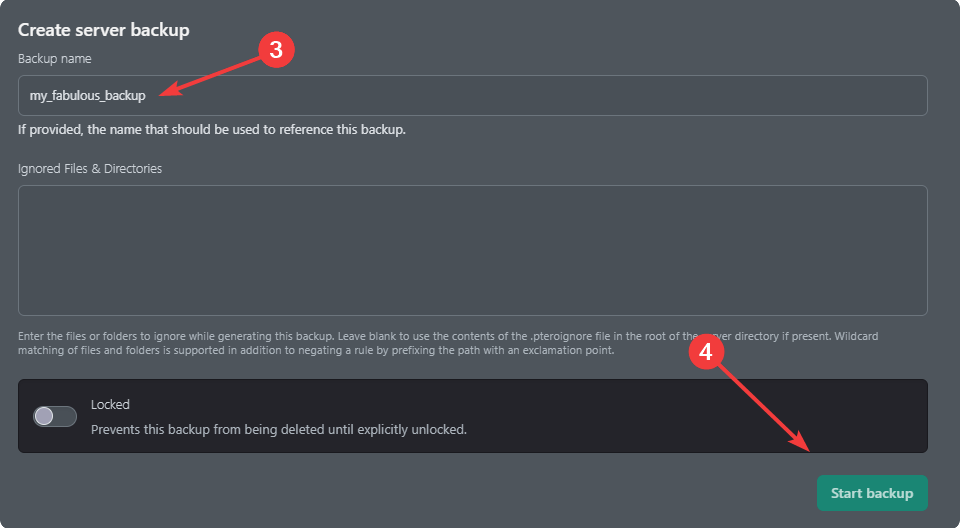
Depending on the size of the backup, it may take a few minutes to complete.
You now have a backup of all files.

## Scheduled backups.
Scheduled backups can be ideal for when you want to plan for it, such as during the night when there are fewer players online.
Near the end you can find examples of time.
1. To do so, head to the **settings** tab on the left.
2. from here, look for the **Schedules** section.
3. Press **Create Schedule**
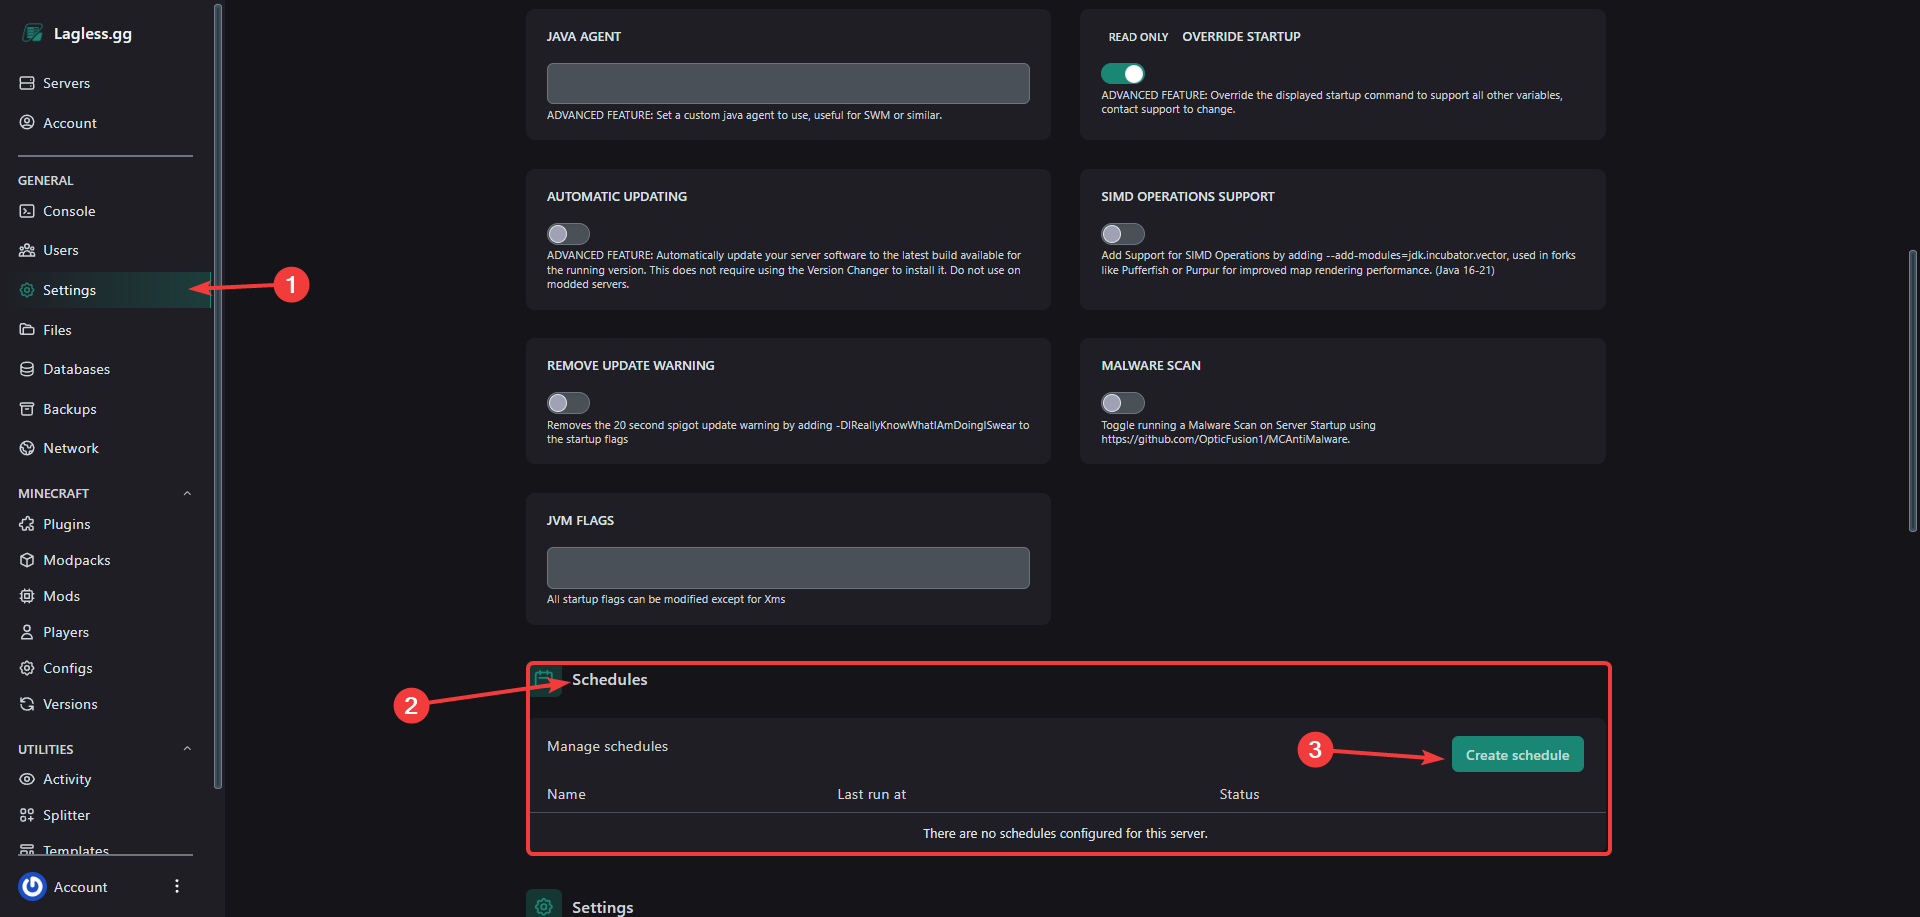
4. start by giving your schedule a name something that makes sense to you. For this example we're going to call it **My_scheduled_backup**
You can enable the **Cheatsheet** if you need an example. The tool on this website may also help you [crontab](https://crontab.cronhub.io/)
5. Now we need to tell it when to do the backup. In the example below, it's set to every 12 hours. More about time settings below.
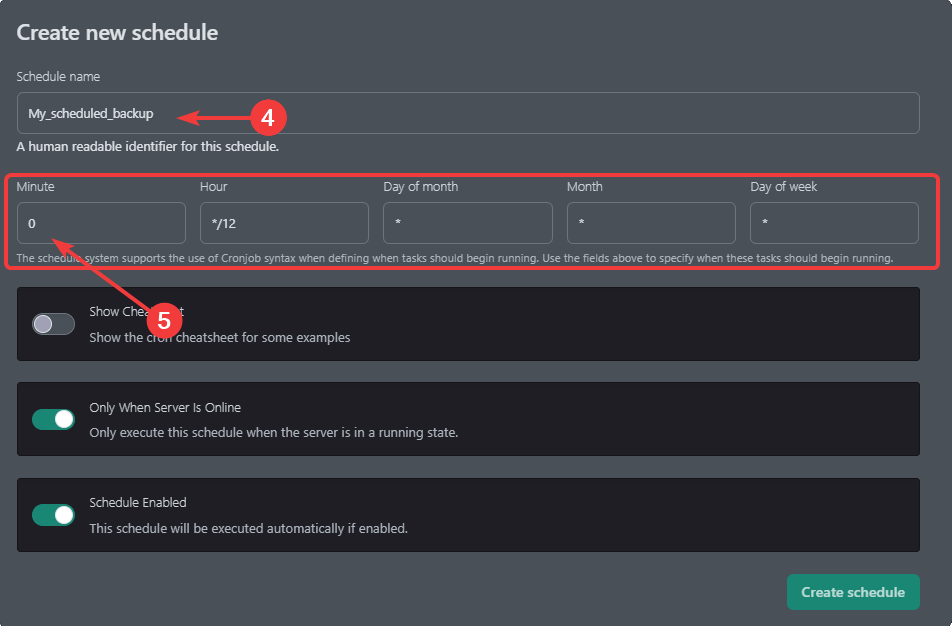
### Schedule time understanding
Understanding what values to enter may seem daunting at first. So let's go over it.
This table shows the possible values
Time - possible values
Minute - 0-59
Hour - 0-23
Day of The Month - 1 - 31
Month - 1-12
Day of week - 0 - 6, with 0 being Monday, 1 Tuesday etc..
* Using * Means every **Minute**, **hour**, **Day of month**, **Month**, **Day of week**. Which ever comes first.
* **/** Means every x hours. So if you were to do */5 in **Minute**, it would do the task every 5 minutes. Or */4 hour, it would do the task every 4 hours.
* **-** Means it runs at every **Minute**, **hour**, **Day of month**, **Month**, **Day of week** within the range set. For example "* 8-12 * * *"means we run our task at hour "8,9,10,11,12"
* **,** Means you run it at all values separated by a ",". So if you want to run a task every 15 minutes, you would use "* 15,30,45,0 * * *"
To give a complex example of all of this
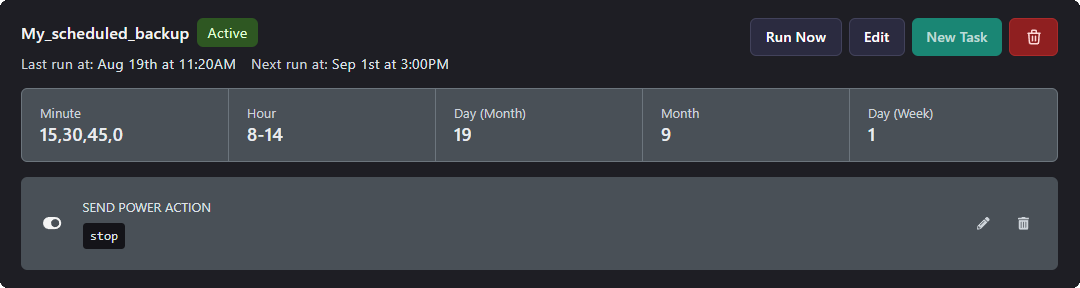
This task would run every 15 minutes, between 8:00 and 14:00, if it's day 19 of the month September, but **ONLY** if it's day 1 of the week, which is Monday. If all of these don't align, it will skip till the next year till it does, which isn't until 2033.
### New Task
Now that we have told when to run the schedule, we still need to tell it what to do.
1. Click **New Task**

2. Here we're going to select the action **Create backup**.
3. Press **Create task**
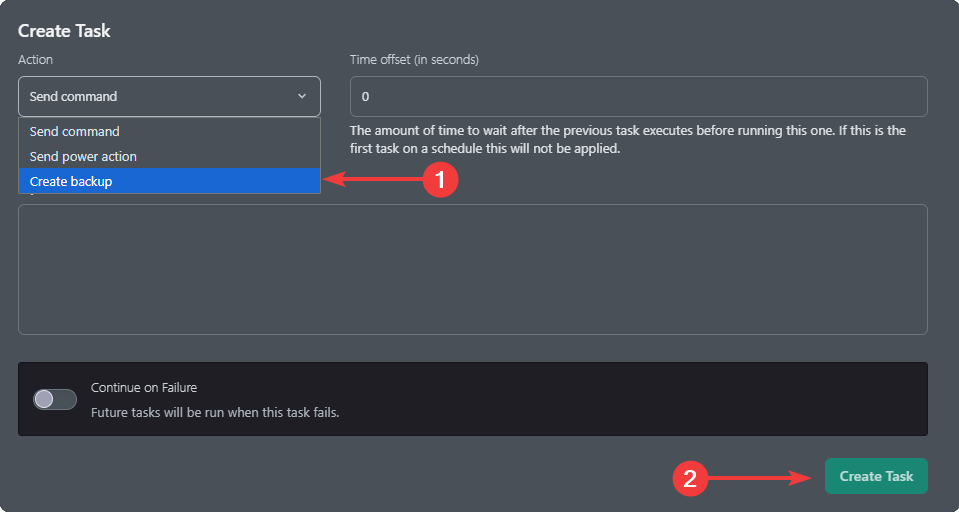
## Filtering backup files
If you don't want to include all files in a backup, there are 2 ways to do this. This method is inspired by .gitignore.
### Manual filtering
During the process of making a manual backup you can use this method.
Typically you would use one of these options. But you can use multiple. Although it's not recommended.
"world" - This will ignore any **file** or **folder** named **world**, anywhere
"world/" - This will ignore the **folder** named **world**, and anthing inside it
"world/*" - This will ignore everything in the world folder, the world folder will still be used, just left empty

In this example, I don't want any worlds backed up.
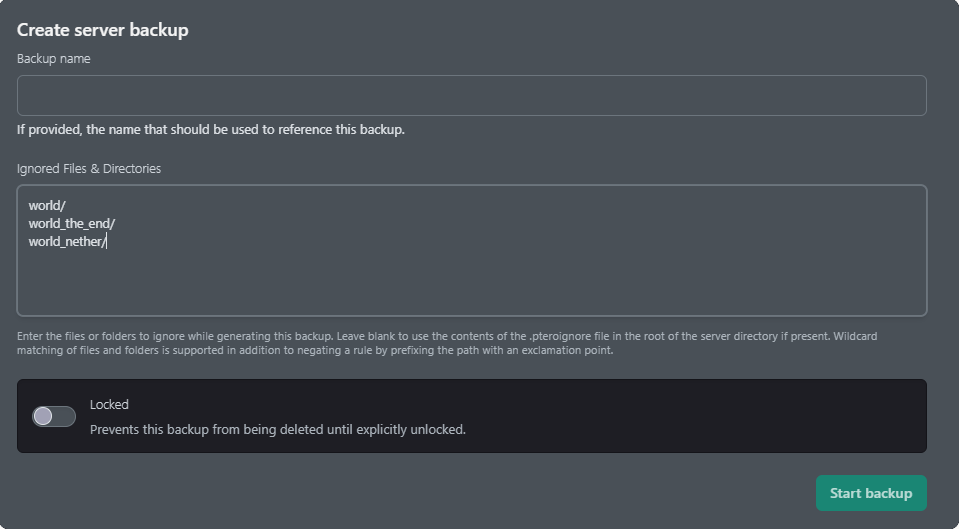
### Automatic filtering
By placing a file named .pteroignore file in your main server directory, you can apply filters to backups made. These apply to all backups, unless stated otherwise.
This works the same as any other text file with the filters mentioned before.
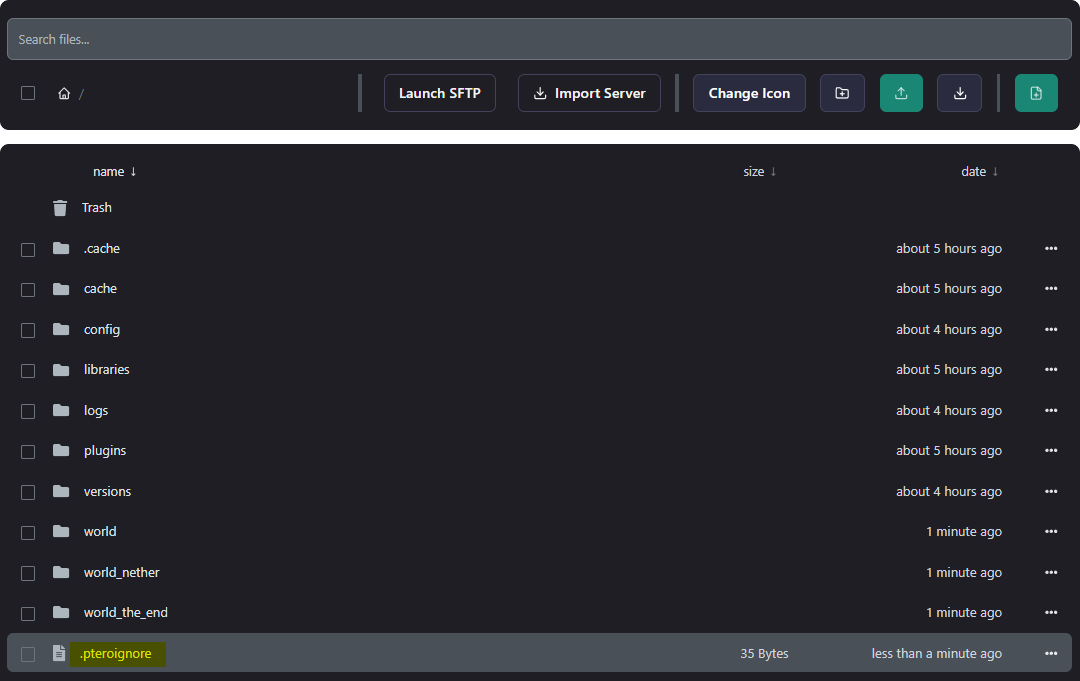
---
# Databases
URL: https://lagless.gg/docs/using-the-panel/databases
Description: Store data for your server that can be shared across multiple servers and sub-servers
## What are Databases?
Databases let you share data between multiple servers or sub-servers. You can create a database to share configurations for Dynmap, LuckPerms, WorldGuard, and more.
Lagless supports three database types:
| Type | Best for |
| :--- | :--- |
| **MariaDB** | MySQL-compatible plugins and mods. The most common choice. |
| **PostgreSQL** | Advanced features, JSON data, and plugins that specifically require it. |
| **Redis** | Caching, session storage, and cross-server communication. |
Not sure which to pick? Choose **MariaDB** if a plugin says "MySQL." Choose **PostgreSQL** if it explicitly requires Postgres. Choose **Redis** for caching or cross-server features.
---
## Creating a Database
1. Open your server in the Lagless panel
2. Click **Databases** on the left sidebar
3. Click **New Database**

4. Fill in the details:
| Field | Description |
| :--- | :--- |
| **Type** | Choose MariaDB, PostgreSQL, or Redis. |
| **Name** | Must be unique. Prefix with your server name if you have several. |
| **Connection From** | Optionally limit which IPs can connect. Leave empty to allow all IPs. |
5. Click **Create Database**
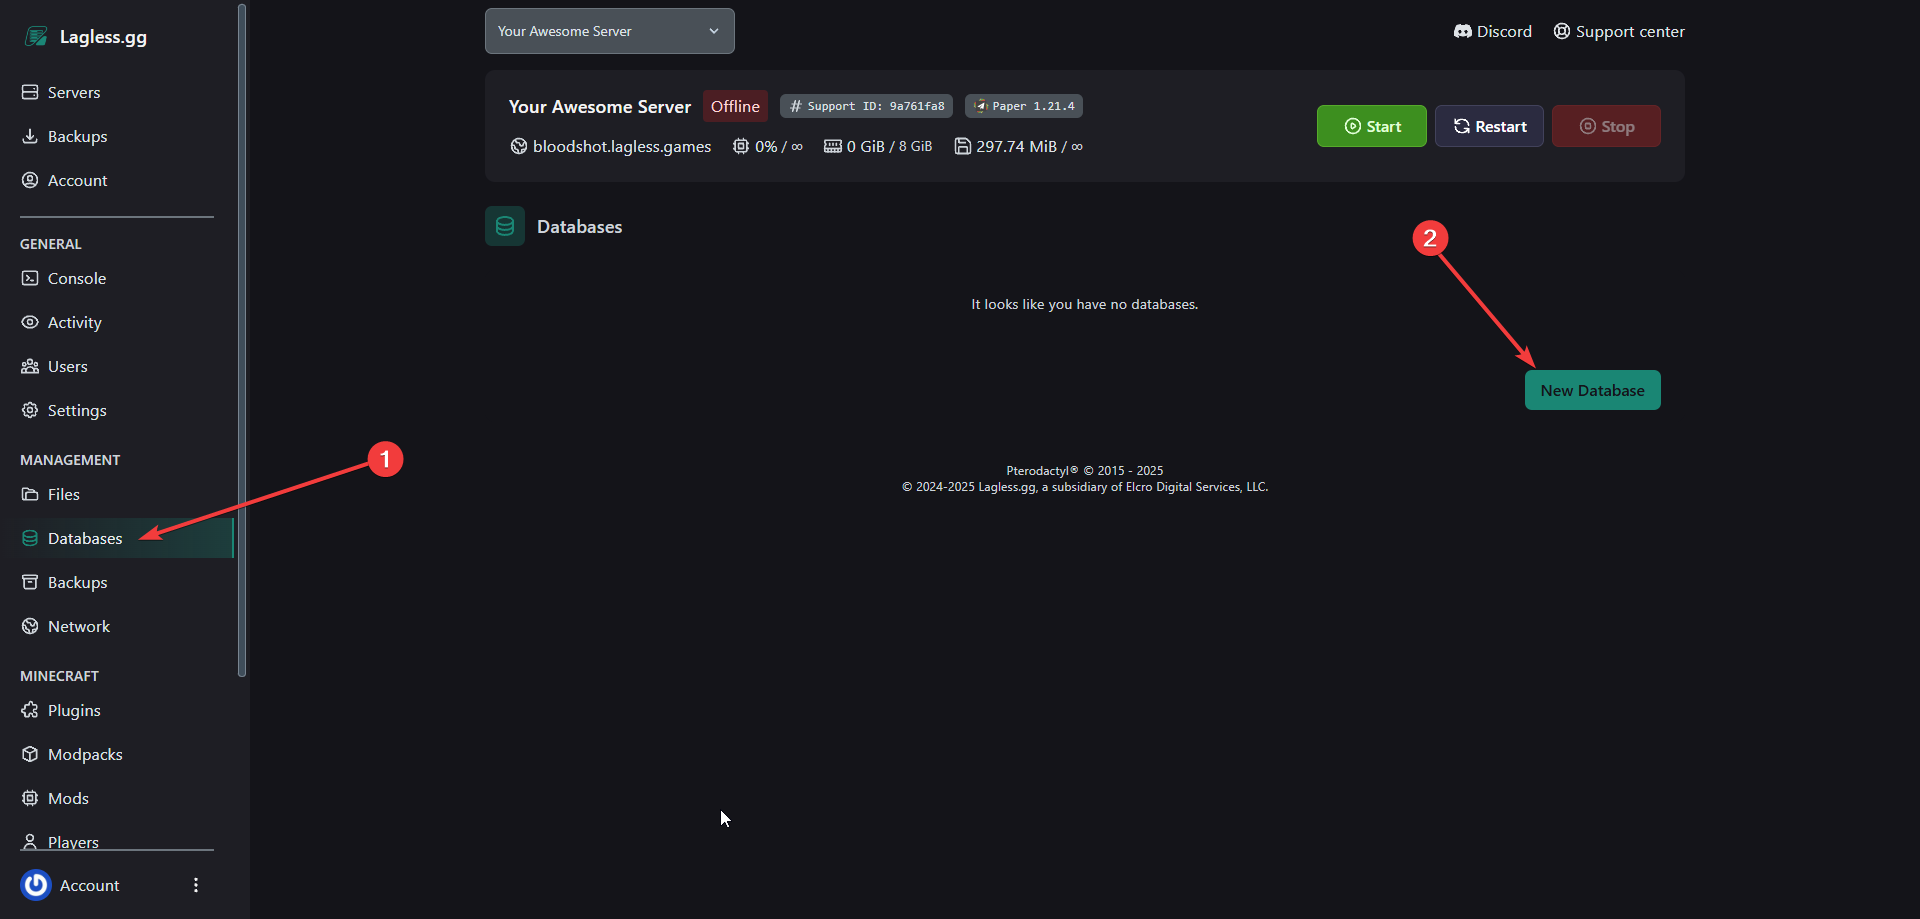
---
## Managing Your Database
Once created, your database appears in the list. Each row has these actions:
| # | Action | What it does |
| :--- | :--- | :--- |
| 1 | **View** (eye icon) | Shows the endpoint and username at a glance. |
| 2 | **Copy** | Copies the connection info to your clipboard. |
| 3 | **Details** | Opens a popup with the full connection info, JDBC string, and password rotation. |
| 4 | **Export** | Downloads a dump of your database. |
| 5 | **Import** | Uploads a dump to restore into your database. |
| 6 | **Manage** | Opens a limited management view. For full management, use an external client. |
| 7 | **Delete** | Permanently removes the database and all its data. |

### Details Popup
Clicking **Details** opens a popup with every field you need to connect:
| Field | Description |
| :--- | :--- |
| **Endpoint** | Host and port to connect to. |
| **Connection From** | Which IPs are allowed to connect. |
| **Username** | Your database username. |
| **Password** | Your database password. |
| **JDBC String** | Ready-to-paste connection string for Java-based plugins (Minecraft, etc.). |
You can also click **Rotate Password** in this popup to generate a new password.
Rotating the password immediately breaks any active connections. Update your config files and restart your server right after rotating.
---
## Connecting to Your Database
Download a database client to connect and make live changes:
| Database | Recommended Client |
| :--- | :--- |
| **MariaDB** | [DBeaver](https://dbeaver.io/), [HeidiSQL](https://www.heidisql.com/), [MySQL Workbench](https://dev.mysql.com/downloads/workbench/) |
| **PostgreSQL** | [DBeaver](https://dbeaver.io/), [pgAdmin](https://www.pgadmin.org/) |
| **Redis** | [RedisInsight](https://redis.io/insight/), [Another Redis Desktop Manager](https://github.com/qishibo/AnotherRedisDesktopManager) |
Enter the connection details from the panel to connect. All three database types work with DBeaver if you want a single client for everything.
Only connect from the IPs you've allowed in **Connection From**. If you didn't set any restrictions, you can connect from anywhere.
---
## Common Issues
#### "Access denied for user"
- Verify the username and password match what's shown in the panel
- Check that your IP is allowed in **Connection From**
- Rotate the password and try again
#### Can't connect from outside the panel
- Confirm the database type is correct (MariaDB vs PostgreSQL)
- Check the port — MariaDB and PostgreSQL use different default ports
- Ensure you're using the exact host from the panel, not `localhost`
#### Plugin says "MySQL" but I created PostgreSQL
- Delete the database and recreate it as **MariaDB**
- MariaDB is MySQL-compatible and works with any plugin that requires MySQL
#### Data not syncing between servers
- Verify all servers use the exact same connection details
- Check that every server's IP is allowed in **Connection From**
- Restart the affected servers after updating their config files
#### Import fails
- Check that the dump file matches the database type (MariaDB dumps don't import into PostgreSQL, etc.)
- Large imports may take a while — wait for the upload to fully complete
- Verify the dump isn't corrupted
---
# Server Importer
URL: https://lagless.gg/docs/using-the-panel/importer
Description: Want to transfer your server to our host? This is how you do it
## Introduction
Whether you're creating a new server with us, or want to move from another host to us, the server importer allows you to transfer your files with ease.
## How to use the Importer
Navigate to your lagless server on our panel.
Go to the tab **Importer** on the left.
Here you will have to enter some information. For our servers, you can find the SFTP information under the **Settings** tab. This may be different with other hosts.
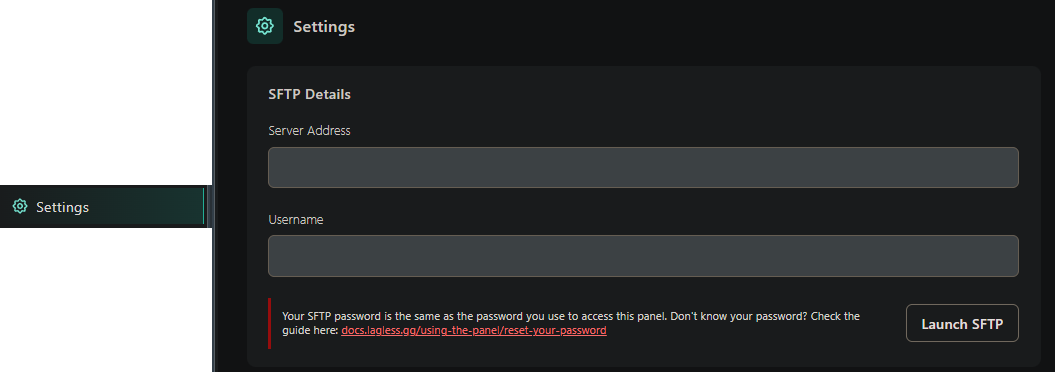
Fill in the information fields **Host**, **Port**, **Username** & **Password**
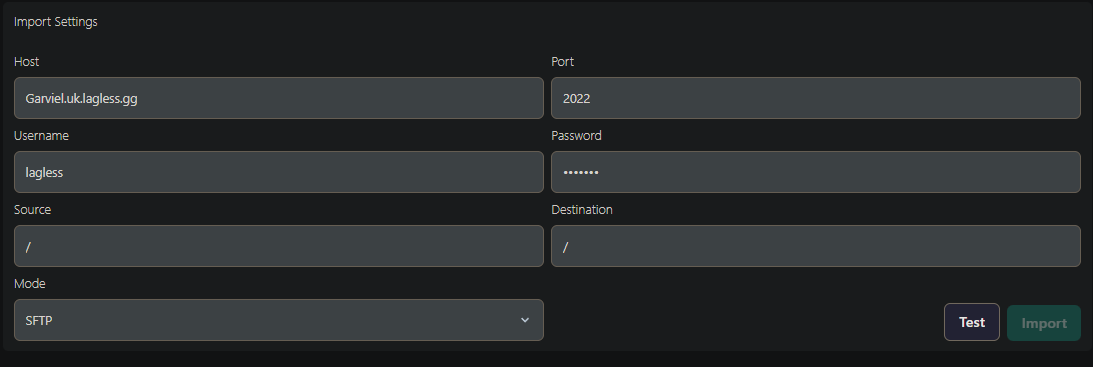
Press the **Test** button to make sure a connection can be made.
Once a connection has been successfully made, press **Import**
Now you can choose to either wipe server files, or if you have already done that, import.
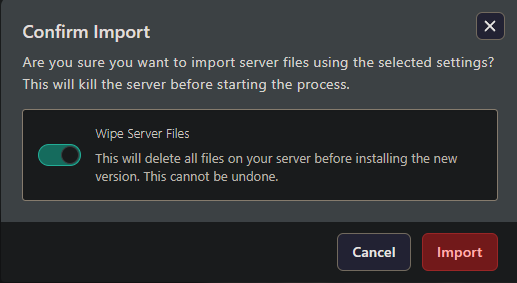
Once you start importing our installer will begin running, and after a few minutes it should be done. (depending on server size)
---
# Manage Users
URL: https://lagless.gg/docs/using-the-panel/manage-users
Description: Create new users and manage user permissions.
# Create a Subuser
Do you have a service with us and do you want to create a new subuser?
This is how you do it. Make sure you are logged into our game panel.
1. Go to the "Users" tab on the left. (as shown in the image below).
2. Click on "New user".
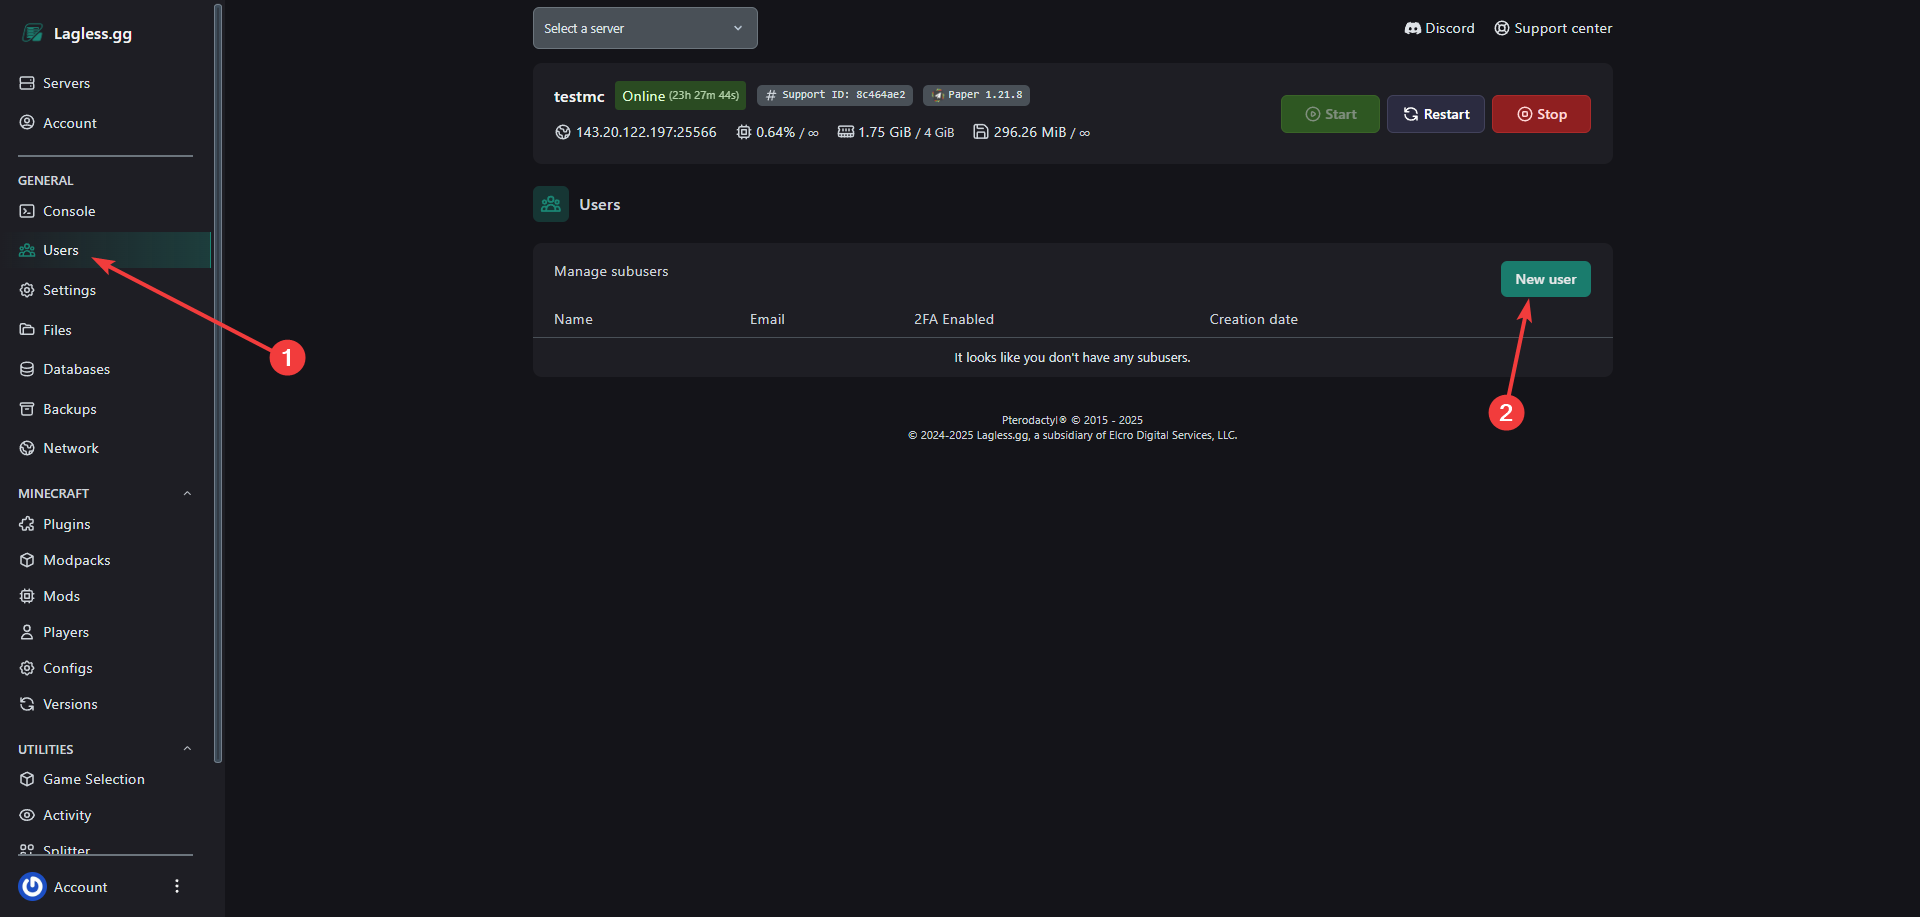
3. Enter the email address of the person you want to invite.
4. You can tick the selection box for all permissions in a section.
5. Or you can select each individual permission.
6. Click invite user
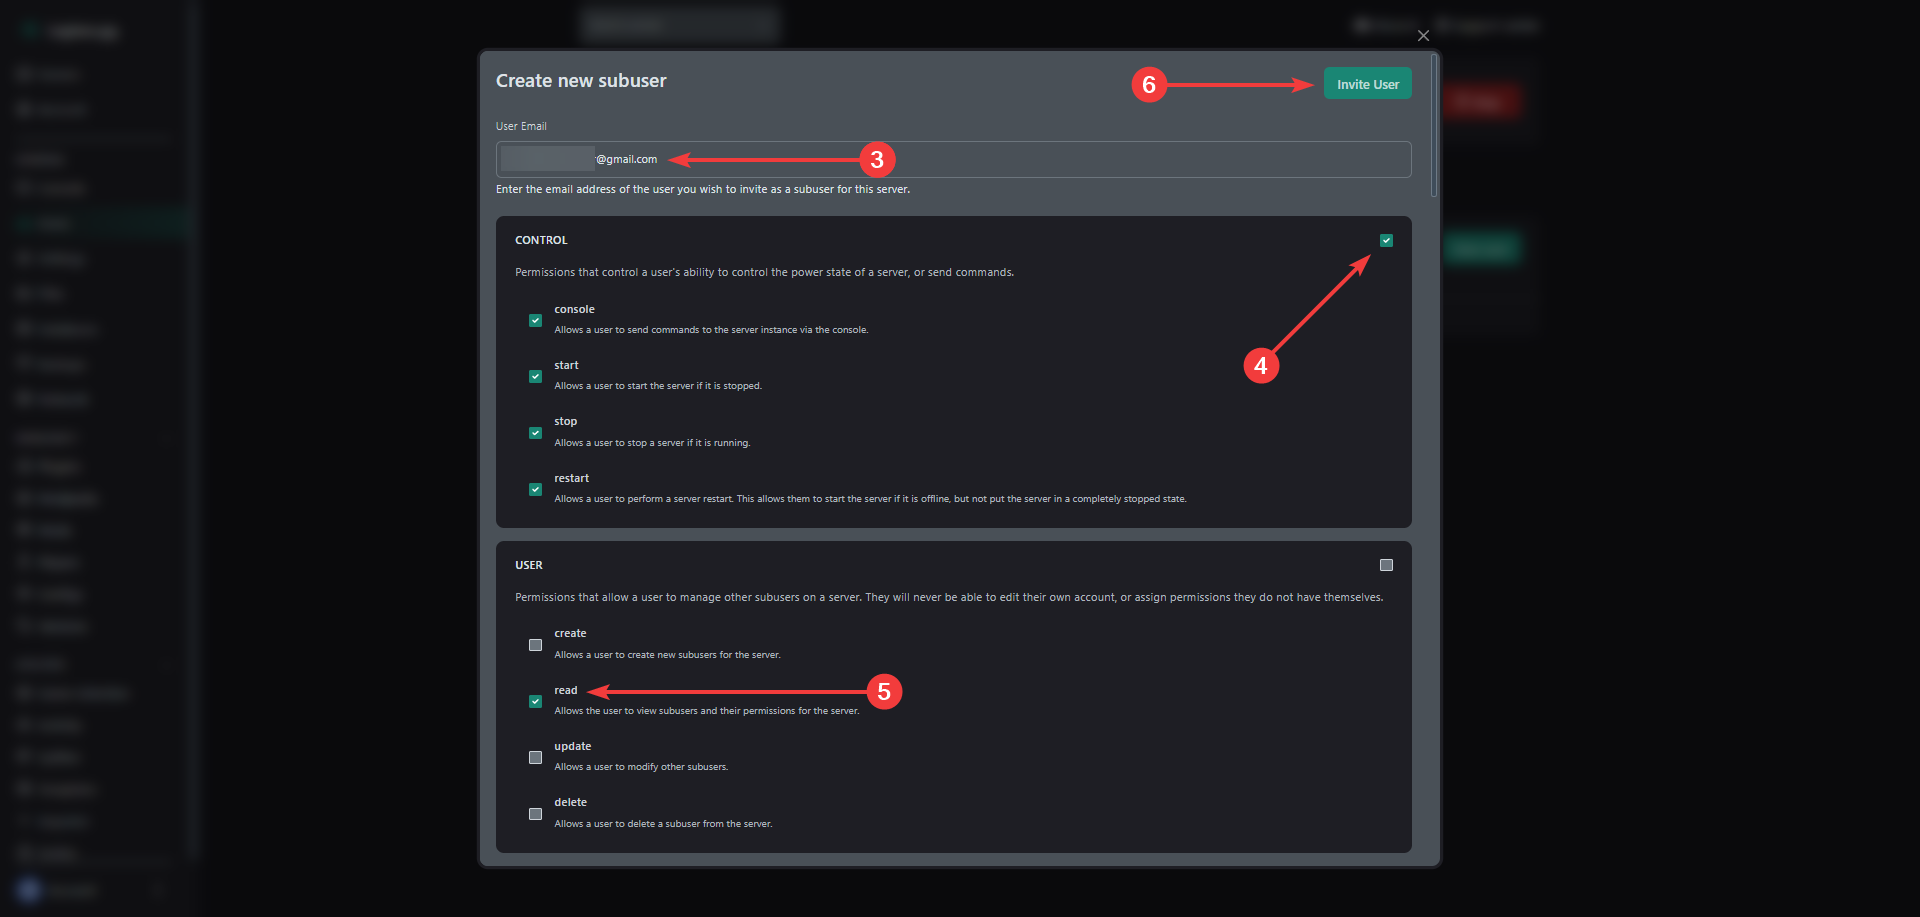
If the user is new and they don't have an account yet, they will receive an email about that.
When they have an account, they will be added as a subuser.
# Modify a Subuser's Permissions
If you wish to modify the permissions of a subuser
1. Click on the users tab.
2. Modify permissions
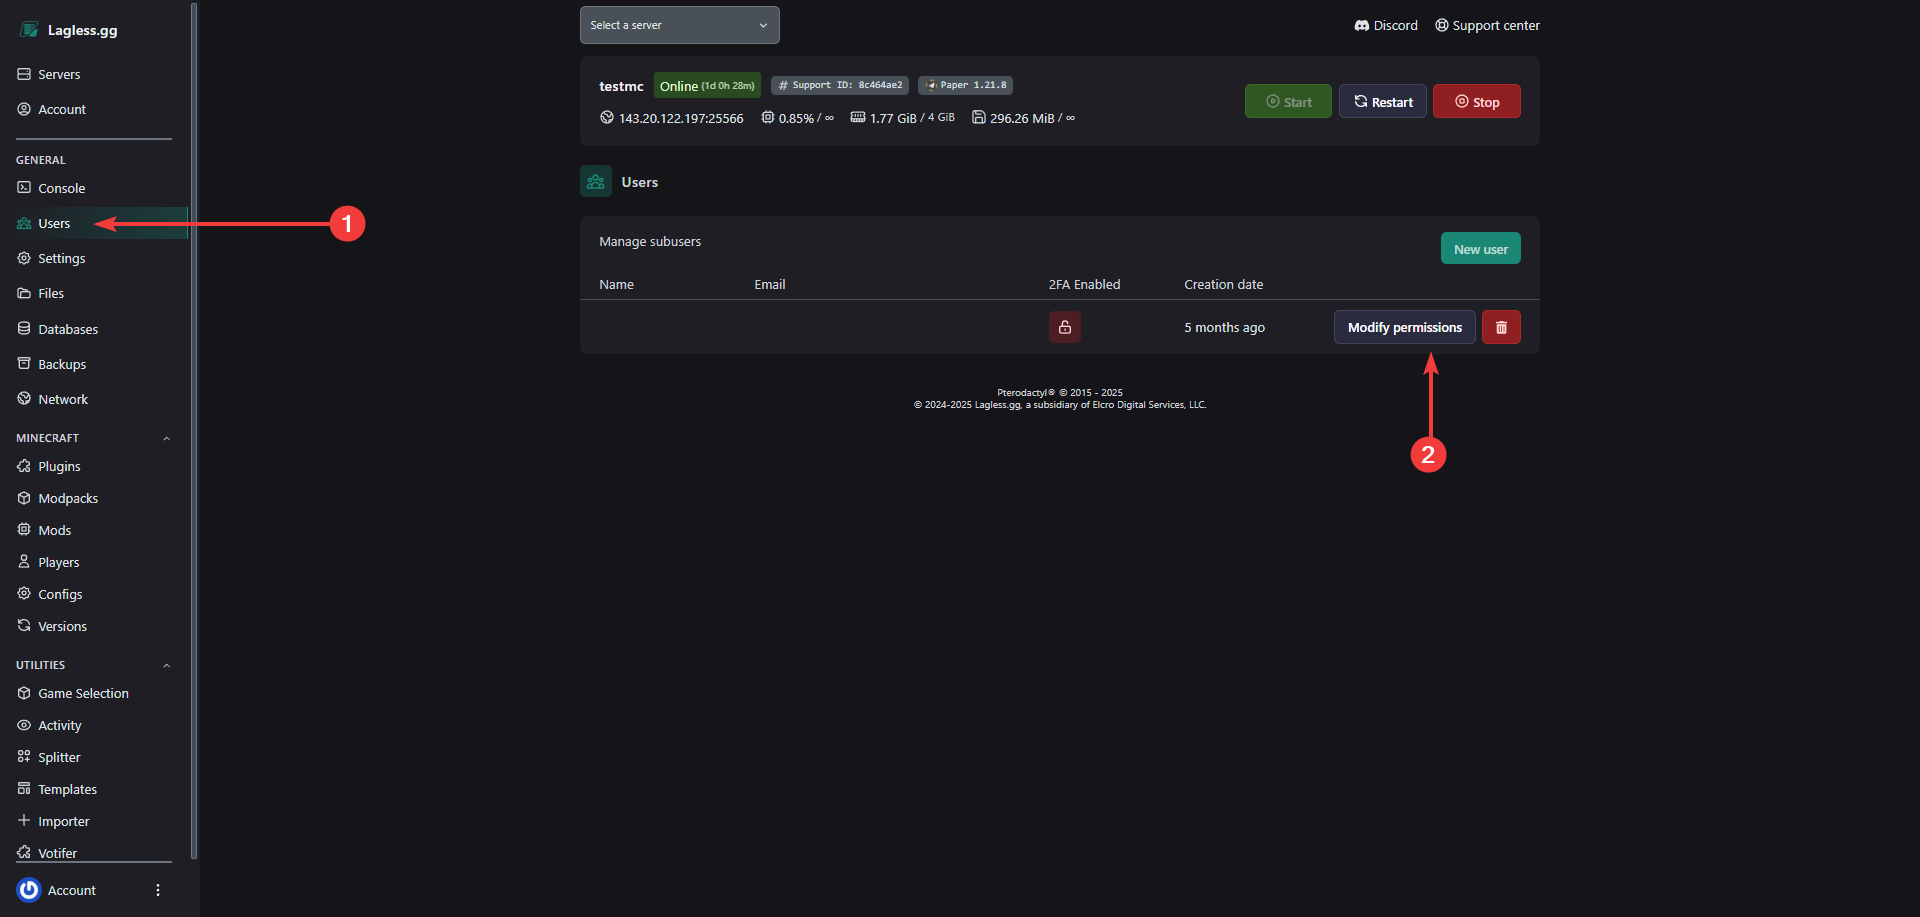
---
# Reset Your Password
URL: https://lagless.gg/docs/using-the-panel/reset-your-password
Description: A quick guide on how to reset your password on the billing panel
## Introduction
This guide will help you reset your password for your Lagless service through the billing panel.
## Prerequisites
- An account on the [Lagless Panel](https://panel.lagless.gg).
- Access to the [billing panel](https://my.lagless.gg).
## Steps to reset your password
### 1. Accessing the billing panel
1. Go to the [billing panel](https://my.lagless.gg)
2. Log in with your existing credentials
3. You will be taken to your dashboard
### 2. Locating your service
1. After logging in, you will be taken to your dashboard/home page
2. On this page, you will see your services listed
3. Click on "View Details" for the service you want to reset the password for
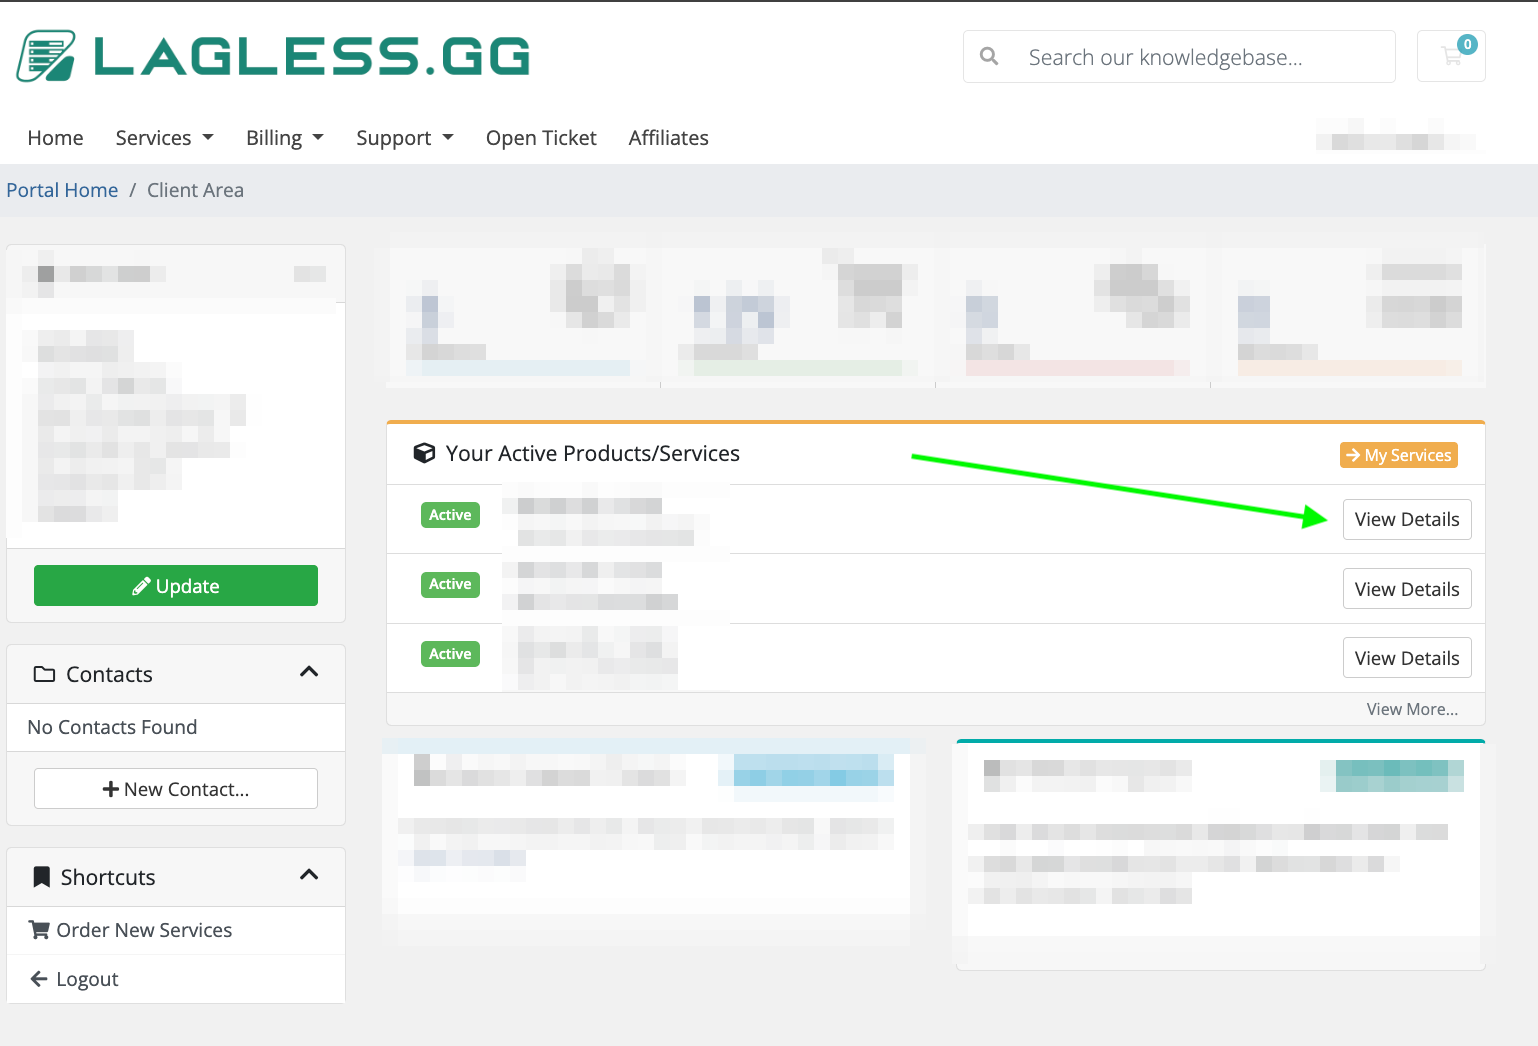
### 3. Finding the Change Password button
1. Once on your service page, look for the "Change Password" button
2. This button is typically located in the service management section
3. An arrow will point to the Change Password button for easy identification
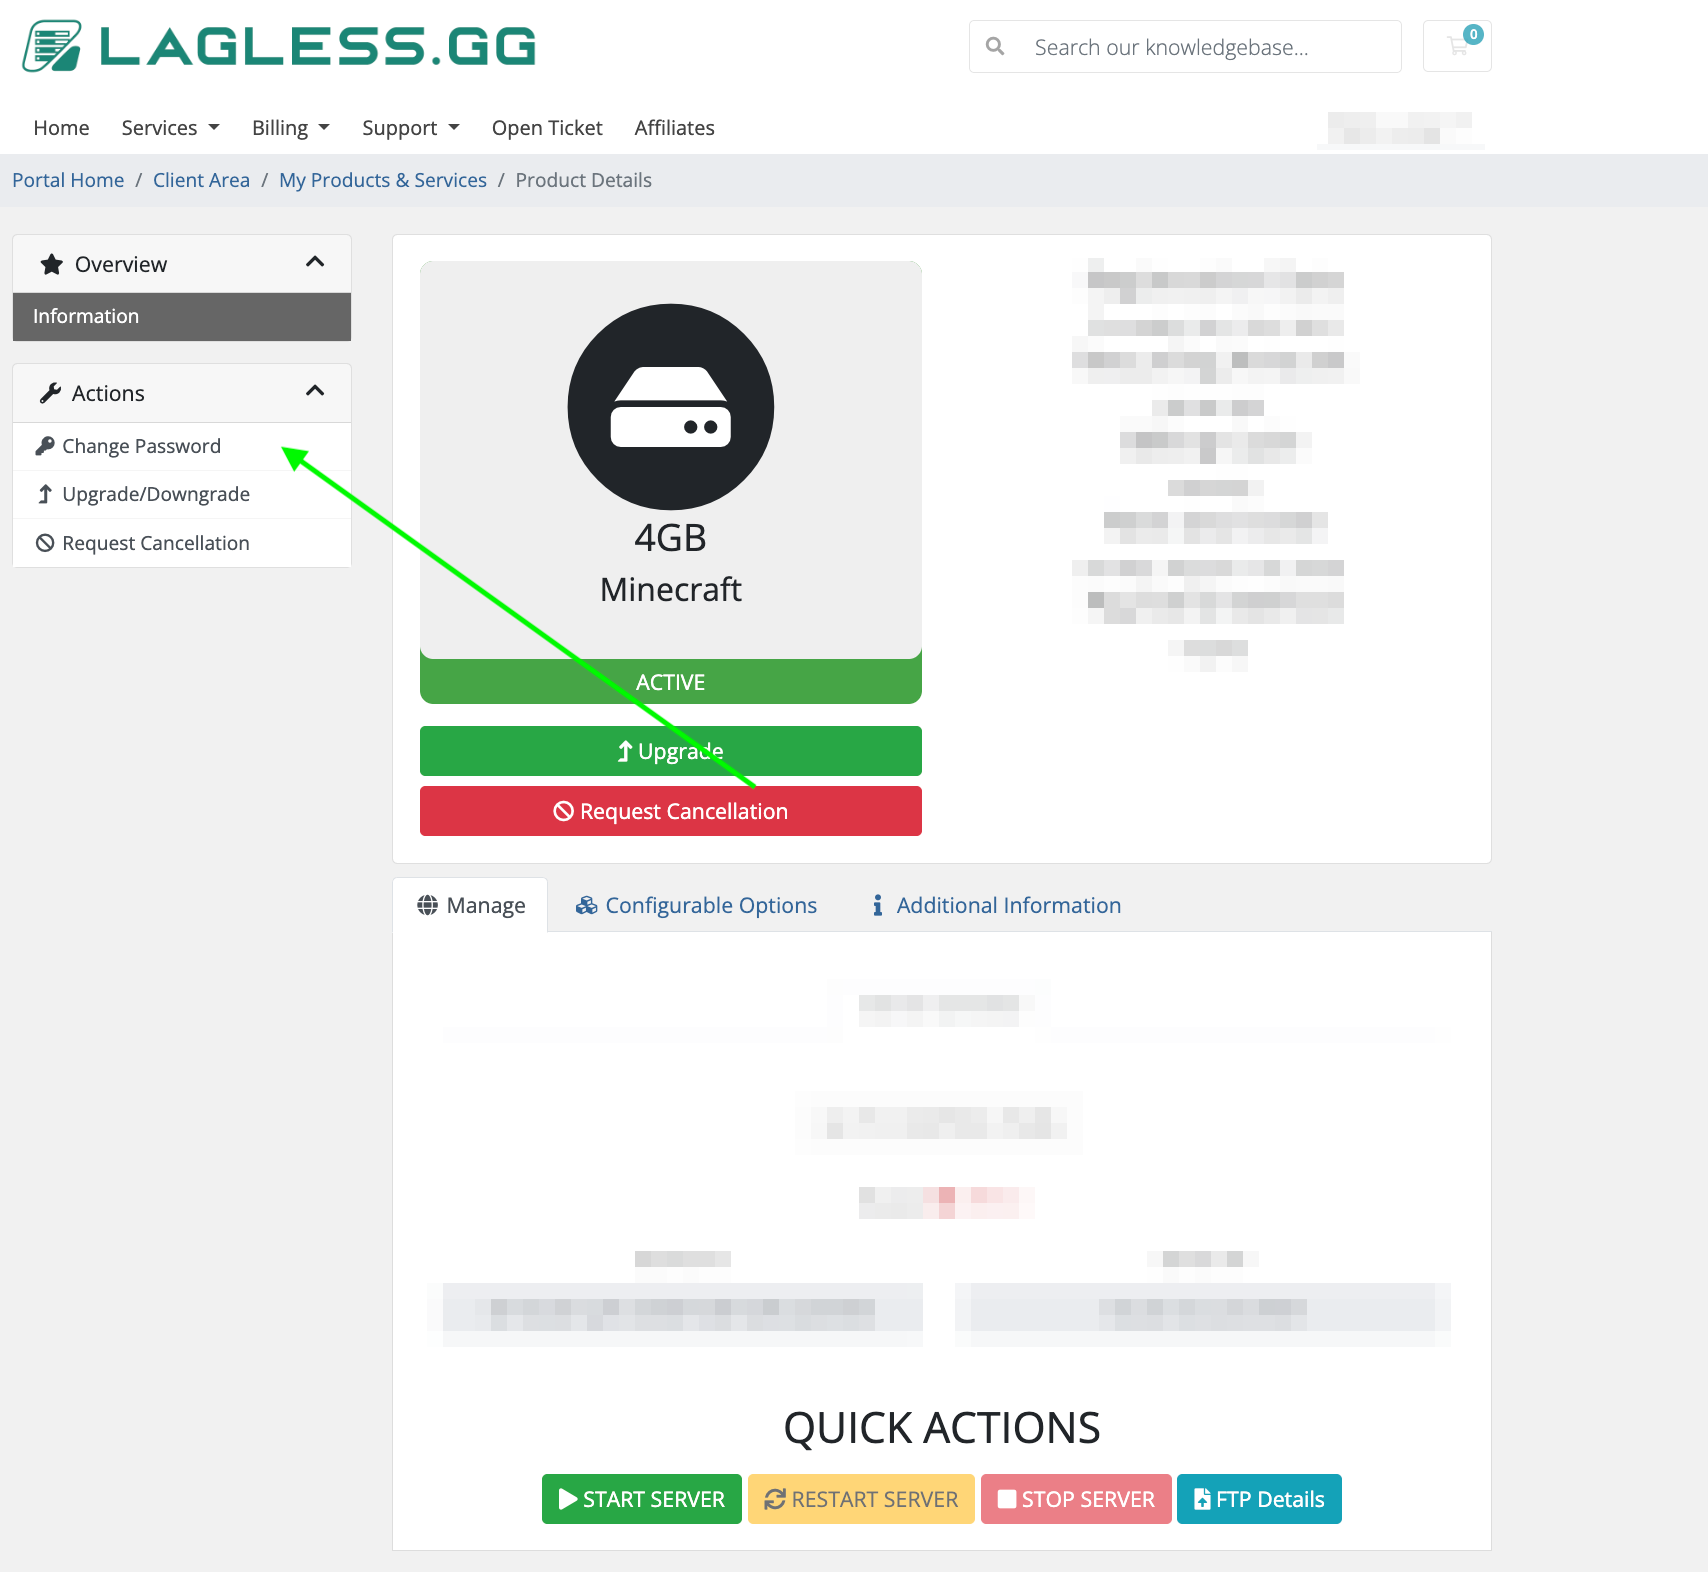
### 4. Resetting your password
1. Click on the "Change Password" button
2. This will open the password change container
3. You will be presented with two options:
- **Generate Password:** Let the system create a secure password for you
- **Enter Custom Password:** Manually enter your desired password
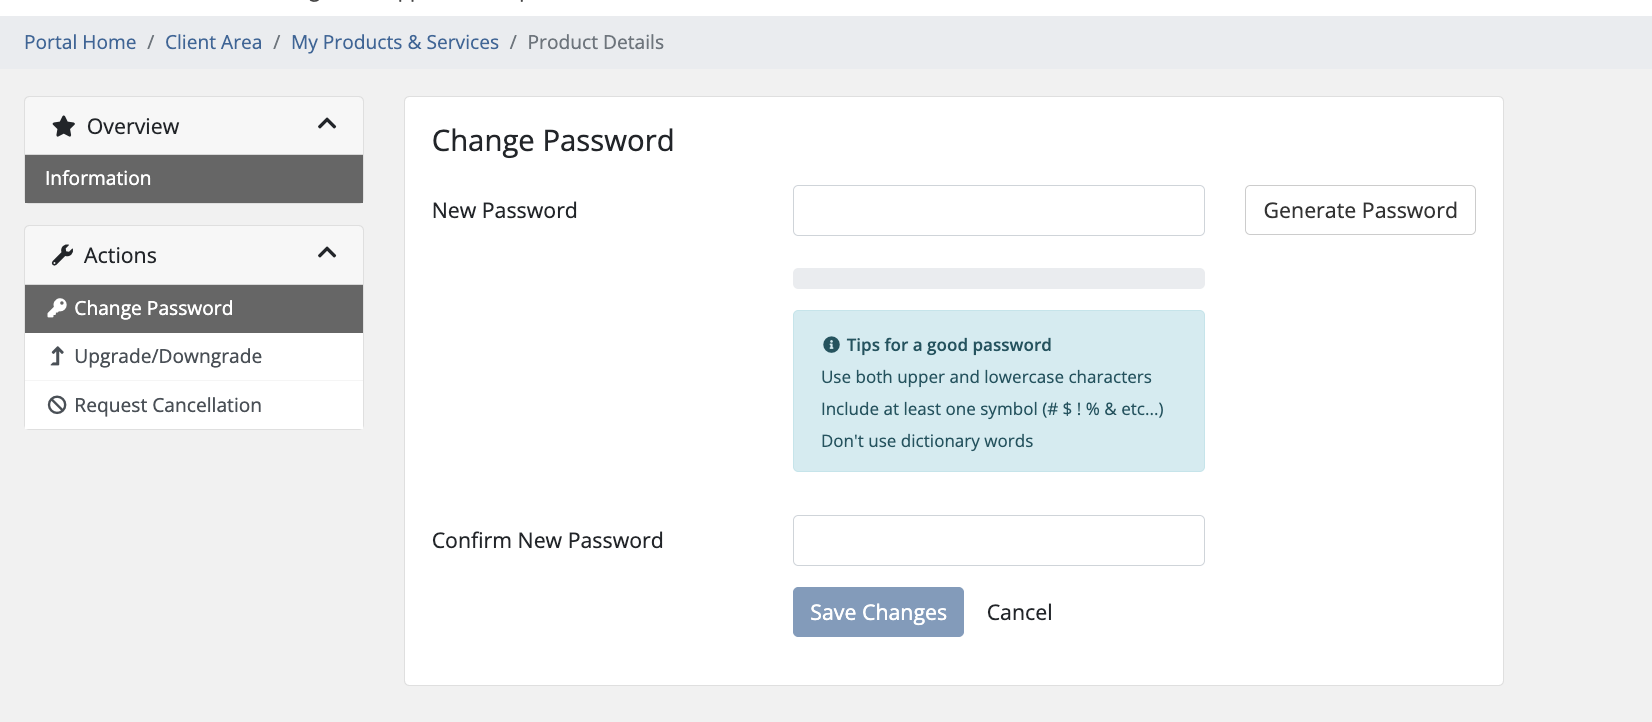
### 5. Setting your new password
1. Choose either "Generate Password" or "Enter Custom Password"
2. If generating, the system will create a secure password for you
3. If entering custom, type your desired password in the provided field
4. Click the "Reset Password" or "Save" button to confirm the change

### 6. Confirming the change
1. The system will confirm that your password has been successfully reset
2. Make sure to save your new password in a secure location
3. You can now use the new password to access your service
## Important Notes
- Your new password will be used for both the Lagless Panel and SFTP access
- If you generated a password, make sure to copy it immediately as it may not be shown again
- Keep your password secure and don't share it with others
- You can reset your password at any time using this same process
## Conclusion
By following these steps, you can easily reset your password whenever needed. Remember to keep your new password secure and accessible for future use.
---
# Schedules
URL: https://lagless.gg/docs/using-the-panel/schedule
Description: Automate restarts, backups, alerts, and more with scheduled tasks
## Schedules
Schedules automate routine tasks on your server — restarts, backups, alerts, and more. You can build one from scratch, or start from a ready-made template in one click.
---
## Method 1: Use a Template
Templates are the fastest way to get started. They cover the most common automations and configure everything for you.
1. Log in to the [Game Panel](https://panel.lagless.gg/)
2. Click **Manage server**
3. In the left sidebar, scroll to the **Utility** section
4. Click **Schedules**
5. Open the schedule **templates** picker
6. Filter by category — **All**, **Maintenance**, **Backups**, **Performance**, **Minecraft**, or **Alerts**
7. Click the template you want
8. Review the pre-filled settings and adjust if needed
9. Click **Activate**
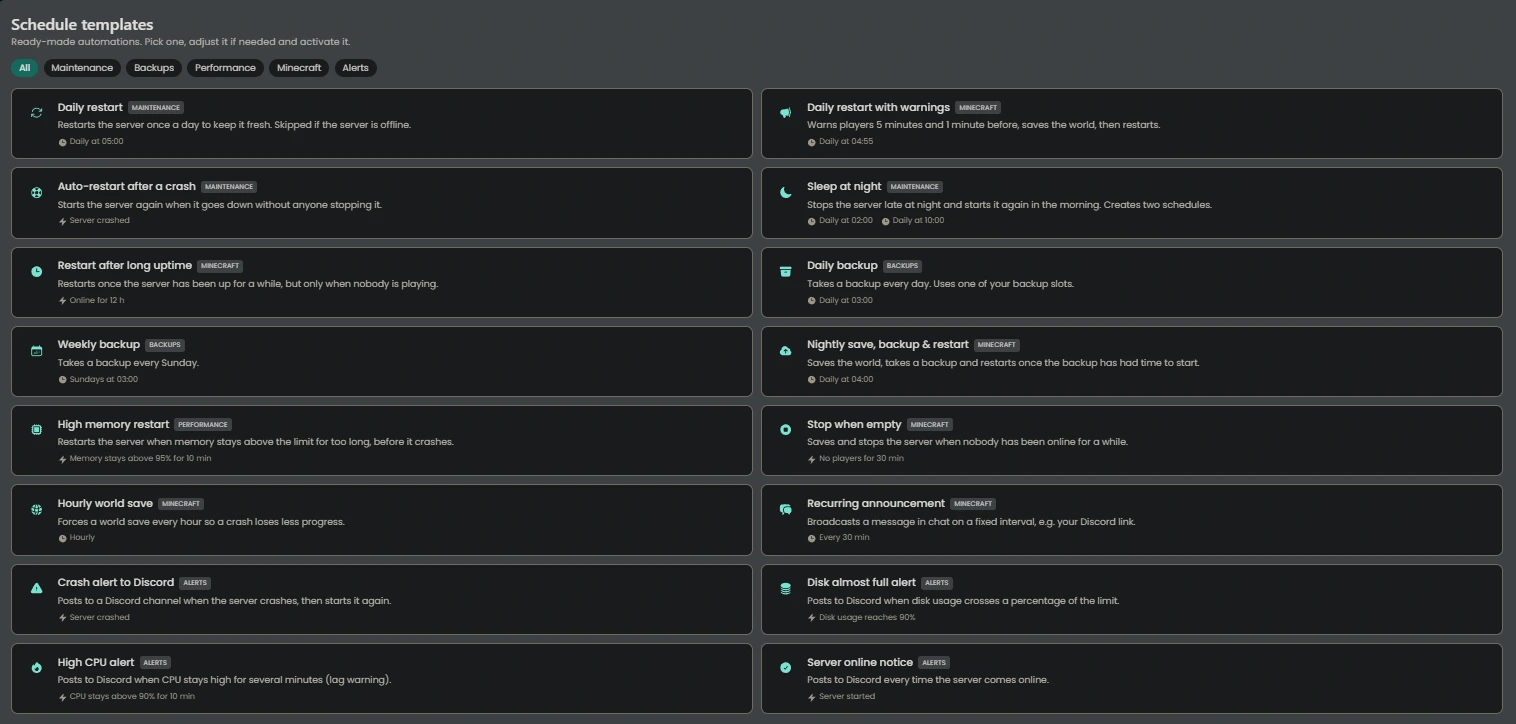
Some templates create more than one task. For example, **Sleep at night** creates two tasks, one to stop the server and one to start it again.
---
## Method 2: Build One Manually
Use this method when no template fits, or when you want full control.
### Step 1: Create the Schedule
1. Log in to the [Game Panel](https://panel.lagless.gg/)
2. Click **Manage server**
3. In the left sidebar, scroll to the **Utility** section
4. Click **Schedules**
5. Click **Create schedule**
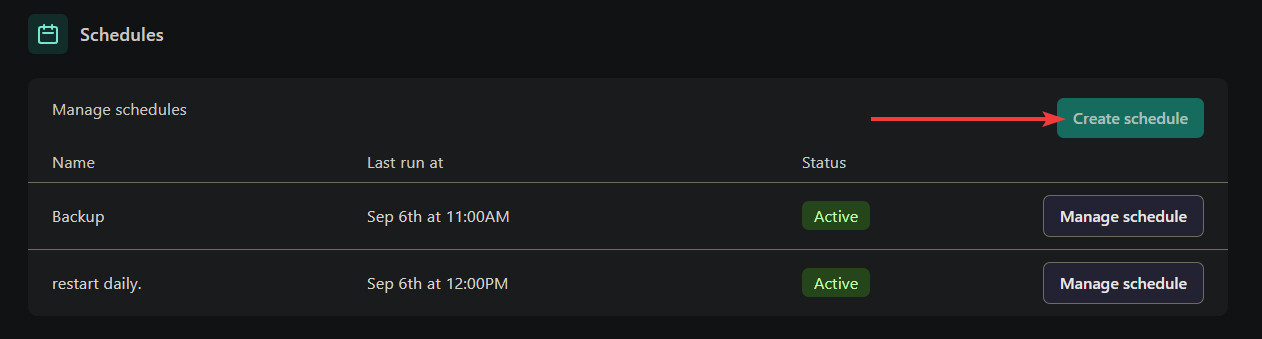
6. Under **Name**, enter a human-readable identifier for the schedule
7. Under **When should it run?**, leave the **Trigger** on **On a schedule (time)** — this runs the schedule at the times defined by the cron expression
8. Pick how often the schedule should run using one of the two tabs:
**Quick** (default) — pick from a list of common intervals:
- Every 5 minutes
- Every 15 minutes
- Every 30 minutes
- Every hour
- Every 6 hours
- Every 12 hours
- Once a day
- Every Monday
- Once a week
- Once a month
**Advanced**, fine-tune the exact timing with a custom cron expression using the `Minute`, `Hour`, `Day of month`, `Month`, and `Day of week` fields. Enable **Show Cheatsheet** for a quick reference if needed.
9. Review the **Summary** panel on the right, it confirms in plain language when the schedule will run
10. Optionally add conditions under **Only if...**, every condition must be true for the schedule to run. Leave empty to always run.
11. Under **Options**, toggle **Schedule Enabled** on (default) to activate the schedule immediately after saving
12. Click **Create schedule**
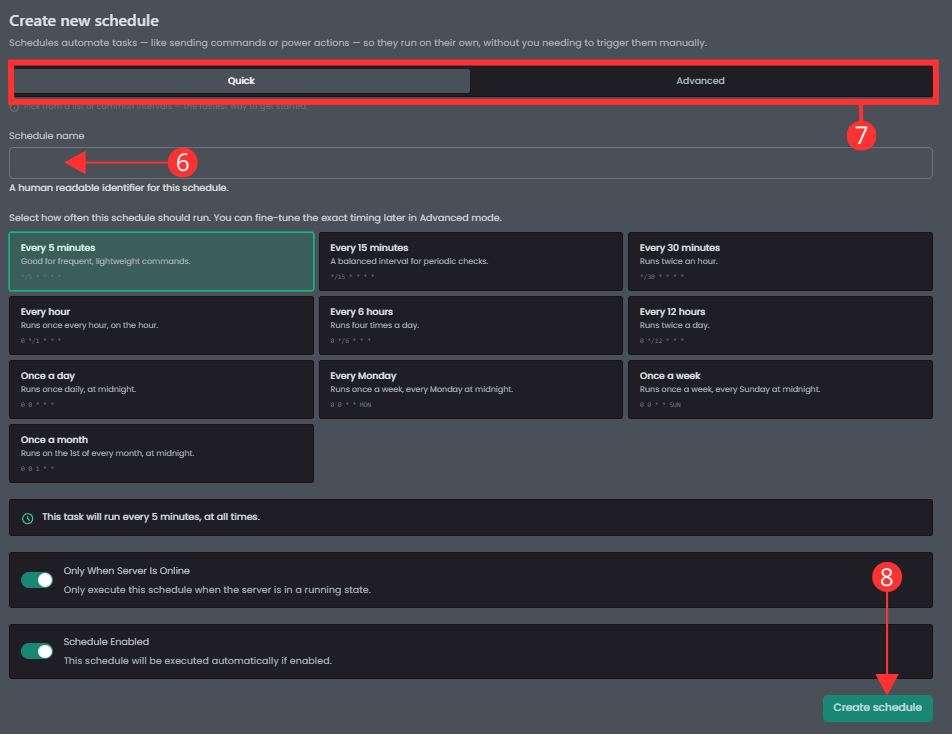
### Step 2: Add a Task
1. Click **Manage schedule** on the schedule you just created
2. Click **New Task**
3. Choose an **action**:
| Action | What it does |
| :--- | :--- |
| **Send command** | Sends a console command to the server. |
| **Send power action** | Start, restart, stop, or forcibly terminate the server. |
| **Create backup** | Creates a backup. Optionally exclude files/folders — defaults to your `.pteroignore` rules. |
| **Send webhook** | Sends an HTTP request to a URL (Discord, Slack, or any endpoint). Use the **Discord**, **Slack**, or **Generic** templates for a quick start. |
4. Set a **Time offset (in seconds)** if this task should wait after the previous one runs. Ignored for the first task, max 900 seconds.
5. Optionally enable **Continue on Failure** so later tasks still run even if this one fails.
6. Click **Create Task**
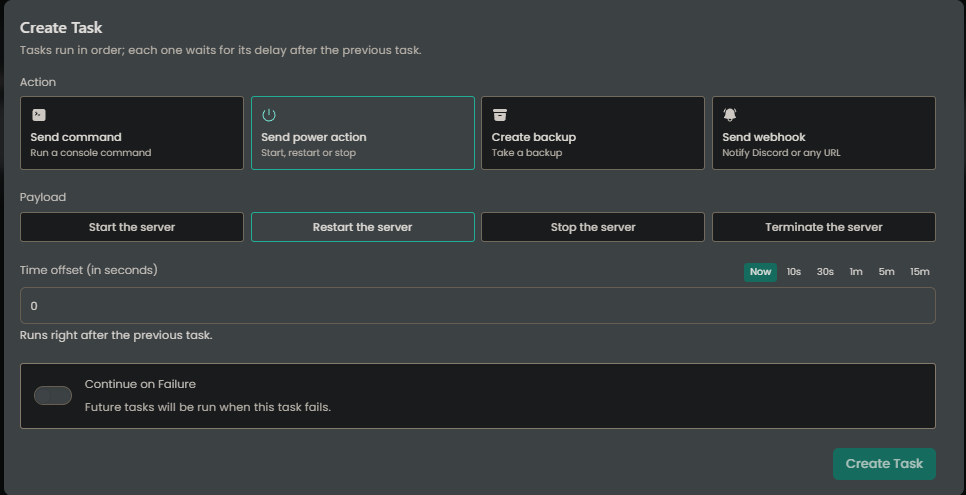
You can add as many tasks as you want to a single schedule. Use a time offset on each task to control the order they fire in.
---
## Example: Daily Restart with Discord Warning
**Goal:** Restart the server every day at 12:00, with a Discord heads-up 10 seconds before.
1. Create a schedule using **Advanced** mode:
- `Minute: 0`
- `Hour: 12`
- `Day of month: *`
- `Month: *`
- `Day of week: *`
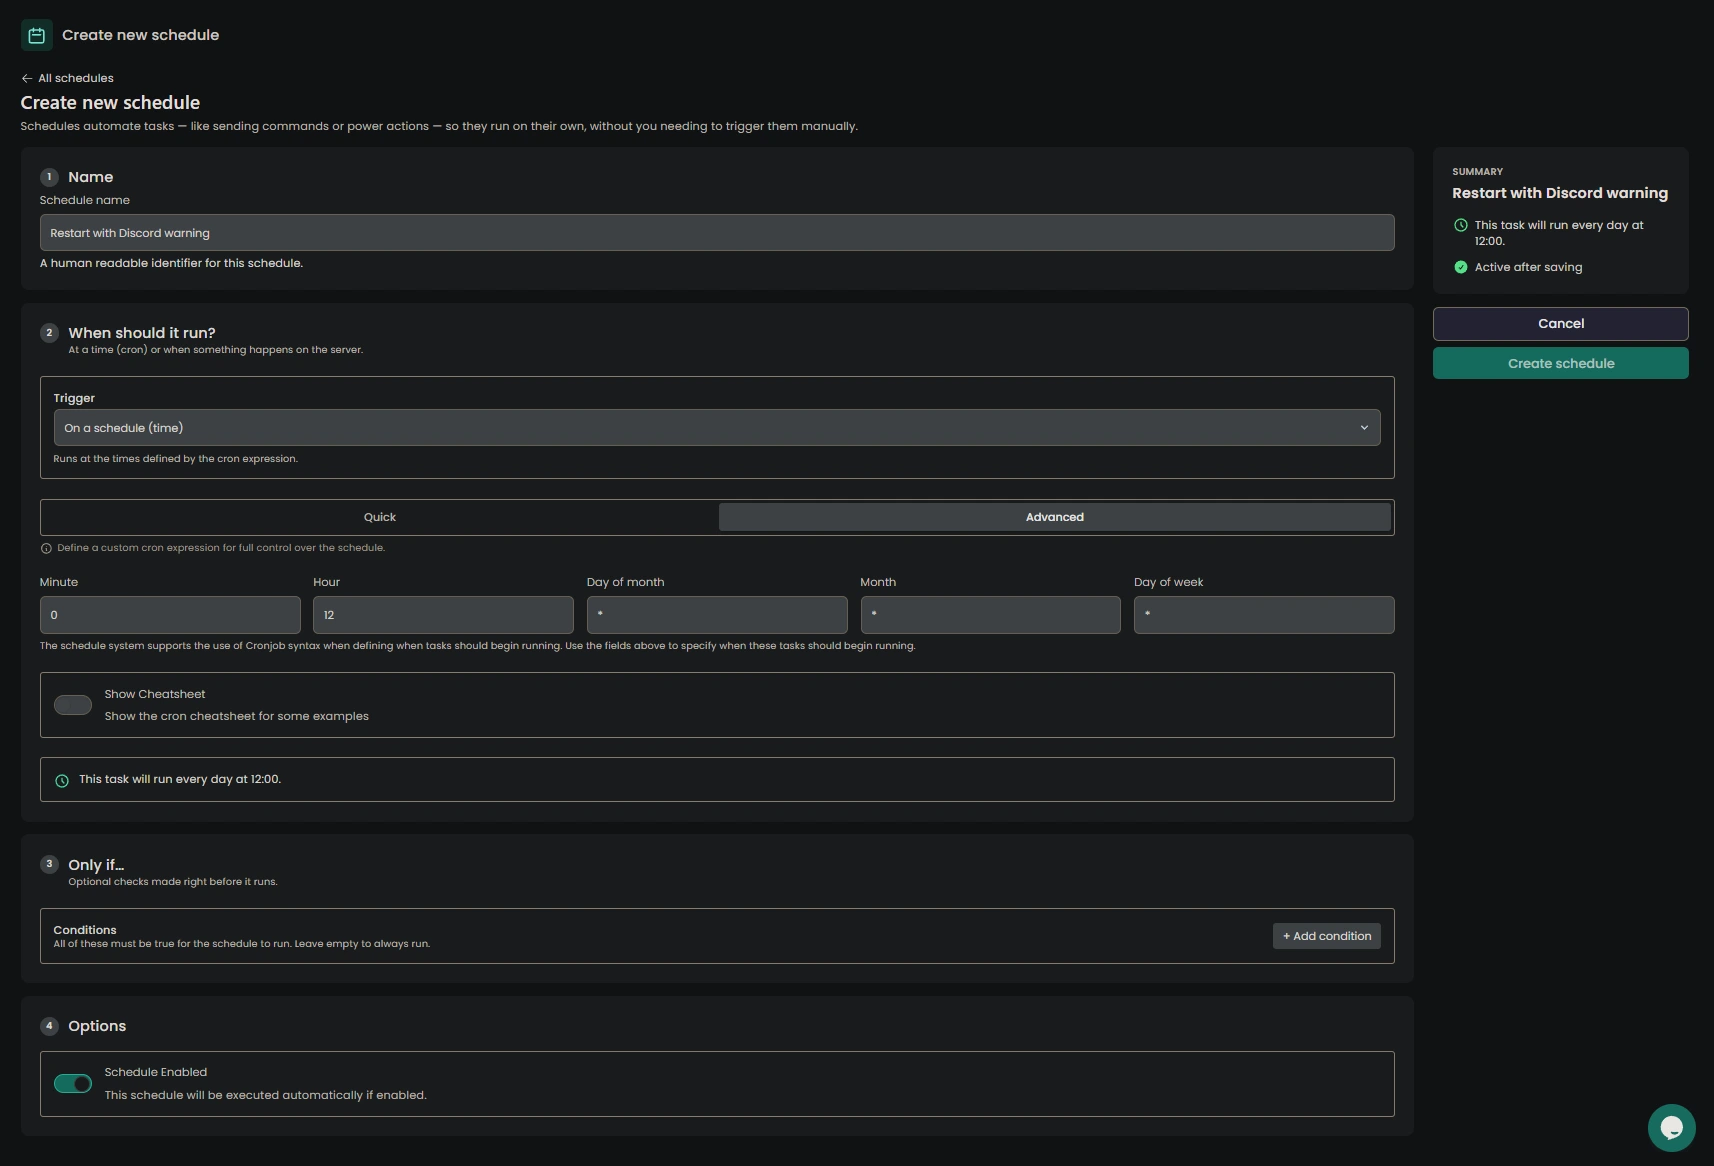
2. Add a task for the Discord notification:
- **Action:** Send webhook
- **Webhook URL:** Your Discord webhook URL
- **Payload:** Use the **Discord** template button, then customize
- **Time offset:** `0` seconds (fires immediately at 12:00)
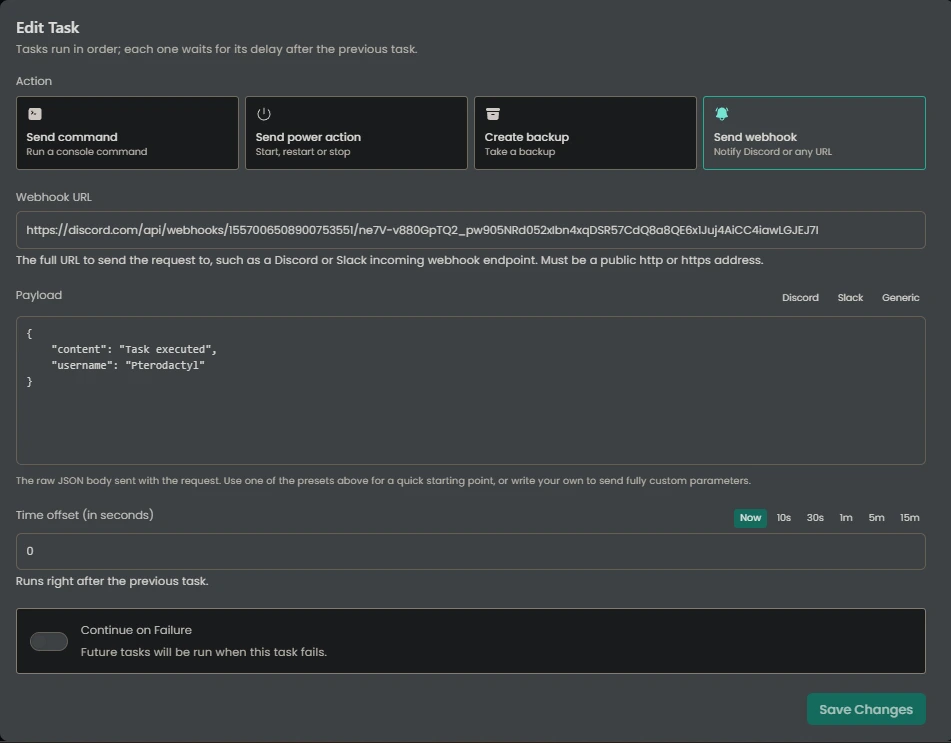
3. Add a second task for the restart:
- **Action:** Send power action
- **Payload:** Restart the server
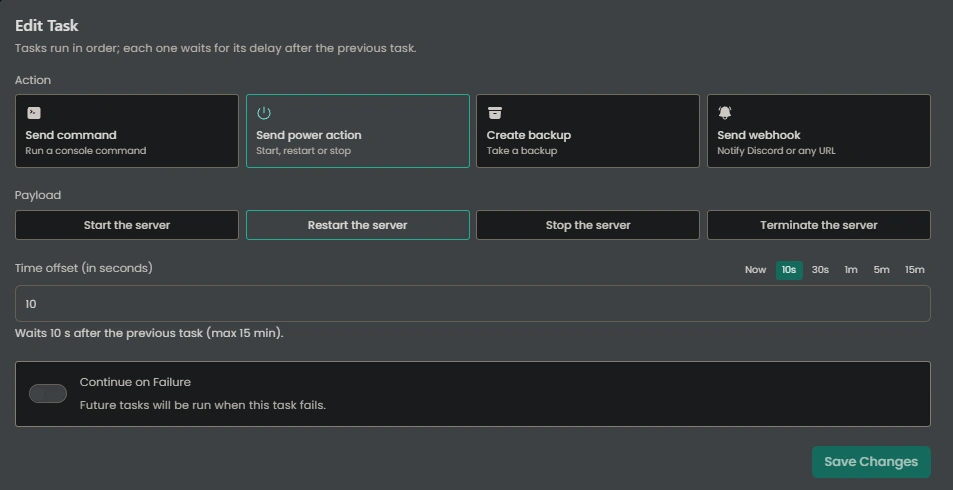
The webhook fires first (10-second offset), then the server restarts at 12:00.

---
## Task Action Reference
| Action | Common use |
| :--- | :--- |
| **Send command** | Schedule events, broadcast `/say` messages before a restart |
| **Send power action** | Restart servers on a schedule |
| **Create backup** | Nightly backups while nobody is online |
| **Send webhook** | Notify Discord/Slack (or any endpoint) when a schedule runs |
---
# Server Splitters
URL: https://lagless.gg/docs/using-the-panel/server-splitter
Description: The best way to get the bang for your buck, or run advanced server configs
# What is a server splitter?
A server splitter is a way to split your resources into "sub-servers" to run other various processes such as discord bots, backend servers, or proxies.
If you choose to upgrade your server specs, additional resources are allocated to your primary server. You can later determine if you need to increase or decrease resources to your other sub-servers.
# Creating Your Splits
Clicking on your primary server, go to Utilities \> Splitter. Here you can see how many splits your server has or is using.
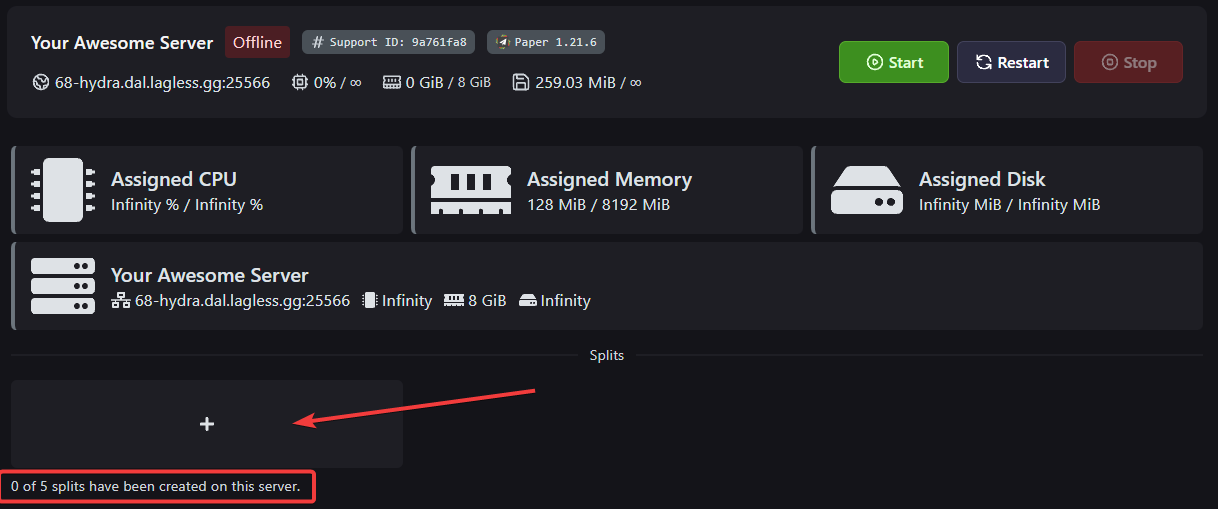
Click the Plus to create a split and fill out the necessary information.
If you want your sub-users from your main server to access the split, make sure to tick Sync Subusers.
If you have sync’d without adding subusers, you may choose to Sync Subusers later on.
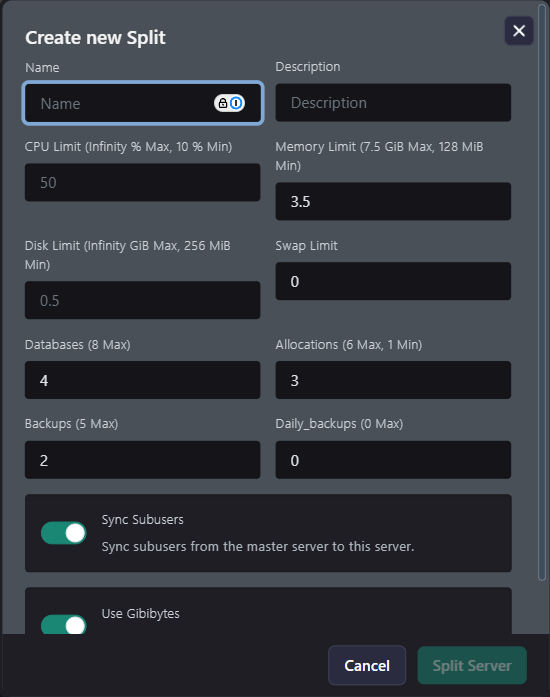
If you have forgotten which server was the main server, go back to the Splitter tab and you'll see it at the top.
Notice how the footer text has changed. Since we're currently looking at a sub-server, it tells you directly at the footer..
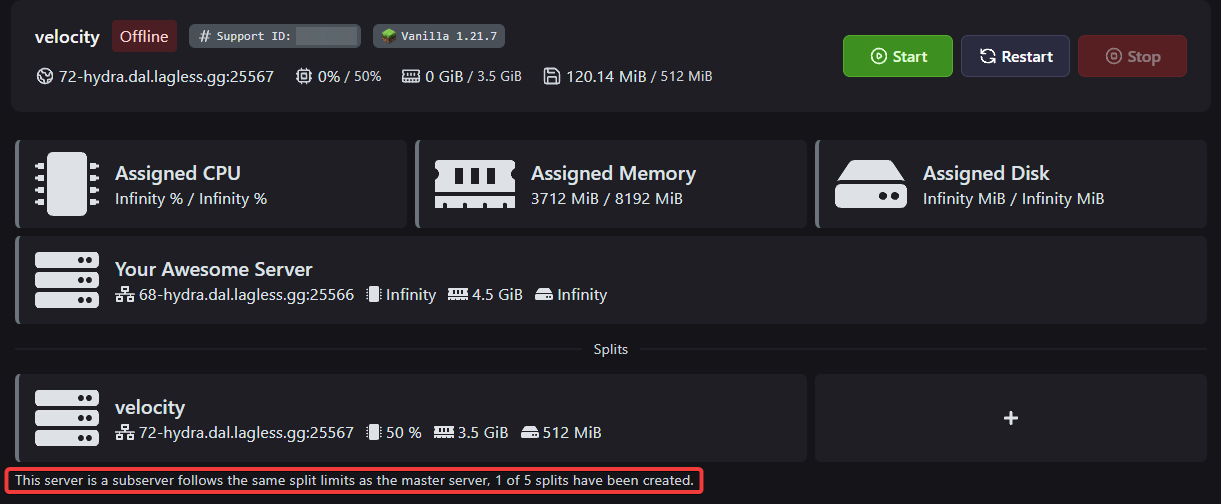
# Updating a Server Split
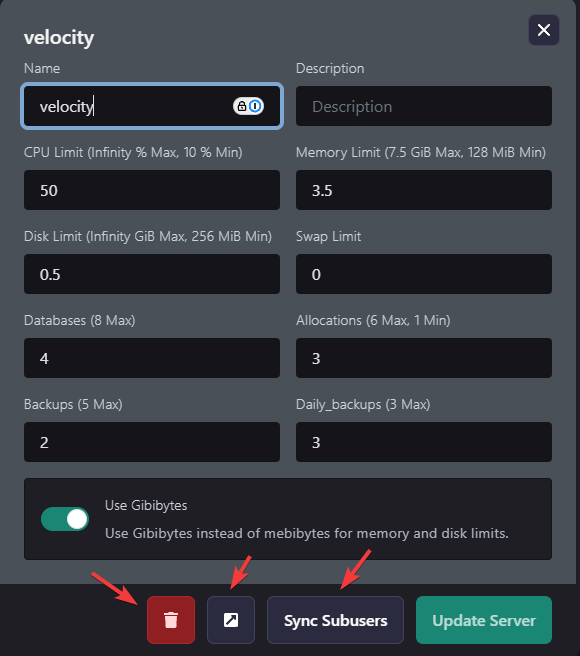
Should you need to remove a split to free up resources, you can click on the trashcan icon to delete it.
You can always increase or decrease a certain resource, however make sure you select Update Server after making changes, so it will take effect.
Clicking on the Open button, you can go to your sub-server to install or manipulate the resources as you need.
---
# Logging into SFTP
URL: https://lagless.gg/docs/using-the-panel/sftp
Description: A quick guide on how to login via SFTP
## Introduction
This guide will help you login to your server and access it's files from your computer.
## Prerequisites
- An account on the [Lagless Panel](https://panel.lagless.gg).
## Steps to logging into SFTP
### Using [WinSCP](https://winscp.net/eng/download.php)
You will need [WinSCP](https://winscp.net/eng/download.php) for this tutorial, this is a Windows only SFTP application.
#### 1. Getting the credentials for your server
1. Go to the [Lagless Panel](https://panel.lagless.gg)
2. Navigate to your server
3. Click on the Settings tab
4. Locate the SFTP Login credentials
5. Copy the SFTP Address and Username
**Note:** You can find your SFTP details under the Settings tab. If you need to reset your password, you can do it under your service on the billing panel at [my.lagless.gg](https://my.lagless.gg).
#### 2. Adding the credentials to WinSCP
1. Open WinSCP
2. Add a new site with the following details:
- **Host name:** Your SFTP Address (e.g., `hydra.dal.lagless.gg`)
- **Port number:** `2022` (make sure to change this from the default)
- **Username:** As provided on the Settings Page (e.g., `lagless.9a761fa8`)
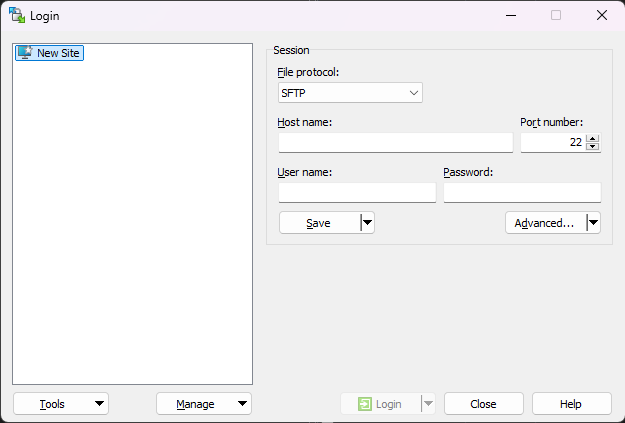
3. Enter your Lagless Panel password as the password for the new site
4. Click Save and "Save Password" option, then click OK
#### 3. Logging the server
1. Press the Login Button
2. Enter any credentials if it asks for them
### Using [FileZilla](https://filezilla-project.org/download.php?type=client)
You will need [FileZilla](https://filezilla-project.org/download.php?type=client) for this tutorial
#### 1. Getting the credentials for your server
1. Go to the [Lagless Panel](https://panel.lagless.gg)
2. Navigate to your server
3. Click on the Settings tab
4. Locate the SFTP Login credentials
5. Copy the SFTP Address and Username
**Note:** You can find your SFTP details under the Settings tab. If you need to reset your password, you can do it under your service on the billing panel at [my.lagless.gg](https://my.lagless.gg).
#### 2. Adding the credentials to FileZilla
1. Open FileZilla
2. Click the Site Manager icon
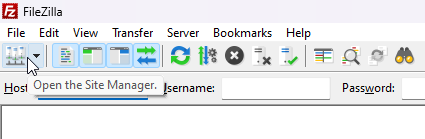
3. Enter the following connection details:
- **Host:** Your SFTP Address (e.g., `hydra.dal.lagless.gg`)
- **Port:** `2022`
- **Protocol:** SFTP - SSH File Transfer Protocol
- **Username:** As provided on the Settings Page (e.g., `lagless.9a761fa8`)
- **Password:** Your Lagless Panel password
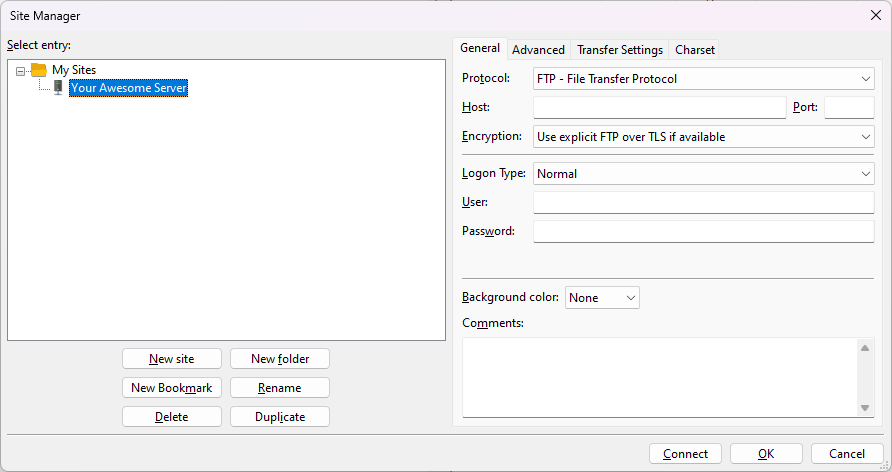
4. Click the "Connect" button
### Using [Cyberduck](https://cyberduck.io/download/)
You will need [Cyberduck](https://cyberduck.io/download/) for this tutorial
#### 1. Getting the credentials for your server
1. Go to the [Lagless Panel](https://panel.lagless.gg)
2. Navigate to your server
3. Click on the Settings tab
4. Locate the SFTP Login credentials
5. Copy the SFTP Address and Username
**Note:** You can find your SFTP details under the Settings tab. If you need to reset your password, you can do it under your service on the billing panel at [my.lagless.gg](https://my.lagless.gg).
#### 2. Adding the credentials to Cyberduck
1. Open Cyberduck
2. Click the New Connection button
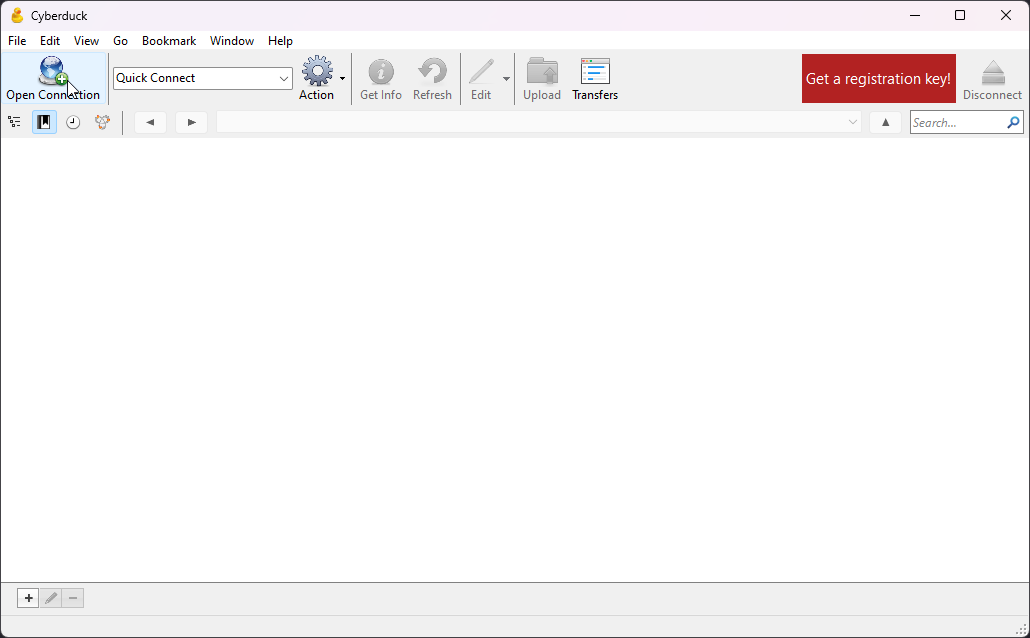
3. Configure the connection with the following details:
- Switch the dropdown from "FTP" to "SFTP (SSH File Transfer Protocol)"
- **Server:** Your SFTP Address (e.g., `hydra.dal.lagless.gg`)
- **Port:** `2022`
- **Username:** As provided on the Settings Page (e.g., `lagless.9a761fa8`)
- **Password:** Your Lagless Panel password
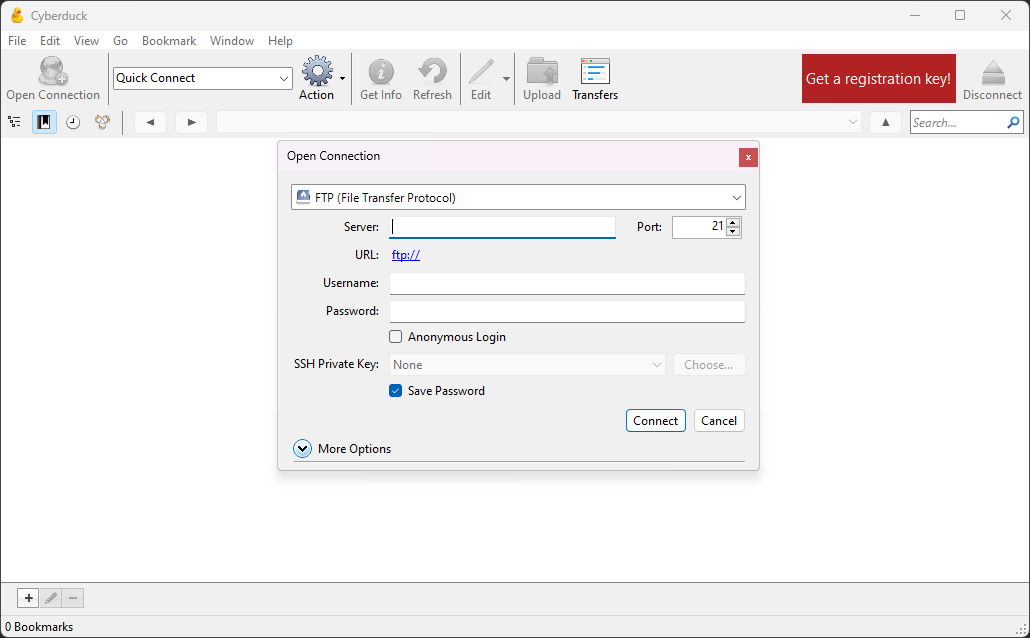
4. Click the "Connect" button
## Conclusion
By logging into the server with SFTP, you can upload folders, large files, and much more.
---
# Swap Settings
URL: https://lagless.gg/docs/using-the-panel/swap-settings
Description: How to configure swap space for your Lagless server
# Swap Settings
This guide explains what swap space is, how it's used in Lagless, and how to configure it for your server.
Most users (99%) do not need to modify the default swap settings. If your server is performing well, there's no need to change anything.
## What is Swap?
Swap is virtual memory stored on disk rather than in physical memory (RAM). It functions as a memory extension but operates significantly slower than physical RAM.
## How Lagless Uses Swap
By default, all Lagless servers are allocated 512MB of swap space. This allocation helps cover Java's overhead requirements, particularly when using optimized settings like Aikar's flags, with minimal performance impact in most scenarios.
However, there are specific situations where you might want to disable swap, which is why we provide this option.
## When to Modify Swap Settings
The primary reason to consider disabling swap is when running memory-intensive applications like Forge modpacks. These modpacks require substantial memory during startup, and with certain optimization flags, the server might experience performance degradation due to excessive swapping.
Disabling swap might provide:
- Slightly improved performance
- Better tick rates (MSPT)
- Support for more concurrent users
## How to Enable or Disable Swap
You can manage swap settings in your server control panel:
Navigate to the Settings section in your Lagless dashboard
Scroll down to the bottom of the page to find the "Swap Settings" section
Toggle the switch to enable (on) or disable (off) the 512MB swap space
Click the "Save" button to apply your changes
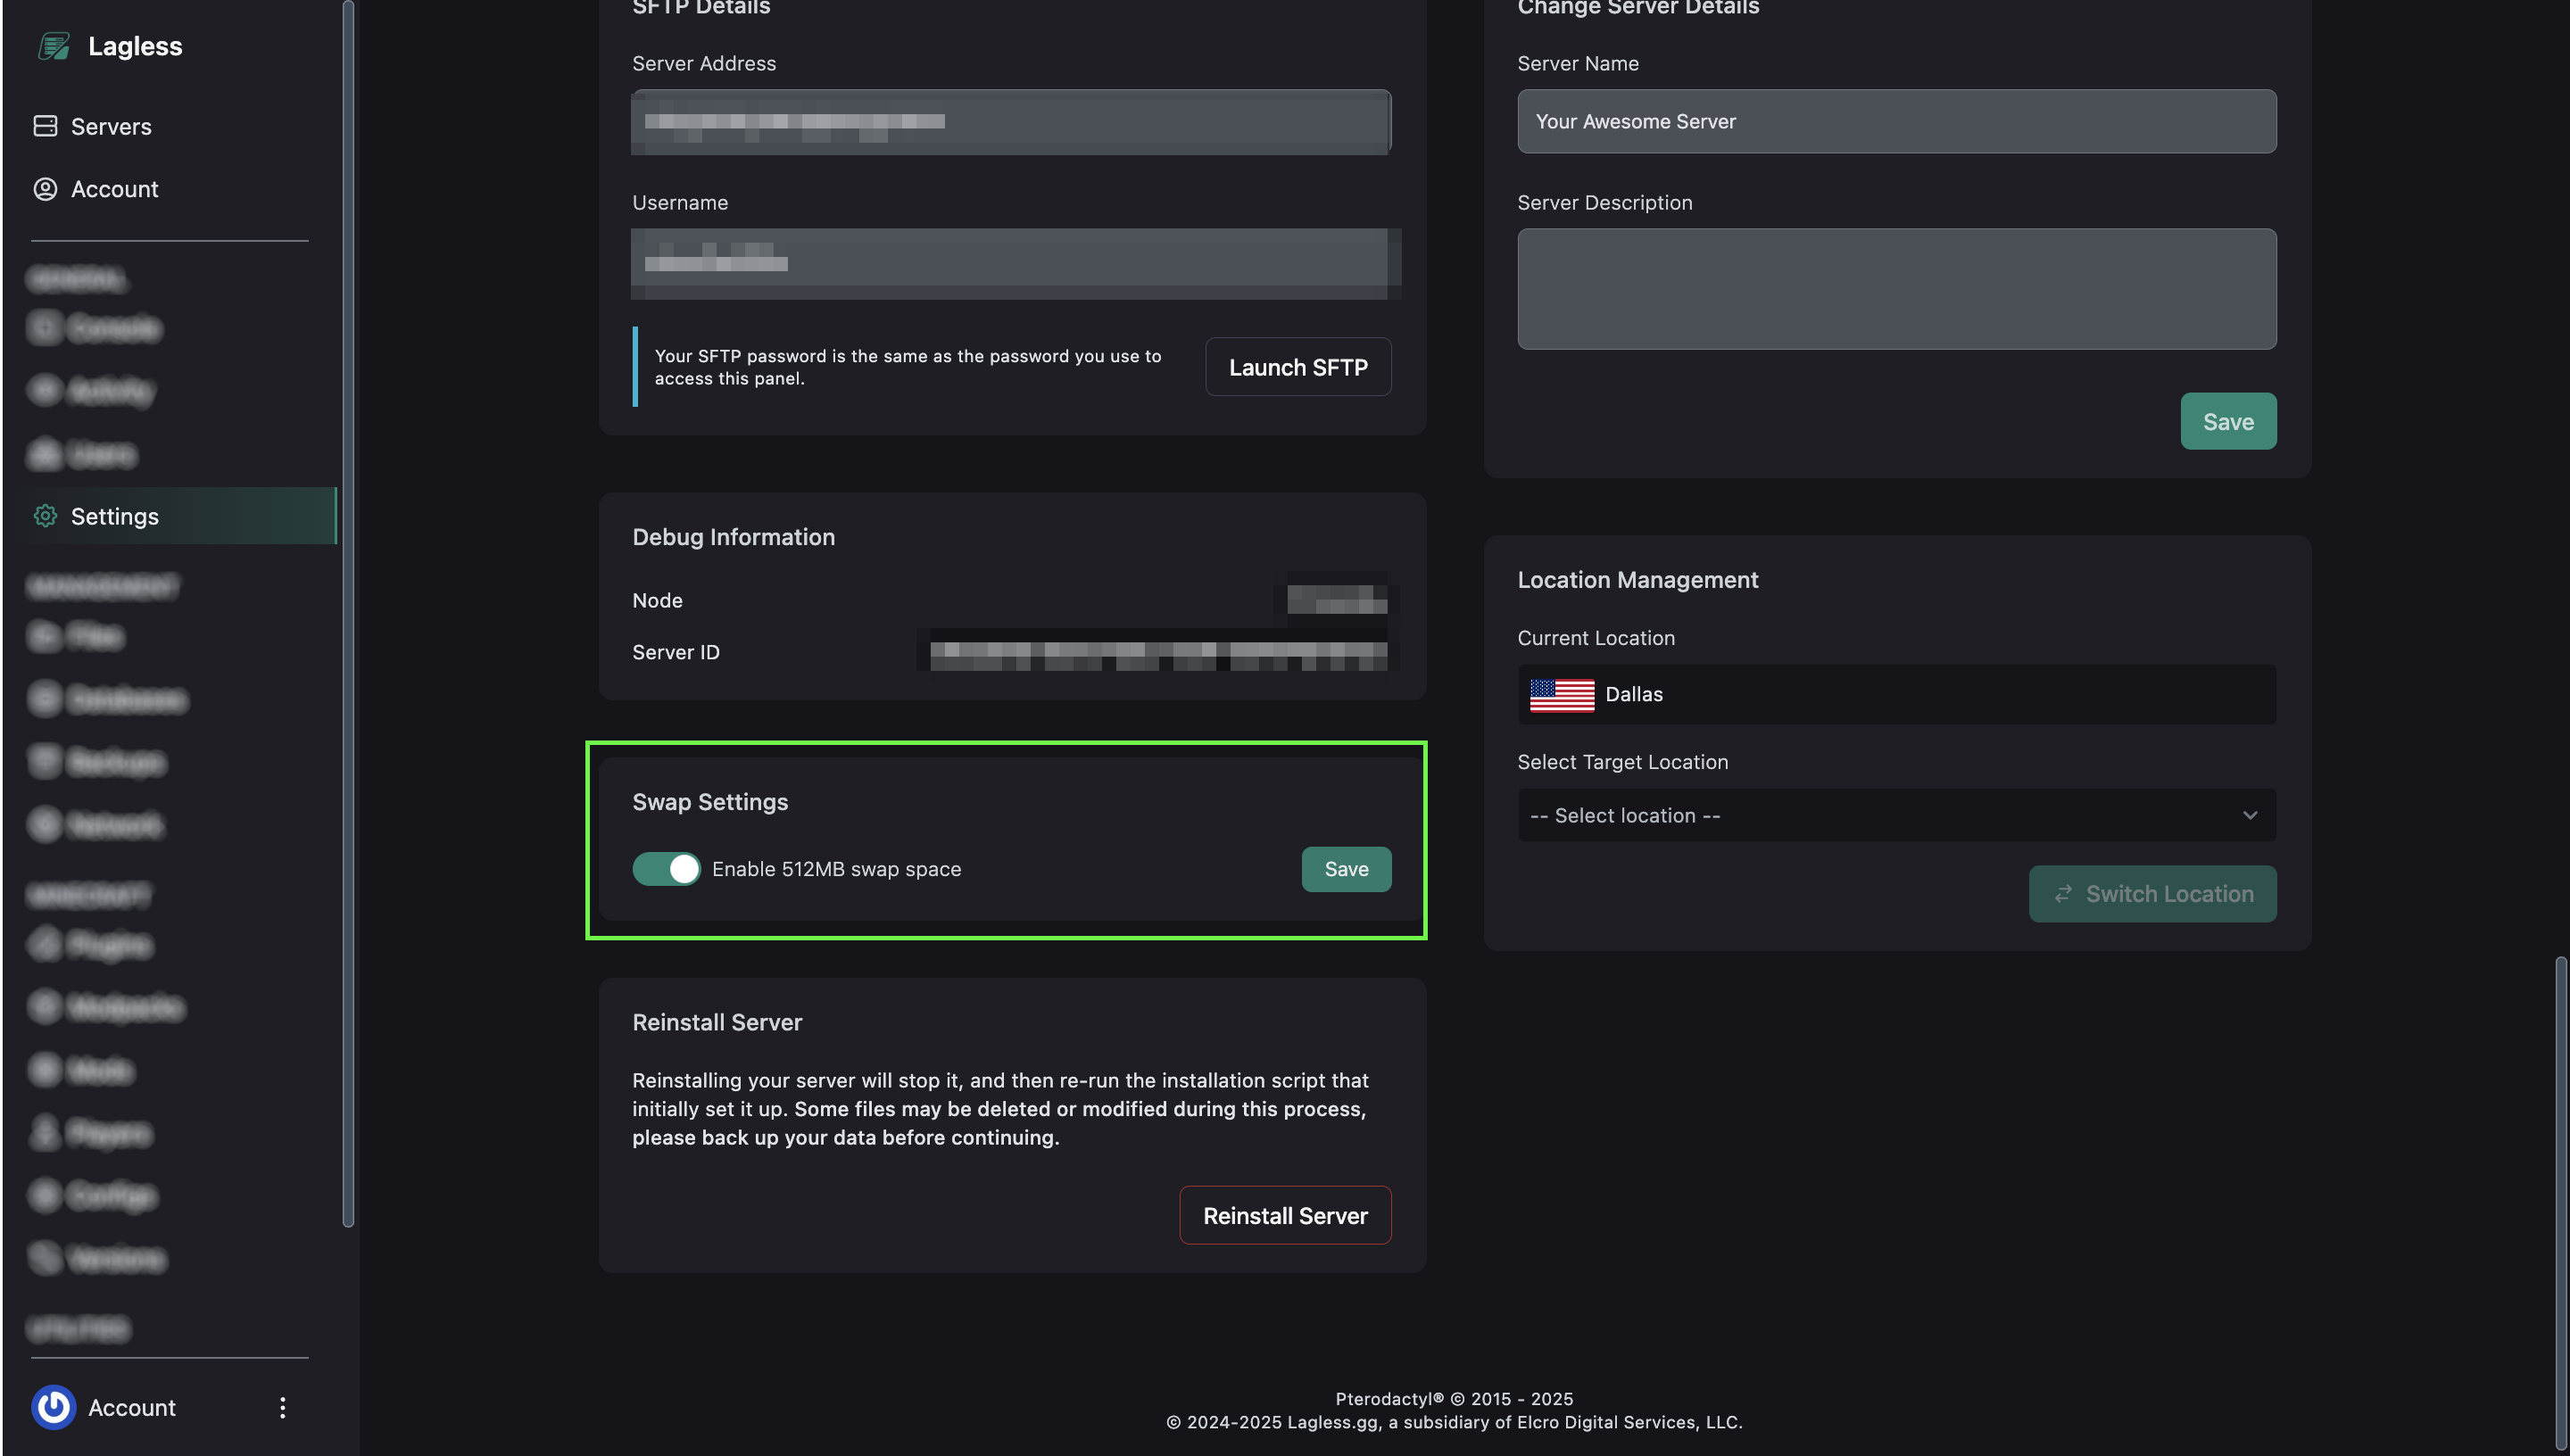
## Important Considerations
If you disable swap, your server needs adequate memory overhead for the Java Virtual Machine (JVM). Without swap, servers using optimization flags may fail to start due to insufficient overhead.
When swap is disabled:
1. You may need to adjust your startup RAM allocation percentage (typically to around 70%)
2. The exact percentage varies between servers and applications
3. If your server freezes, it might indicate insufficient overhead
4. "Out of memory" errors in logs indicate the JVM itself is out of memory
## Troubleshooting
If your server fails to start after disabling swap, try:
- Re-enabling swap temporarily
- Adjusting your startup RAM allocation to a lower percentage (e.g., 70%)
- Increasing your server's total RAM allocation
If you're experiencing performance issues with swap enabled:
- Monitor your server's memory usage with diagnostic tools
- Check for memory leaks using heapdump tools
- Consider upgrading your server's RAM if you consistently use all available memory
Keep swap enabled if:
- You're not experiencing performance issues
- Your server runs memory-intensive applications
- You frequently see "out of memory" errors
- Your server needs to run for extended periods without restarts
## Summary
At Lagless, we aim to provide you with complete control over your server environment. The swap configuration option gives you another tool to optimize your server's performance for your specific needs. For most users, the default setting works well, but power users running specialized workloads may benefit from customizing this setting.
---
# Virtual Private Server
URL: https://lagless.gg/docs/vps
Description: High-performance VPS hosting for your applications and services
# Virtual Private Server (VPS)
Lagless.gg offers powerful Virtual Private Server hosting solutions designed for developers, businesses, and individuals who need reliable, high-performance computing resources. Our VPS hosting provides full root access, customizable configurations, and enterprise-grade infrastructure to support your applications, websites, and development projects.
## Key Features
- **Full Root Access**: Complete control over your server environment
- **High-Performance Hardware**: Latest generation processors and SSD storage
- **Global Data Centers**: Choose from multiple locations worldwide for optimal latency
## Getting Started
Ready to deploy your VPS? Our comprehensive guides will help you get up and running quickly.
---
# Configuring SSH
URL: https://lagless.gg/docs/vps/ssh
Description: Learn how to securely configure SSH access on your VPS for enhanced security and peace of mind.
# Creating your key
SSH (Secure Shell) is the standard protocol for securely accessing remote servers. Properly configuring SSH on your VPS is essential for maintaining security and preventing unauthorized access. This guide will walk you through setting up secure SSH access using key-based authentication and hardening your SSH server configuration.
### On Your Local Machine
1. Open your terminal and generate a new SSH key pair:
```bash
ssh-keygen -t rsa -b 4096 -C "your_email@example.com"
```
2. When prompted, accept the default location or specify a custom path.
3. Optionally, add a passphrase for additional security.
By setting a passphrase, you have an additional layer of security on your ssh key however if you lose or forget your passphrase, you'll need to regenerate a new SSH key.
### Add your Public Key to VPS Panel
Go to the directory you saved your SSH key to and copy the file ending in `.pub`. Make sure you copy your public key, not your private key. One way to confirm this is by looking at the end of your public key file, your comment should be at the very end.
From your VPS Panel, select SSH Keys at the top then Add Key. Give your SSH key a name and paste the public key into the box then save.
## Adding SSH key manually (on your own)
If you prefer not to use the panel or if you are working on an existing server, install the key directly into your account's `authorized_keys` file.
### Method 1: Use `ssh-copy-id`
1. Run this from your local machine:
```bash
ssh-copy-id -i ~/.ssh/id_rsa.pub user@your-vps-ip
```
2. Enter your password when prompted.
3. Verify login via key:
```bash
ssh user@your-vps-ip
```
### Method 2: Manual key deployment
1. On your local computer, copy the public key content:
```bash
cat ~/.ssh/id_rsa.pub
```
2. Connect to your VPS using password auth first:
```bash
ssh user@your-vps-ip
```
3. On the VPS, ensure the SSH directory exists and has correct permissions:
```bash
mkdir -p ~/.ssh
chmod 700 ~/.ssh
```
4. Append the public key to `authorized_keys`:
```bash
echo "" >> ~/.ssh/authorized_keys
chmod 600 ~/.ssh/authorized_keys
```
5. Test SSH login with key. After you ensure your key works, you can proceed to this next article on securing SSH on your machine.
---
# Enable ICMP (Ping) on Windows Server
URL: https://lagless.gg/docs/vps/windows-icmp
Description: How to enable ICMP echo requests on Windows Server using PowerShell and Command Prompt via Windows Firewall rules.
By default, Windows Server blocks ICMP echo requests (ping) on the Public network profile through Windows Defender Firewall. This guide shows you how to enable ICMP using either PowerShell or Command Prompt.
Enabling ICMP on a public-facing interface may expose your server to network reconnaissance. Consider enabling it only on Domain or Private profiles if your server is internet-facing.
## Prerequisites
- Administrator privileges on the Windows Server instance
- Access to PowerShell or Command Prompt (run as Administrator)
---
## Enable ICMP
### Open PowerShell as Administrator
Right-click the **Start** menu and select **Windows PowerShell (Admin)** or **Terminal (Admin)**.
### Enable ICMPv4 (Ping) inbound
Run the following command to create a firewall rule that allows inbound ICMPv4 echo requests:
```powershell
New-NetFirewallRule `
-Name "Allow-ICMPv4-In" `
-DisplayName "Allow ICMPv4 Inbound" `
-Protocol ICMPv4 `
-IcmpType 8 `
-Direction Inbound `
-Action Allow `
-Profile Any `
-Enabled True
```
### (Optional) Enable ICMPv6
If your environment uses IPv6, also run:
```powershell
New-NetFirewallRule `
-Name "Allow-ICMPv6-In" `
-DisplayName "Allow ICMPv6 Inbound" `
-Protocol ICMPv6 `
-IcmpType 128 `
-Direction Inbound `
-Action Allow `
-Profile Any `
-Enabled True
```
### Verify the rule was created
```powershell
Get-NetFirewallRule -Name "Allow-ICMPv4-In" | Select-Object Name, DisplayName, Enabled, Direction, Action
```
You should see `Enabled : True` in the output.
To scope the rule to a specific network profile, replace `-Profile Any` with `-Profile Domain`, `-Profile Private`, or `-Profile Public`.
### Open Command Prompt as Administrator
Press `Win + R`, type `cmd`, then press `Ctrl + Shift + Enter` to launch as Administrator.
### Enable ICMPv4 (Ping) inbound
Run the following `netsh` command to add an inbound firewall rule for ICMPv4 echo requests:
```cmd
netsh advfirewall firewall add rule ^
name="Allow-ICMPv4-In" ^
protocol=icmpv4:8,any ^
dir=in ^
action=allow ^
enable=yes ^
profile=any
```
### (Optional) Enable ICMPv6
```cmd
netsh advfirewall firewall add rule ^
name="Allow-ICMPv6-In" ^
protocol=icmpv6:128,any ^
dir=in ^
action=allow ^
enable=yes ^
profile=any
```
### Verify the rule was created
```cmd
netsh advfirewall firewall show rule name="Allow-ICMPv4-In"
```
Confirm the rule appears with `Enabled: Yes` and `Action: Allow`.
Replace `profile=any` with `profile=domain`, `profile=private`, or `profile=public` to restrict the rule to a specific network profile.
---
## Reverting the Change
To remove the ICMP rules and restore the default blocked state:
```powershell
Remove-NetFirewallRule -Name "Allow-ICMPv4-In"
Remove-NetFirewallRule -Name "Allow-ICMPv6-In"
```
```cmd
netsh advfirewall firewall delete rule name="Allow-ICMPv4-In"
netsh advfirewall firewall delete rule name="Allow-ICMPv6-In"
```
---
## Testing Connectivity
Once the rules are applied, test from another machine on the network:
```bash
ping
```
A successful response confirms ICMP is now enabled.
---